| ||||
| ||||
| Moderated by: Greg Fletcher | Page: 1 2  |
|
|||||||||||||
| 11040 has moved to Austin, Texas | Rating: 
|
| Author | Post |
|---|
| Posted: 06-25-2011 01:39 am |
|
1st Post |
|
Mason Jones Member 
|
Well, here she is, ol’ #11,040! A mostly original, white 1973 Mk I. I bought it from another old car fan here in Austin. What little I know of the car’s history is he bought it from an estate sale in CA. I believe he said it was in storage for a number of years and the seller couldn’t get it to start. After having it shipped to Texas he replaced the wiring harness with one from a donor car and it started. 
|
||||||||||||||
| |||||||||||||||
| Posted: 06-25-2011 01:57 am |
|
2nd Post |
|
Mason Jones Member
|
The body is in decent condition, a few dings and small dents here and there. I'm kidding about the orange, the rust is really not bad. The usual rust in the passenger floor pan and the trunk but the rest is pretty minor. The sills somehow survived with only surface rust.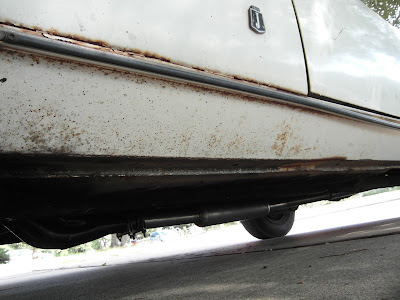 The car came with a ton of new and used parts the PO had not yet installed including a complete header and exhaust system from Delta. This was the first thing I installed as the old one had at least 4 holes in it. You can kind of see the new pipes in the last photo. Things he had done were rebuild the carbs, rear brakes/suspension/shocks/springs and replaced the fuel pump, lines, cleaned the fuel tank (oh, and the plastic “T” connector) and installed the Pertronix ignition. He bought all the stuff for the front suspension/brakes as well but had not installed them.
|
|||||||||||||
| ||||||||||||||
| Posted: 06-25-2011 02:16 am |
|
3rd Post |
|
Mason Jones Member
|
Lets take a look under the hood! Aftermarket hood release:  
|
||||||||||||||
| |||||||||||||||
| Posted: 06-25-2011 02:19 am |
|
4th Post |
|
Mason Jones Member
|
Aftermarket hood support: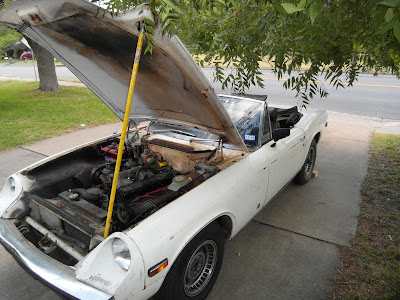
|
|||||||||||||
| ||||||||||||||
| Posted: 06-25-2011 02:34 am |
|
5th Post |
|
Mason Jones Member
|
This was kind of funky, bare green wire wrapped around the red wire's connector. Other end of the green wire is jammed in the connector on the distributor: 
|
||||||||||||||
| |||||||||||||||
| Posted: 06-25-2011 02:37 am |
|
6th Post |
|
Mason Jones Member
|
There are enough ways for this thing to catch fire, lets not add another. Aaah, that's better! 
|
|||||||||||||
| ||||||||||||||
| Posted: 06-25-2011 02:59 am |
|
7th Post |
|
Mason Jones Member
|
Sorry for all the posts, I can't seem to put more than 1 image in a single post. The car came with a spare "low mileage" 1975 engine and a complete set of new gaskets, seals, timing belt, etc. I think he had planned to make it a 2.2 stroker. For me, the original engine runs great and has plenty of power. I think I'll just put the new timing belt on the original and drive it for a while before deciding what to do with the 75 engine. Here's the original engine...in the process of replacing all the water hoses. Some appear to be original. 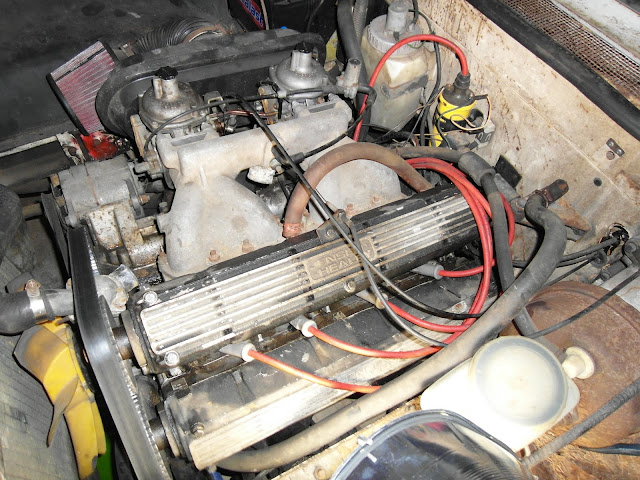 Is there anything I should do to the spare 1975 engine to preserve it? It could potentially sit for 6 months or longer if the old engine continues to run nicely. I suppose I could sell it. How much more reliable would the newer engine be with the improved design? The current engine's oil pressure comes right up to about 60lbs immediately upon starting.
|
||||||||||||||
| |||||||||||||||
| Posted: 06-25-2011 11:25 am |
|
8th Post |
|
Mason Jones Member
|
OK, got all the new hoses on and...no leaks! While waiting for it to warm up I thought I'd record the sound of it. Sounds a bit like a sewing machine. Oil pressure is good at about 60 lbs at idle. Not sure what kind of oil is in it. http://www.youtube.com/watch?feature=player_profilepage&v=RPX_IBPyAnQ Should I worry about the valves/tappets? Listening to other videos of 907s on Youtube I think they sound very similar. We used to have a '75 Valiant slant-6 that sounded just like this only much louder. It ran for years that way. You could always tell when dad got home. I'll try changing to one of the "classic car" oils and see if it makes a difference.
|
|||||||||||||
| ||||||||||||||
| Posted: 06-25-2011 01:24 pm |
|
9th Post |
|
dwalls1 Member
|
I am enjoying your posts and pictures. Your engine sounds a little "clacky" to me, but I tend to be in denial about my J-H as I would rather drive it than work on it. I've put over 10,000 miles on mine and only been bitten once by my denial. Good Luck and have fun.
|
||||||||||||||
| |||||||||||||||
| Posted: 06-25-2011 10:02 pm |
|
10th Post |
|
SpeedyMitch Member 
|
Mason Jones wrote: Should I worry about the valves/tappets? Hay Mason, Looks familiar! My JH looked much the same when I dug it out of a snow bank and dragged it home. Have you opened up the access ports behind the front wheel to investigate the rust at the seam of the rocker and fender? My JH looked 'clean' at the seam but there was enough rust behind the panel to warrant some really fun wire brushing followed by the POR-15 treatment. You should also check the rear access port. Here is a link to the kit that I used with very good results: http://www.por15.com/SUPER-STARTER-KIT/productinfo/SSKB/. I would have to say from the video that you have a lifted valve. Others can correct me, but I believe it is easy to check the valve clearances but difficult to set/correct the clearances? Speedy
|
|||||||||||||
| ||||||||||||||
| Posted: 06-26-2011 02:45 am |
|
11th Post |
|
Mason Jones Member
|
I was afraid you guys would say that! Guess I’m about to learn about adjusting valves. Although ignoring it sounds like a plausible strategy as well. Hmm…decisions, decisions. I’m picking up the spare engine tomorrow and maybe I can get a better idea about its condition. Ideally I’d like to keep driving the car and take my time going over the newer engine. Yeah, that sounds real smart! (Secretly I know that means the spare engine will sit in the corner of the garage for a very long time.) Thanks for the tip on the access panel, I’ll take a look!
|
||||||||||||||
| |||||||||||||||
| Posted: 06-26-2011 02:07 pm |
|
12th Post |
|
Mason Jones Member
|
Hey Speedy, I thought this black stuff on the underside of the car was 37 years of oil and dirt. But I notice here in the wheel well it is not on the access panel. Is the black stuff some kind of undercoating? Should I not scrape it off?  Black stuff is only on the painted body section, not on the panel: 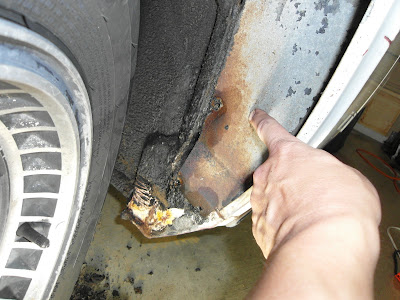
|
|||||||||||||
| ||||||||||||||
| Posted: 06-26-2011 05:52 pm |
|
13th Post |
|
SpeedyMitch Member
|
Mason Jones wrote: Is the black stuff some kind of undercoating? Should I not scrape it off? My JH had what looks like the same stuff all over the bottom. Even the drive shaft had a fair bit of thick over-sprayed undercoating on it. My panel cover had been sprayed as well. Interesting that your panel cover does not have the undercoating. Either it was removed to apply the coating or it has been replaced. I would scrape it off only where needed or if you can see it is cracking / flaking off as mine had in several places. I had significant rust where the coating was no longer bonded to the body. If its any consolation your panel cover is in MUCH better condition than mine was! Good job on getting another JH back on the road!
|
||||||||||||||
| |||||||||||||||
| Posted: 06-26-2011 09:18 pm |
|
14th Post |
|
subwoofer Member
|
Mason Jones wrote:OK, got all the new hoses on and...no leaks! While waiting for it to warm up I thought I'd record the sound of it. Sounds a bit like a sewing machine. Oil pressure is good at about 60 lbs at idle. Not sure what kind of oil is in it. I hope this is cold engine only, if you have 60psi at idle with warm oil your oil is WAY too heavy. You should have 60psi close to the redline with warm oil, not too much before that. -- Joachim
|
|||||||||||||
| ||||||||||||||
| Posted: 06-26-2011 09:21 pm |
|
15th Post |
|
subwoofer Member
|
Mason Jones wrote:Sorry for all the posts, I can't seem to put more than 1 image in a single post. Use the JHPPG galleries or PhotoBucket (or some other service) for storing the pictures, then simply link to them with IMG tags (copy the IMG tag field in PhotoBucket is the easiest way). This is what I always do, that way there is no real limitation. -- Joachim Last edited on 06-26-2011 09:21 pm by subwoofer |
||||||||||||||
| |||||||||||||||
| Posted: 06-28-2011 01:19 am |
|
16th Post |
|
Mason Jones Member
|
subwoofer wrote:I hope this is cold engine only, if you have 60psi at idle with warm oil your oil is WAY too heavy. 60psi was with a cold engine (cold in Texas being 98F.) After reading your post I went to check the oil pressure warmed up and now the temp gauge isn’t working. In fact, none of them are working now. (I know, you’re laughing with me not at me, right?) About 20 yrs ago I had a 72 TR6 so I’m experiencing a bit of déjà vu here. The TR6 was in similar condition, engine ran great but I could never get all the lights to work on the same day to get it inspected. I did everything I was supposed to: drew a circle around the car, lit some candles and recited the proper incantations. I even tried cleaning up all the contacts with sandpaper (as though that would do anything). Thought about asking if I could get the left half of the car inspected then come back in a week to get the right half done but I don’t think they would have gone for it. So, at the top of my revised to do list is fix gauges (and whatever else stopped working when they did). Then rebuild the front brakes (did I mention the front brakes stick?) and replace all the flex hoses. At times like this it helps to do something easy to make you feel better about your purchase. So I replaced the torn-up driver seat with the vinyl from a spare seat. Here’s one of the future drivers of 11040 the day we picked it up. Notice the white t-shirt around the driver’s seat holding in what’s left of the foam. 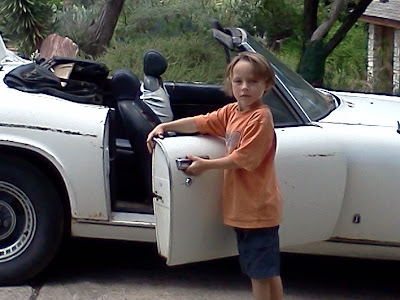 And here's the "new" seat cover. At least the interior is shaping up! 
|
|||||||||||||
| ||||||||||||||
| Posted: 06-28-2011 09:00 pm |
|
17th Post |
|
subwoofer Member
|
I know the feeling, the Ghost of Lucas (or is it a poltergeist?). The most likely culprit is the fuse box on the firewall, it is quite possibly the worst design I have ever seen. Some DPO probably drowned the fuses in dielectric grease too, this does not really improve matters. Have a look at these wiring diagrams to help you navigate (what is left of) the wiring loom: http://home.comcast.net/~jrkengr2/html/wiring_diagrams.html The reason she runs may be that someone has jumped wires from one circuit to another to keep it running, I found out it was done on Ms. Jensen because the tach would come and go. -- Joachim
|
||||||||||||||
| |||||||||||||||
| Posted: 07-01-2011 04:59 am |
|
18th Post |
|
Mason Jones Member
|
Finally got a chance to look at it…it was a blown fuse. Luckily there were 2 spare original Lucas fuses in the fusebox cover. I didn't have time to drive it but I ran the engine for about 10 minutes just idling in the driveway. The temp gauge never quite reached halfway which is where it usually is while driving. The oil remained the same as it was cold (about 60psi). Maybe not a good test since it was not fully warm but the temp gauge was up to around 1/3 which is not cold anyway. The oil weight is an unknown as the po had changed it. I think I’ll change it for one of the 20-50W racing or classic car formulas and see if it makes a difference in the pressure or the valve noise. After I do the brakes I'll take a look at adjusting the valves. One thing at a time!
|
|||||||||||||
| ||||||||||||||
| Posted: 07-20-2011 06:52 am |
|
19th Post |
|
Mason Jones Member
|
My big goal now is to get the car inspected so I can drive it out of the neighborhood. First I need to exorcise a few gremlins from the electrical system. Armed with the necessary tools--a printed copy of St. John Kimbrough’s wiring diagrams and a bargain vino--I get to work. First I remove the steering wheel then remove the insanely fragile turn signal/everything switch. I immediately discover why the horn is intermittent as a purple wire breaks loose from the crazy contraption. There is not enough of the purple wire sticking out of the turn signal lever to reattach. I have a spare switch but it is the same--purple wire broken right where it emerges from the lever. I need the horn for inspection so I have 2 choices. Try to find replacement switch or rig a generic switch somewhere for the horn. I read somewhere that an MG multi-switch is a close fit and can be had new from Moss but that’s too expensive for me. I opt for the cheesy second choice. Some PO had installed a big chrome switch on the dash so a big ugly hole was already there. Cheesy but it fills the hole and now the horn works.  I’ve already replaced both blinker units for hazard and turn signals and sometimes they work, sometimes not. The hazard switch I can tell is loose inside. Following the info in this post I see that a bad hazard switch would affect the turn signal as well: http://www.jensenhealey.com/forums/view_topic.php?id=1525&forum_id=7 I removed and disassembled the switch and one of the pivots of the rocker was broken. I superglued it back and it seems to be holding. I cleaned the contacts with an emery board and put it all back together. Reinstalled the switch and voila! Blinkers and hazards work! It appears some long ago PO had to do a similar fix on the headlight switch using wire and glue. It works so I’m not going to touch it!  Next up, the slow wiper speed doesn’t work. Fast speed kind of works but is sluggish. I tried swapping a spare wiper switch and same result, no slow speed, fast speed not very fast. Also, sometimes when I switch to low speed I hear the fuel pump stop working. Could be the slow speed winding in the motor is shorted and stealing all the juice? Or could be the wiring to the motor shorting. A quick look at the wiper motor…looks like oil dripping from it. Hmmm…if it’s a bad motor this is a can of worms I don’t want to open right now. Hope the fast speed will be enough for inspection. On to the radio, it lights up but no sound. Here’s why the front speakers don’t work…nothing there! 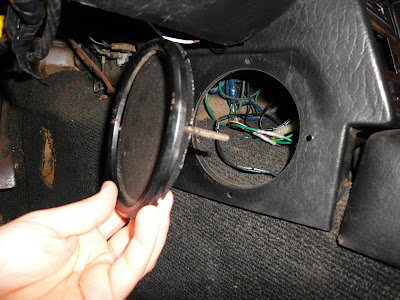 The back speakers are there but not connected. Here's the primo installation done by some 70s stereo shop. 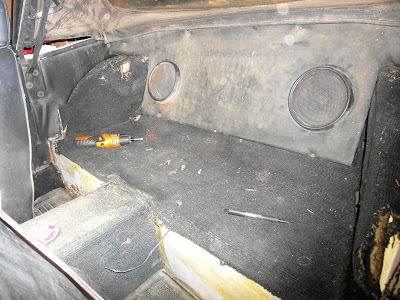 These things look as old as the car! (I wonder when I'll be able to afford a carpet kit.) Last edited on 07-07-2012 12:11 pm by Mason Jones |
||||||||||||||
| |||||||||||||||
| Posted: 08-12-2011 06:18 am |
|
20th Post |
|
Mason Jones Member
|
Sadly the original Jensen radio doesn’t work. Not sure what I’ll replace it with. I really prefer the vintage look (even if it was mono!) I’ve been tackling the brakes. Both front calipers were sticking. The car now has a brand new TR6 master, new hoses and rebuilt calipers. The old pistons just looked too bad and I didn’t want to go through the hassle of rebuilding them only to have them not work. This was strange. I ordered a set of pads off of ebay and they are different from the originals. The new pads have a tab on top. The old ones don’t. The shims came with the rebuilt calipers from Delta. The old shims have a notch and would fit the old or the new pads. The new shim I had to cut a notch so the new pads would fit. New shims and new pads (unknown brand) on the left. Old shim/pad on the right.  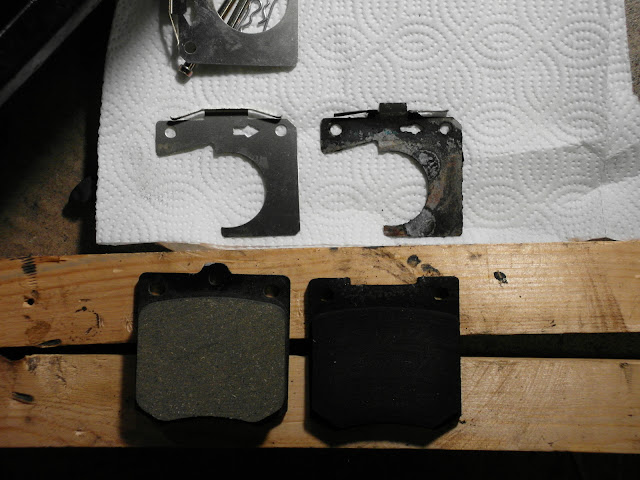 Other than having to modify the shims everything went on fine. Now that the front brakes no longer stick on I guess I'll have to fix the parking brake!
|
|||||||||||||
| ||||||||||||||
| Current time is 12:08 am | Page: 1 2 |
| > Jensen Healey & Jensen GT Tech > Projects > 11040 has moved to Austin, Texas | Top |