| Moderated by: Greg Fletcher | ||
| Author | Post | |||||||||
|---|---|---|---|---|---|---|---|---|---|---|
|
answerman Member
|
Well, I've owned 16173 for about 4 days now, and driven her around town for a couple of hours total. That ended today because I need to really take a good look at the brakes before she hits the road again. Here's what I've learned so far. First the general description and details about the car itself: 1974 JH MkII, seems to run pretty well though she idles very rough. Not too worried about that yet. Included with the purchase was the original owners manual complete with foldout wiring diagram (which proved invaluable 24 hours later, as explained in the next paragraph), a shop manual, a Haynes manual for the Strombergs, the original (I think anyway) hardtop which is in pretty good shape except for the fact that someone decided it was a good idea to paint it metallic grey, and all the receipts for the work that the previous two owners had done going back to 2001. Interior is really nice, probably not original. Body is ok... it's been repainted (red) and mostly solid except for the rails being a little soft and a few soft spots in the floor. That'll be the winter project. Now, on the way home I noticed that it wasn't charging... meter wasn't moving, but the ignition light wasn't coming on either. Battery seems to be good (thankfully) and after doing a voltage test across the battery I determined that it was not charging at all. So, I charged up the battery and spent Sunday afternoon between the manual, the car, and this site learning how the LUA604 was supposed to work. The receipts showed it was replaced in 2009 so I was hopeful it was something simple. Diving into it, and scratching my head repeatedly, I figured out that whoever installed the alternator didn't seem to understand it. Long story short... I pulled out the wiring they had spliced in (with spin on wire nuts, can you believe it?) and basically replaced the three wires with new ones, with new connectors, and actually connected the wires where they were supposed to be connected (the brown/yellow exciter wire was connected to one of the 3/8" terminals, and the lighter brown wire wasn't even connected). Put it back together, crossed my fingers, fired her up, and watched the voltmeter rise up to a little over 14V. Whew. So, that solved, my next step was going to be to investigate why the tach and temp gauge don't work. Looking at the wiring diagram, I wonder if it's just a bad connection since if I remember right they share a white wire from the ignition switch. Meanwhile, I took it out a bit the past two days to play with it a little. I had noticed the car pulled to the left a bit and could hear the pads dragging a bit, so it was no surprise when, today, I hit the brakes and the left front wheel pretty much locked up. Didn't skid but it was pretty tight. So, it gingerly went back home and into the garage, where it will sit while I ponder just how much of the braking system I want to replace. I'll update as things progress. Thanks so much to Greg and this for being such a resource to me... the last time I tackled a project car (1975 Fiat X1/9) was back in the late 80's when we didn't have this Internet thing. It's great to have so many knowledgable people here to draw from. Attachment: JH16173-1-800.jpg (Downloaded 1045 times) |
|||||||||
|
answerman Member
|
Long as I'm posting pictures.... here's another angle. Interior, as I said, looks way too good to me to be original. Attachment: JH16173-2-800.jpg (Downloaded 1049 times) |
|||||||||
|
Jensen Healey Super Moderator 
|
Welcome Answerman, Looks like you're in for some new brake hoses at the very least! Have fun, Kurt Housh San Anselmo, Ca JH 13148 |
|||||||||
|
Art DeKneef Member
|
Welcome to the group. Good job on the alternator. Checking and cleaning any suspect connections will be a good idea. I wouldn't drive the car until you are sure on the age and condition of the timing belt. If the records show it is more than a few years old you should consider replacing it. Cheap insurance. The brakes probably need a good cleaning and overhaul. Also replace the rubber brake lines with the steel ones. That usually fixes braking issues. Unless the rotors are warped or the calipers are rusted. If you search the site you'll find a couple of threads on checking out a car if it has sat for a while and fixing the brakes. Art |
|||||||||
|
answerman Member
|
Thanks for the advice, Art. The receipts show that the timing belt was replaced about 3 years / 6000 miles ago. That's on my list... it looks ok but I'm not sure how the car was stored/used during that time. This weekend I'll be pulling the calipers off and seeing just how stuck the left front is. At this point I'm pretty much prepared to replace the calipers, pads, and brake lines assuming that the caliper is indeed sticking. If not, maybe I can get away with just the pads and lines for now. The rotors, from what I can see looking through the wheel, don't seem to be too bad so I'm hoping that maybe I can hold off on them. Hoping I can get the brakes resolved shortly to at least get me through a couple of months (it'll be winter here soon and she's definitely not going out in the snow, I have a Ford Excursion for that!). To give me a bit of incentive, our town has an Octoberfest downtown festival the last weekend in September (go figure) and they do an informal car show on Friday night, just everyone parking on the main drag. Every year they do a featured "theme" and of course this year, ironically, is "British Sports Cars". So of course I want to get her down there, even though she's not near show ready. We'll see if it happens. |
|||||||||
|
Art DeKneef Member
|
If the calipers aren't too bad you might be able to rebuild them instead of buying new ones. It's not that difficult of a job. The pistons are what is probably stuck on the left side. The hard part is getting the pistons out. After that, inspecting them and cleaning with replacing the gaskets should fix it. Isn't that the way it always is. Something comes up and the car is down. Hey you still have 2 weeks to go. |
|||||||||
|
answerman Member
|
Small victories... did some more wire tracing last night and found that the reason the temp gauge wasn't working was because the wire that was supposed to be connected to the sensor was lying down under the carbs. Popped it back on the spade and it works fine. Wish they were all this easy. Still no tach though. It doesn't move at all. Am I correct in assuming that if the white/slate wire from the tach to the ballast resistor isn't connected, the car won't run? I could just disconnect it and try, I guess, but since I'm here... |
|||||||||
|
subwoofer Member
|
Are you sure some DPO hasn't jumped the coil+ wire from another circuit? The tach will only work if it is connected in series with the coil. I had this "fix" in Ms. Jensen when I bought her, the tach came and went as the fuse box misbehaved in the usual way. -- Joachim |
|||||||||
|
answerman Member
|
Haven't touched 16173 since last week, as I needed to fix up her room. Funny... I was reading through Joachim's story of his Ms. Jensen and it's oddly paralleling mine. Spent the weekend finishing up the insulating and drywalling of the garage (I had done the ceiling a couple of weeks ago, and I just needed to do the walls to finish). Now that that's done, I can get back to her. Bonus find of the weekend, and perfect timing... wifey wanted to go out rummage saling on Saturday, and the first place we stopped had a 4000W flush wall mount electric heater. $15 bucks, and it's never been used. That went into the wall before the insulation and drywall went up. Now I'm really ready for winter. |
|||||||||
|
answerman Member
|
Well, did the experiment I talked about. Started her up, ran her for a bit, then shut her down and pulled the wire off the ballast resistor (the one that runs to the tach). Tried starting her again... she would catch once like she wanted to start and then die. So, that tells me initially that the 12v is going through the tach as it should. Or if it's jumped, it's not under the hood anyway. Garage will be cleaned and ready tomorrow... then I can start in earnest. |
|||||||||
|
answerman Member
|
The project inches along. Being in Wisconsin, I've got maybe a month at best of driving weather before winter gets here, so I set my goal of getting Ms. Jenavieve drivable for the short term (yes, she got a name). Talked with Greg and he didn't have any calipers on the shelf, so I found a cheap Cardone rebuild caliper to get me through for now (it's actually specced for a Spitfire but supposedly it's a direct replacement, sure looks like the same one). I did order new brake hoses from Greg since he had those in stock. Assuming that all's well there once I get these parts in, I'll spend the next few weeks getting a little driving enjoyment and once winter comes, she will go into full restore mode. At that time, I'll probably pull both calipers and send them to Greg to have them rebuilt. I'll get there. Oh... and I *finally* figured out, after reading the manual, searching the forum, and looking at pictures... how to properly stow the soft top. It actually works pretty well if you do it exactly right. It almost looks like the picture in the owners manual, though my top is a little stiff so the "flaps" at the rear quarters don't compress down quite tight enough to roll up super tight... but they do fit and I've got the cover nicely installed over the top. The trick, the part I had the hardest time understanding, is to drop the rear rail down behind the frame before rolling the top. You wouldn't think it would be that complicated. |
|||||||||
|
answerman Member
|
Well, this is interesting. I'll be looking more into this tomorrow when I have more time, but the caliper replacement went way better than I expected... until the end. Old caliper came right off. I was expecting to have to do a lot more persuasion on the mounting bolts and brake line nut than I had to. Everything loosened up nicely. Oh, and the caliper is seriously locked up. Couldn't move the pistons at all, at least by hand. Assembled the new pads in the new caliper, and slid it into place. Holding it in place, there was just a little clearance between the pads and the rotor... perfect! My troubles are solved, right? Well, not so fast. I inserted the bolts and tightened them finger tight... and the rotor wouldn't turn. Scratched my head over this for a bit... checked the pads, not dragging. In fact they were rattling around a bit. Looked further into it and the outside edge of the caliper is tight against the rotor. Huh? So I looked at it from the front, and I see that the rotor is not even close to being centered in the caliper. Well, that's no good. Took it apart and put it together a couple of times, just to be sure I had it right (sheesh, it's not that complicated) but all with the same result. So, tomorrow I do a little more playing with it. Thinking about it, it's not an issue with adding spacers to the caliper bolts because that will make it worse... it needs to move in the other direction, and obviously it can't because it's already tight against the mounting surface. Or, the rotor needs to move inward...? Wondering if maybe it's not a stock rotor? Too thick maybe? I'd guess it at about 3/8" which from what I've seen in other posts sounds about right. Or maybe the mounting surface (didn't peek back there) is bent somehow? I'll be taking some very careful measurements tomorrow to investigate if there are any differences between the two calipers that would cause this, but I would guess that there is about 1/4" of clearance between the caliper frame on the inside edge, and none at all (tight against the rotor) on the outside edge. Really confused. More info after sleeping on it and looking at it again. Last edited on 09-30-2012 04:55 am by answerman |
|||||||||
|
answerman Member
|
OK, things are making more sense today. Turns out that the Spitfire caliper is not exactly the same. The mounting lugs are about 1/4" closer to the caliper body than they were on the Jensen caliper. So, what was actually hanging up was the edge of the rotor. Not to be dissuaded, I decided to disassemble the old caliper. After struggling with getting the pistons removed (compressed air works great to remove one, but then I had to figure out a way to seal the side I removed so that I could remove the other one) I took a good look at the inside of the old caliper, and it's basically more dirty than anything else. So, I took some emery cloth and shined things up, and the inside of the caliper looks great now. The pistons look almost as good, and they all slide together nice and smooth. Thinking maybe what I will do tomorrow is disassemble the Spitfire caliper and swipe the seals and maybe the pistons to rebuild my old caliper myself, since I went this far. |
|||||||||
|
answerman Member
|
Worked like a charm. Reassembled the old caliper body with the removables from the new one. Ms. Jenavieve is drivable again. Drove around for about an hour today just because I could. She is still pulling a bit when I brake, but not nearly as bad. I figure my hoses from Greg should be arriving probably Tuesday, and when I get them I will probably disassemble and clean the other caliper and replace the pads on that side, since I have them. Having fun again. |
|||||||||
|
Art DeKneef Member
|
Good news on the progress. But more importantly, Did you make the car show? |
|||||||||
|
answerman Member
|
Well, *I* made the show, but Ms. Jenavieve didn't. Show was on Friday, and I didn't get done with her till Sunday. Which was too bad, because the local British Sports Car Club was all there, and there were a bunch of MGBs and Midgets, Spitfires, quite a few TRs, and a couple of bugeye Sprites... but no Jensens. I would have been the only one there. I did join the club though and talked with quite a few of the members. We'll be doing other events next year (this was the last one for this year, Wisconsin weather isn't real conducive to this sort of thing between October and April). |
|||||||||
|
answerman Member
|
Update. Actually not really an update, because I haven't done much of anything. The weather has been teasing me, being "almost" nice enough outside to drive her, so I've resisted starting any major work that would keep her in pieces for more than a day, but then the weather doesn't get past the "almost" part and she ends up staying in the garage getting dusty. Once in a while I slide into the drivers seat and make a few "vroom vroom" noises. The only thing that's been done to this point was to introduce myself to the Lotus position to pull the tach out to check the wiring. It all seems good, there is 12v where I would expect, etc. and the car definitely won't start with the tach out, so I assume that the wiring is as it should be. But it still doesn't move. At this point I have to assume that the tach itself is bad. Any way to bench test one of these bad boys? Once I'm sure she's off the road for the year, the project will start in earnest. |
|||||||||
|
answerman Member
|
Well, now that we had our first significant snowfall, I expect that Ms. Jenavieve will not be hitting the road until spring. We had nicer weather than I expected this fall and she got about 200 miles put on her just driving around the countryside... otherwise she would probably be farther along. So, the project will be beginning. I'll be starting small things first and then once we get past the holidays I'll have more time to devote. To do list as it stands at the moment, in no particular order: NOW/SOON: Spend a LOT of time with a sander. I want to take her down to bare metal to see just what I have to work with. The overspray that was done by the previous owner just isn't going to cut it, and I'd rather start fresh. Obviously, repair and repaint the body. So far it doesn't look like I'll have too much repairing to do... she's actually in a lot better shape than I initially thought. Replace front brake hoses that I got from Greg about 2 months ago and have been sitting on my workbench. Replace all brake pads/shoes, just because now seems to be a good time to do it. Replace timing belt, just because everyone says it's a good idea. I assume I'll need a new tensioner as well. Find a replacement light switch (I've disassembled mine a couple of times and cleaned the contacts but it's still "intermittent"). Find a replacement tach... I assume mine is bad because I've checked the wiring thoroughly with my Fluke and everything seems to be as it should be. Still, no movement whatsoever on the tach. Fiddle with the carbs to see if I can get her to start any more easily than she does now. A cold start is a 3 minute process these days, messing with the choke and getting her to run for a few seconds, stall, restart, repeat... but once she is warmed up she starts and runs fine. CLOSER TO SPRING: New tires. I'll probably go with close to original (185/70SR13 or so) on the stock wheels. It'll be nice to get a set of tires for what I pay for one tire for my Excursion. The tread is ok on her tires now, but I have no idea how old they are, the sidewalls show a bit of cracking, and for the ~$300 or so it's a good investment. With the amount of driving she'll get, new ones will probably last me 10 years. And, just before spring, a Retrosound radio. Don't need it yet, but it looks at least halfway period authentic for the car(other than the fact that it's digital and has an MP3 port). I just need one that works, and it's got that nice dual knob chrome look. My goal is to have her back on the road all shiny and mostly new by next April. Once I get to that point, I can address the nitpicky points like new dash wood trim, etc. |
|||||||||
|
Art DeKneef Member
|
You made me laugh this morning with your project list. I know you said in no particular order but found it funny you were starting on the small things first and then mentioned spending time with the sander and painting the car. All by April. I hope you have a heated garage. What don't you like about the paint? What kind of paint is it? Single stage or base coat/clear coat? Maybe some fine sanding and polishing will make it better until you have more time for a complete paint job. Taking a car down to bare metal for a respray is a lot of work and time consuming. Especially to do a good job. Voice of experience speaking here. Doing the brake work should be a weekend job. Don't forget the rear brake hose and the rear brake cylinders. Timing belt will probably be the same depending on how much stuff you have to move in order to get the belt off and replace the tensioner bearing. Delta should have replacement light switches. Could it possibly be a weak ground somewhere? Does the distributor still use points or has it been upgraded to a Pertronix? If it has a Pertronix there are reports of the tach not working sometimes. I believe there are a few threads here on the board discussing this. One of the solutions is to have the tach rebuilt with modern components to work with the Pertronix. Do you know when the carbs were last adjusted or rebuilt? Since it seems to occur whenever the car is cold it could be the choke assembly on the front carb needs adjusting, cleaning or rebuilding. Let us know how it goes. |
|||||||||
|
answerman Member
|
Oh yeah, the garage is all ready... got it all insulated and heating installed a couple of months back. I'm good there. Actually I don't think the body work will be that bad. I've done it before... I've got a pretty good setup with a serious air compressor and a good dual action sander. My concern is that I want to only do this once, and I'd rather take the extra time to get the paint right than find out I have rust coming through in a couple of years. There's a bit of bubbling in a few spots and a couple of places where the paint is actually cracked, as though it didn't adhere properly the first time and then raised up. That's the main reason for the repaint. Once I have her prepared to my satisfaction, I have access to a professional paint booth and equipment (the benefit of not burning bridges with previous employers, and she won't be the first car painted in that booth). I haven't decided how far I am going to take the paint as far as the engine compartment etc, but I am planning on removing the hood, trunklid (I should say bonnet and boot, no?) and the doors to at least do them right. Timing belt and brakes are pretty straightforward, as you said. I've not done anything with the rear brakes but as you said I probably should. It's still the stock points ignition. The wiring is all correct from what I've matched to the wiring diagram in the manual and tested with my Fluke. If I take the tach out of the circuit she doesn't run past the first catch so it's definitely in series... in fact I jumpered the two wires together with the tach out and then she started up. I really think it's the tach itself. It's one of those things that doesn't affect how she runs, but it'll bother me till I get it figured out. The light switch is... basically junk. It doesn't stay together (the back falls right off) and it's not making good contact when I push it together. If I tap the switch with my finger when the lights are on I can get them to flicker. I figure a new switch is a small price to pay. I really don't know the status of the carbs... they are Strombergs with the K&N aftermarket filters. Supposedly the previous owner had them rebuilt, but I can't vouch for that, though they do look pretty clean (in fact the whole engine is pretty clean). Like I said, she runs fine once she warms up so I assume it's just adjusting. |
|||||||||
|
Art DeKneef Member
|
Having a heated garage to work in is nice when it's cold. Being from the Chicago area I know how cold it can get there. Having a place to paint is a bonus. Trying to paint in the garage is a pain without the added issues of ventilation and overspray to deal with. What color and type of paint are you planning? My current quick project, which hasn't been as quick as I hoped, is a copper/bronze single stage. Need to spray the engine compartment and hood. The other full restoration car will be base coat/clear coat. When I have done brake work I usually do everything so I know what I have. It may take a little longer and cost a little more, but the thought of everything being checked and fixed is worth it. A new switch sounds to be the answer. The tach will involve a little more work. If an adjustment of the carb's choke assembly doesn't solve the issue then I would think taking it apart and checking would be the next step. I'm rebuilding a set right now and after taking them apart I can see why the car didn't run all that well. They were pretty dirty on the inside. Not that hard just time consuming with all the parts for rebuilding. |
|||||||||
|
answerman Member
|
Well, here's an update. My winter didn't go quite like I expected it to. Crazy cold, too cold for the heat in the garage to compensate, and as a result not much has gotten done. I'm rethinking the whole repaint idea for now, since once it gets nice out I'll be wanting to drive her (other than cracking and bubbling in a couple spots, she looks pretty good from 20 feet away) so I suspect that the body work/paint may wait till after I've finished the mechanicals such as brakes and timing belt. And a set of tires... the sidewalls are pretty cracked on her current set and for what I can get a cheap set of 185SR70/13s for, I'll invest in a temporary set so that I don't have to worry about a blowout. |
|||||||||
|
answerman Member
|
Another victory. Ms. Jenavieve's headlight switch hasn't worked right since I got her. Same problem as outlined by others on the forum. Contacts were pretty burned up inside and the switch would basically fly apart if you looked at it wrong. Intermittent headlights aren't a good option. Anyway, was at True Value Hardware this afternoon, of all places, and they had a black rocker switch exactly the same size and style as the factory headlight switch. It's only a single throw, but since I can't imagine when I would want to have just the parking lights on, I spliced the blue and red wires together so that they all come on when the switch is on. I also bypassed the dash light dimmer, since it has never worked right either. Even at full bright the dash lights aren't exactly what I would call blinding. $10 and an hour's work. Not too shabby for lights that actually work when you flip the switch. One more thing crossed off the rapidly expanding to do list. |
|||||||||
|
answerman Member
|
Baby needs a new pair of shoes! Well, actually two pairs. My Kumho P185/70R13s are in, and will be installed tomorrow. Also ordered the Retrosound Model One radio, which should be here by the end of the week. Between brake hoses and the radio swap, I know what I'm doing this weekend. Spring is in the air and I want to be ready! On that subject, just in case anyone sees this before the weekend... is there a trick to getting to the radio? Can it come out the back of the console, or does the console need to be removed? I didn't see any obvious screws holding it in place other than the two that hold the fresh air vent controls. |
|||||||||
|
Art DeKneef Member
|
You need to remove the center console. Then you will see a couple of screws holding down the radio console to the trans tunnel. Then you look at where the top of the radio console attaches to the dash. On each side there is a small bolt or screw that needs removing also. After removing them you should be able to move the console around and then get the radio out easier. |
|||||||||
|
answerman Member
|
Thanks Art. That's what I suspected. Actually, I need to pull the choke cable out too (the whole cable and housing is trying to move now, pretty sticky in there) so I would like to pull the radio console anyway. Noticed it this morning when I drove her over for her new tires... if I pull the choke knob she chokes right up, but pushing it back in just moves the whole cable so the choke doesn't open back up. Drove over idling at 40mph... lol |
|||||||||
|
Art DeKneef Member
|
The choke cable is a pain to work with. As I mentioned early, did you check the actual choke on the carb? When you disconnect the cable at the carb choke see if the choke assembly moves freely. If not, then it needs cleaning. And you might need a new choke cable if it sticks real bad. But you'll know for sure when you have the cable out. It should slide smoothly. |
|||||||||
|
answerman Member
|
Actually it wasn't that bad. Went to O'Reilly and bought a universal choke kit for $10, pitched everything except the cable housing, and cut it to the proper length. Then I disconnected the cable at the choke (which moves fine by the way), pulled the cable out of the housing, removed the old cable housing all the way back to the dash, and replaced it with the new one. Pushed the old cable back through the housing (after greasing it up good), hooked it back up, and good as new. The problem turned out to be that the housing was pulled off the mounting behind the dash... it was just sliding around with nothing to stop it from moving. The worst part was getting the old mounting point off behind the dash... because I got impatient and didn't wait till this weekend when I was going to have the radio console off anyway, I had to assume the Lotus position and sneak an open end wrench up through to loosen the locknut from the back. Got it though after scraping my knuckles up pretty well. The new mounting is a lot smaller, but still fit fine in the dash opening, though I was ready to put a couple of washers in if needed. |
|||||||||
|
answerman Member
|
Quite the productive weekend. Started off Saturday afternoon *finally* getting around to installing the brake hoses I ordered from Greg last fall, along with the pads for the right caliper (the left side was replaced when I rebuilt the caliper last fall). Like everything else, it all ended up being more involved than I had hoped. First, when I removed the right wheel I immediately saw that something didn't look right. The pads were shifted slightly from their correct position and the top edge was actually riding "off the edge" of the rotor. Looking into it, the lower retaining pin was completely missing! Fortunately, I kept all the extra parts from the Spitfire replacement caliper I bought last fall for the left side (if you remember it didn't fit right but I ended up disassembling it and using the seals and pistons to rebuild the existing caliper) and was able to find a retaining pin there. However, I didn't have the little clips to hold the pins in place... more on that below. While I had the caliper off I decided I might as well clean it up a bit, so I basically did a rebuild of the existing parts. Popped the pistons out using compressed air, pulled the seals, shined up the inside of the cylinders and the pistons with emery cloth, and put it back together. The seals all looked pretty good, which was fortunate since I didn't have replacements handy. The only thing missing at this point were the clips to hold the retaining pins in place ("retainers for retainers?"). The ones I remember from the left side were what I would call "hitch pins" for lack of a better name, kind of shaped like a capital R, with a straight part that fit through the hole in the retaining pin and then curved around to clip against the outside edge. Not sure if these were original, but that was what came with the replacement caliper last fall. Long story short... none of my favorite hardware stores stock such a thing in such a tiny size. What to do? I finally ended up just using a standard (albeit tiny) split cotter pin cut down to about a half inch long, and then carefully bent back around the sides of the retaining pin. It worked fine, but I will be cursing myself when it's time to change the pads again since these are really going to be a bugger to remove again. With the caliper successfully rebuilt and reinstalled, time for the new brake hoses. I only did the front, didn't do the rear one. I'll probably be cursing myself for not ordering all three. Anyway, that went pretty uneventfully. By this time it was pretty late, so I knocked off and picked up Sunday morning after church. With all this done, all that was left was to bleed the system. So, armed with a quart of DOT4 fluid, off we went with Mrs. Answerman on the brake pedal and me on the bleeder valves. After almost a quart of fluid and an hour of getting the three bleed points at least close, we couldn't seem to get all the air out of the system. So, I did a little online research, headed over to Harbor Freight Tools, and came back with a pneumatic bleeder kit (http://www.harborfreight.com/brake-fluid-bleeder-92924.html). Oh wow. I am never going to bleed brakes without this little gem again... best $25 I have spent to date. Took another quart of fluid, but we finally got them bled out properly and the pedal is nice and firm. The rest of the day was preparation for the new Retrosound Model One radio that should be arriving tomorrow. Pulled the door trim panels off, and removed the incredibly crappy speakers that the PO had mounted in the doors... 3 1/2 inch speakers that didn't even fill the opening. No wonder they sounded so rotten. Then, tackled the radio console. Now, this didn't quite go as I expected (actually easier if you can believe that). What ended up happening is that after removing the shifter/e-brake console, I removed the two screws holding the lower edge of the radio console down, and then removed the two screws that hold the vent handles under the dash in place. As Art suggested, there appear to still be screws holding the top edge of the radio console to the dash, but I could not find them for the life of me. Just for fun, I started pulling on the bottom edge of the console and the whole thing wiggled pretty well, but wasn't going to come out. So I pushed it back into position... and the "woodgrain" trim plate popped loose. Ooh! So, I disconnected the choke cable to give me a few inches of give, popped the fan switch off, pulled the bulb assemblies from the 3 warning lights at the bottom, and was able to remove just the panel. Maybe this was the way it was supposed to come out, and I just misunderstood, but regardless I now had access to the front of the radio. The radio was mounted to a plate that was held to the face of the console metal with 4 screws. Took them out and the radio came right out the front of the console. Easy as pie. Again, this may not be the original setup. I will get a couple of pictures of it all before I put it back together. Today's project is to run over to Best Buy and pick up some new speakers to be mounted tonight. I have picked out a pair of JVC 4" coax speakers that look like they will fit into the door space. And, I am going to build a box for the 6 1/2" Alpine rear speakers I will be picking up at the same time. A box that is 34" wide by 7" high by 4" deep should fit nicely in the rear well under the rolled up soft top, covered with cheap automotive carpet. When it's all said and done, I think it will be more a more than acceptable speaker setup for the space available... not audiophile quality, but more than good enough for me. Bonus find of the day was a pair of cabinet doors (one of the neighbors must be remodeling their kitchen) made of 3/4" plywood, 36" high by about 12" wide. Perfect material to make my speaker box, and the price was right. |
|||||||||
|
answerman Member
|
Quick update... picked up the speakers tonight and decided to put them in so that part was done when the radio got here. I have to say I'm confused about the door speaker mounting. They are definitely designed for 4" speakers, since 5 1/4 would overhang the beveled area they mount in, but the 4" speakers I got didn't quite fill the opening. I thought about it for a while and decided to try a little field modification, especially since I didn't care for the way they would have mounted anyway. What I ended up doing was going to the hardware store and picking up a roll of 1/2" sponge rubber window insulation, and circling the back of the door trim cutout for the speaker, so I would have a nice seal between the door trim and the door metal. Then, I put the door trim panel back on and mounted the speaker to the trim panel, drilling holes into the beveled area. That worked out pretty well, though I lost the stock speaker grilles in the process since they wouldn't fit over the speakers anyway. I ended up using the grilles that came with the speakers. Tomorrow: the Retrosound radio arrives, and that goes in along with building and installing the rear speaker box. Once that is all done, the interior will be reassembled and I can actually drive her in comfort (though the weather's not supposed to get out of the 40s for the rest of the week so she'll probably stay in the garage anyway). |
|||||||||
|
answerman Member
|
Radio and speaker installation is complete! As previously mentioned, I found a 4" pair of JVC speakers for the doors and a matching pair of JVC 6 1/2" speakers for the rear deck. The doors: 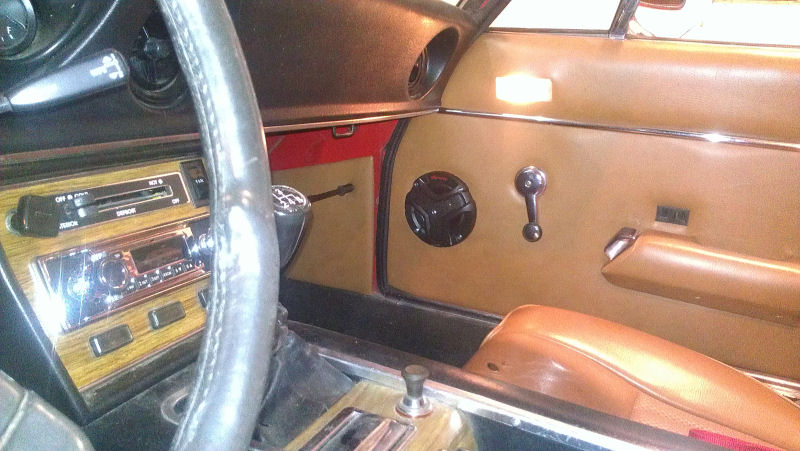 And the rear well: 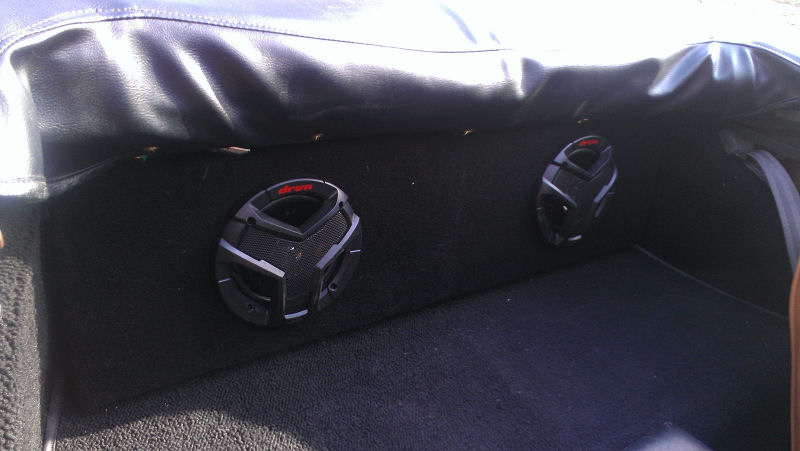 What I ended up doing for the rear was to build a box 33" wide by 7 1/2" high by 5" deep, just enough to fit tight into the rear well under the rolled up top and frame. Covered it with cheap black automotive carpet and it looks like it's part of the car. Other than the grilles being very modern looking, it doesn't look too bad if I say so myself. The Retrosound Model One radio installed: 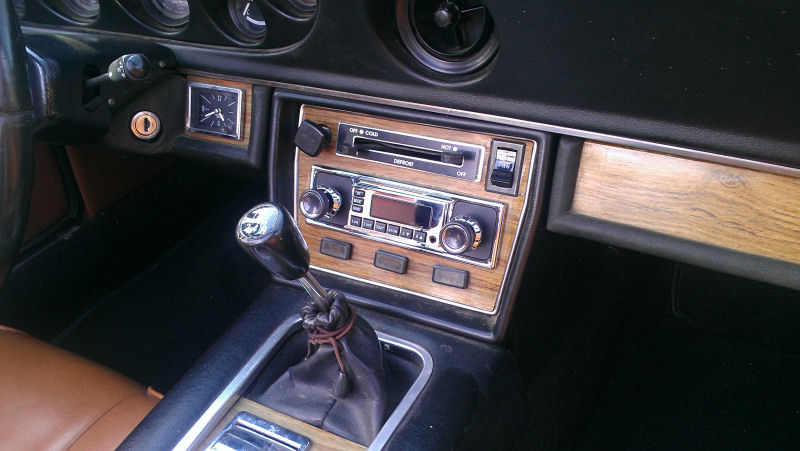 Oh, and the radio is chrome... for some reason I can't get a picture of it without it looking reddish brown. Reflecting off the interior, I suppose. *EDIT* I was able to get a couple of pics in the sun yesterday and the radio and rear speakers pics are updated now. Plus I figured out how to embed pics within the post :-) Anyway, it looks very appropriate in the 1974 dashboard. Last edited on 04-08-2013 11:37 pm by answerman |
|||||||||
|
answerman Member
|
Since Joachim updated his project, I guess I should update mine. Decided last night to start hitting Ms. Jenavieve with the grinder. The right side appears to be the worst (from the outside anyway) so that's where I started...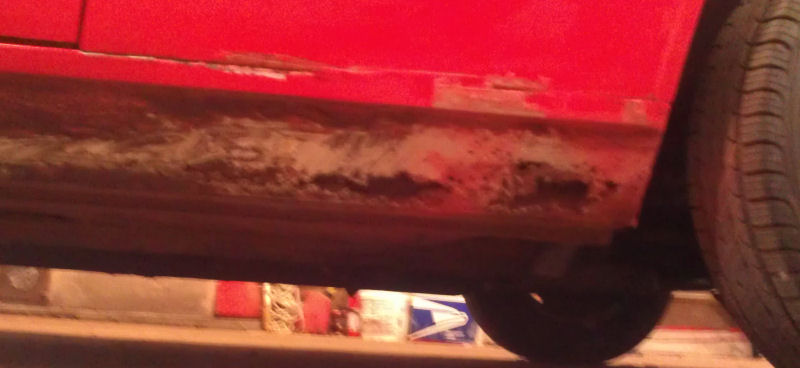 So, the rocker is pretty much Swiss Cheese as I suspected. This looks to be a nice straight flat piece, guess I'll just cut it out the entire length right under the groove where the red paint ends, and weld in a new piece of metal. 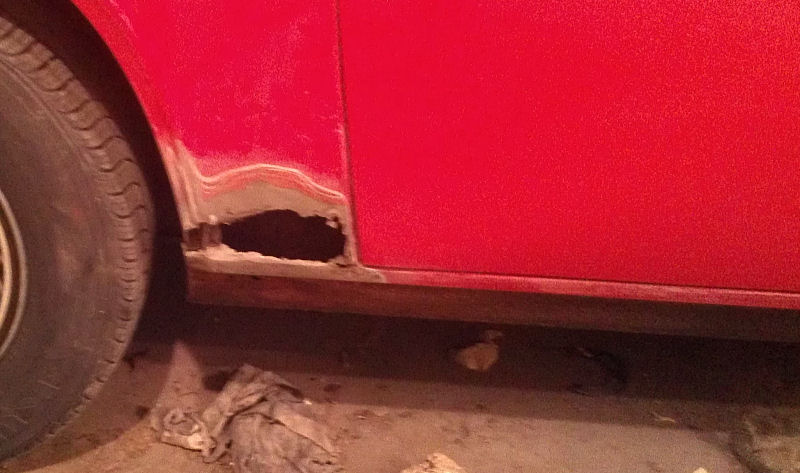 This will be a bit more of a challenge. I could see that one of the POs had done some Bondo work here. Started chipping away and pulled out all the old school bodywork: about an inch thick of Bondo backed with some wadded up newspaper and rags. Not to mention that when I reached through the hole, the rocker has a nice fill of what appears to be very high quality topsoil, nice and moist. I'll clean that out when I cut the rocker as per the previous picture. Fun stuff. Obviously I'll need to weld some new metal in, but shaping it is going to be interesting. Thinking about doing it as a two piece job, welding a small piece in for the "flange" or "lip" of the wheel well first to connect the flange to the rocker, and then doing the flat piece and mating it to the first one. Last edited on 04-26-2013 08:22 pm by answerman |
|||||||||
|
Art DeKneef Member
|
Fixing the rocker, or is it rockers, is going to be a pain no matter how you look at it. Once you get the rocker opened up and can get a look inside you'll get a good idea if just welding in the flat piece will work. Based on the picture my initial guess would be no. The bottom of the rocker is probably going to be rusted also. And trying to weld on the rusted area will cause more problems. You might think of calling Delta and see if they have rockers and what the cost would be. You might be able to buy 1 rocker and use it to fix both sides. Of course you could always make your own rocker. It's not that difficult. Just requires a lot of bending and measuring. Spoken from experience. The bottom front of the rear passenger fender is another piece you can make. I made one for one of my cars. It takes time and patience to get it right. Well, that and having the right tools really helps also. But this piece is easier to do than the rocker in my opinion. The wheel lip is the hardest part. |
|||||||||
|
answerman Member
|
Talked to Delta today and they will be getting the rockers back in stock shortly, but the repair piece for the rear fender is no longer available (supplier went out of business or something). I think I'm going to go ahead with my original plan of patching the rocker as best I can for now, making a new patch panel for the fender/wheel well (maybe glass and a little Bondo), and doing what I need to to make it presentable for the summer. Then, next winter I can address a permanent solution, probably just replacing both rockers with new ones from Delta as part of the complete stripdown and repaint. For now, I just want to get her on the road and not be embarrassed... the driving season in Wisconsin (which STILL hasn't started) is way too short. |
|||||||||
|
answerman Member
|
Don't shoot me... I know I committed a car restoration faux pas. It's only temporary. I just need it to hold up for the summer and then we'll do it right next winter. Armed with Bondo Glass, Bondo Body Patch, glazing putty, high build primer, and about 9 different grades of sandpaper from 40 to 1200 grit, I've spent the past few days patching up what you saw above. It's not perfect, but it'll pass the 10 foot test. I had my body shop friend match up the paint and get me a quart of single stage with the appropriate reducer and activator, and will cross my fingers that it will match and spray it tomorrow. Pictures then unless it comes out completely bodged. |
|||||||||
|
answerman Member
|
Well, I wouldn't say completely bodged, but the new paint is definitely darker than the old. Giving it a couple more days to harden up and then I'll hit it with the buffer and see if I can blend it a little better. I think it'll be ok for the summer.... at least pass the 20 foot test anyway. |
|||||||||
|
answerman Member
|
Change of plans (as mentioned in another post). I was checking my eBay account to see if the tach I had ordered had shipped (which it had, and I've received it, and it didn't solve my problem, but that's for another post) and ran across a listing for a 1974 JH parts car. Long story short: it now belongs to me and my son and I will be driving over to Perham, MN to pick it up this weekend.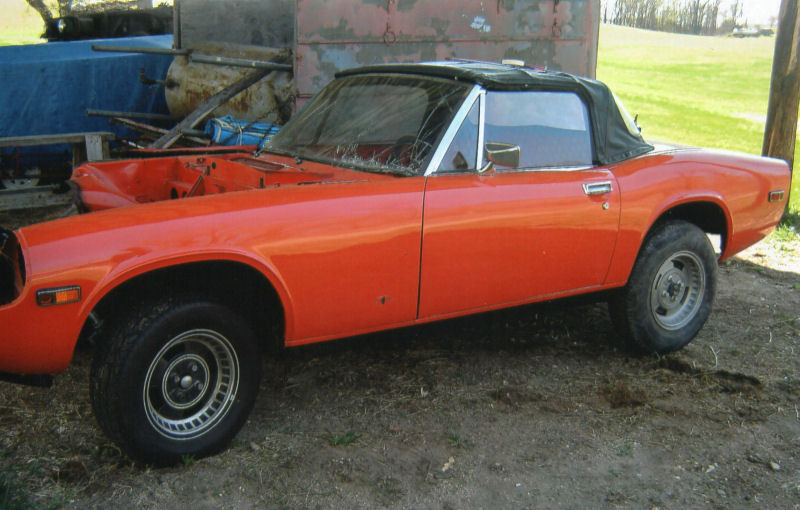 From the good side. And.... 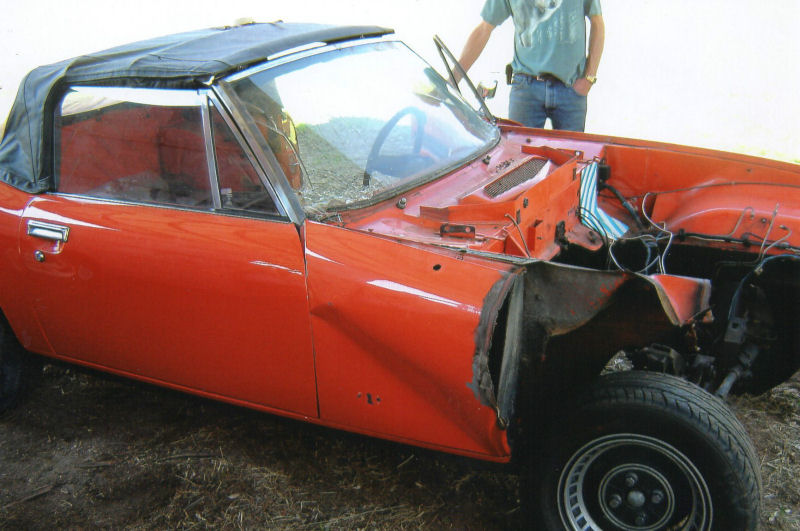 From the not so good side. As a result of this unexpected event, I am going to hold off on any more body work on Ms. Jenavieve for the summer, and then re-address it next fall/winter when I can do it right with the donor car. I haven't actually seen this in person yet, but according to the owner it's in pretty good rust-free condition (other than the obvious damaged/missing parts). This solves my problem of needing rockers and lower fender repair patches, plus I can use the floorboards and maybe a few other bits. The pictures aren't quite correct as he's since removed all of the exterior lights and trim. And obviously the engine, transmission, interior, dash, etc. are gone as well. Still lots of good parts there, though. The plan is to disassemble this as much as I can this summer and dispose of what I don't need, either by finding people who can use the parts or just storing them "just in case" and sending what's left to the recycle bin. Last edited on 05-14-2013 08:52 pm by answerman |
|||||||||
|
answerman Member
|
Well. JH 19370, or what is left of her, is now in my possession. Nice drive across Wisconsin and Minnesota to pick her up this past weekend. Looking like an excellent investment, the more I delve into her. She belonged to Ernie West (who as I understand is a JHPS member but isn't active on the forum) and we had a really nice chat about JHs in general and ours specifically. Many of the parts from 19370 moved over to his other JH, which was apparently featured in the JHPS newsletter tech talk some time back (before my time apparently). Anyway, got her home and been playing the past couple of days. Like I said above, he stripped pretty much anything that could be unbolted and removed. However, the items I was looking for are all there (along with a couple of nice surprises). The three fenders that weren't damaged in the accident are pretty much perfect, as are the rockers and floor pans. Even the front passenger fender is probably salvageable in the "behind the wheel" area, which is the part I need. Those will all be coming off in the weeks to come. Also (and this made the cost of the car and the transportation much easier to swallow) the soft top, while not perfect, is in perfectly serviceable condition... just needs to be cleaned up. It's a much lighter weight than the aftermarket top that Ms. Jenavieve came with, it's not suffering from any shrinkage (in fact it's a tad loose), and the framework is clean as a whistle. So, the first order of business tonight was to unbolt both top frames and do a bit of regluing at the header rail, and the soft top and frame you see in the picture above is now happily mounted on Ms. Jenavieve. I think it'll be perfectly fine once it's tidied up, and more importantly it actually fits right and I can snap and Velcro the back the way it's supposed to be done. Took all of an hour to swap, and it actually works right. |
|||||||||
|
answerman Member
|
Small update, just because I like to talk about my cars :-) Donor car is getting lighter every day. As of tonight, all 3 1/2 fenders, trunklid, and doors are removed and stored safely in my garage attic until I get to stripping them and prepping for the graft onto Ms. Jenavieve. Also removed and stored in the attic are the stainless door trim from both sides, convertible top frame (actually it's the one from Ms. J), heater, fan, windshield frame, steering wheel, wiper motor, and a few odds and ends like door latch striker plates and the convertible top locating hooks from the rear deck. These all fall into the category of "probably won't use them in the restore, but maybe someone else can use them". To remove yet: rockers/sills and floor pans, which will be part of Ms. J's restore. Once those are removed, all that will be left will be to remove the wheels, front rotors, rear drums, steering column, and rear axle/differential (and the rear taillight surround panel if I can figure out a way to remove it without too much trouble) and then what's left can be carted off to the crusher. Unless someone can think of something I missed that would be of value. I'm thinking that I can have the rotors turned and kept as spare pairs, and the wheels sent off to be blasted and refinished for either spares or swapping if I think they are better than the ones Ms. J has now (both sets are stock style). Meanwhile, Ms. J is all shined up and ready to take part in her first show this weekend... the British Car Field Day in Sussex, WI. Over 200 British cars on display, and from what I've seen in last year's pictures she should be the only JH there (though there were a couple of Interceptors last year). Of course this isn't too far from the Mau family abode, so maybe Ron or Jeremy may be there. We'll be driving down with the local British car club... the lone JH in a procession of MGs, Triumphs, Jaguars, Minis, a couple of Lotuses, and even one Rolls that I know of. I'm not expecting any trophies in her current condition, but it'll be fun just to go take part in it. Last edited on 06-14-2013 05:12 am by answerman |
|||||||||
|
answerman Member
|
It's been a while, though not a whole lot has happened in the interim. Donor car is gone. Got the sills and rockers removed and stored, along with the rear valance (or whatever it's called, the rear panel that the taillights mount into), the rear axle and suspension, and what was left of the front suspension, and called it good enough. What was left was loaded by myself and my two teenage sons onto my little flatbed trailer and carted off to the local recycling center. At 7 cents a pound, this pile of classic British steel resulted in the recycling center handing me $23.80. Kind of sad... 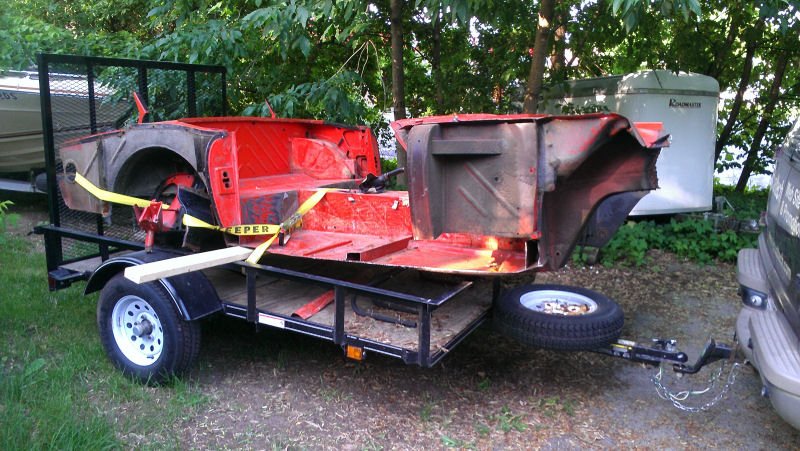 The British Car Field Day was fun. Great weather, over 200 British classics on display. As expected, no trophies for Ms. Jenavieve. Actually, they didn't quite know what to do with her, so they classed her as a big Healey. Take a look at this picture and tell me which car you would vote for... or which one not to vote for. Kind of unfair competition :-)  The remainder of the summer will now be odds and ends that will keep her in driving condition (gotta drive when I can in Wisconsin, the season will be over way too soon) and getting the body panels from the donor car prepped for this winter's transplant. Other than that, probably not too much work on her for a while, though I noticed yesterday that there is a bit of fluid leaking from the area of the right rear brake. It's always something... On the plus side, was vacationing with the inlaws this week in NY state and dropped in to visit Brett Gibson. Had a great couple of hours chatting, sharing tips and getting insights, and looking over his JHs. Last edited on 07-09-2013 07:25 pm by answerman |
|||||||||
|
answerman Member
|
Yup, brake problems indeed. Decided to drive Ms. J to work today for the first time in a couple of weeks, and the pedal is going right to the floor. Looks like it's time to hit the club store for a new rear cylinder (unless I get lucky and it's something silly like a loose fitting... haven't gotten down there to look yet). Sigh. |
|||||||||
|
answerman Member
|
Well, good news for a change. It was in fact the rear right brake cylinder spewing fluid at an alarming rate. However, I was doing some work in the garage and happened to glance over at the rear axle assembly that I removed from my parts car (and was too heavy to drag up to the attic) and lo and behold, the cylinders were still mounted! For some reason I had convinced myself that Ernie had pulled them (like he did the front calipers) before selling me the car, but there they were. Pulled the right rear cylinder, took it apart and cleaned it up just to be safe, and swapped it out with Ms. J's faulty one. After a quick power bleed, I can stop again! This parts car is starting to look like the best investment I've made in a long time. |
|||||||||
|
answerman Member
|
Another puddle on the garage floor. Looks to be gas this time *sigh* It's always something. The boot has always smelled like gas... my guess is with the crazy hot weather we've had the past week, things are expanding and opening a tiny leak into a small leak. Guess I'll be pulling the gas tank for repair... |
|||||||||
|
answerman Member
|
Not much has changed in the past couple months, decided that this was the summer to rip the old wood siding off our house and replace it with vinyl, so that's been taking most of my free time. 3 of the 4 sides (the complicated ones) are done, hoping to finish up the last side over the next couple of weekends. The gas leak I mentioned above seems to come and go... I am writing it off to the weird changes in the weather we had all summer. My guess is there's a tiny leak somewhere in the tank that is expanding and contracting with the weather changes. It'll wait till this winter when the body comes off, and then I can assess the tank for repair or replacement. On a side "fun" note (and I suspect several of you have been there) the first "oh you have a convertible!" moment happened this week. My son volunteered me to drive Ms. J in his high school homecoming parade with a homecoming court couple perched on the boot. So, that'll be fun. Any excuse to show her off, right? |
|||||||||
|
answerman Member
|
Well, it's official. Ms. J is off the road for the winter (it's 31 degrees F which works out to -1 C for those of you across the pond, and likely to get colder rather than warmer for the next several months) which means it's time to start the restoration in earnest. First order of business is to start prepping the panels I took off of the parts car I picked up from Ernie West earlier this year. Fortunately, those appear to still have the original paint so hopefully removal down to either bare metal or a good base shouldn't be too much work. I'll be replacing the front left, rear left, and rear right fenders, the boot lid (maybe, haven't decided yet, depends on whether I want to go with or without the luggage rack she currently has mounted), and the rockers. Looking forward to drilling out all those spot welds fastening the rockers to the inner sills. Since I'm not planning on replacing the sills, I just Sawzalled off the whole rocker and sill assembly from the parts car along with a bit of the floor pan, so those spot welds should be friendlier to drill out (I can just put the whole assembly on my workbench and use my drill press) though the ones on Ms. J will be fun. Is there such a thing as a portable horizontal drill press? Once all that's done, then I get to prep the rest of Ms. J. Lots more fun there. At least one badly done Maaco-style paint job to remove from the bonnet, doors, and other parts not mentioned above. |
|||||||||
|
answerman Member
|
New year, and time to get to it. As I just posted on the Jensen East 2014 thread, I have 19 weeks to get Ms. J ready for the event. Nothing like a deadline, right? I got a bit of a wrench thrown into things when I blew out my knee back in November and had to have it scoped, but I think I'm now ready to tackle the project in full. Assuming the weather warms up some (if you haven't seen the national weather reports, it's crazy here... minus 21 degrees F at the time of this writing) my first goal is to get everything unbolted by this coming weekend. Doors, bonnet, boot lid, and fenders removed, and seats and carpet pulled. Garage is heated and insulated, but that kind of temperature is hard to overcome, so we'll see. Then, it's assessment time regarding floors and rockers, once I have the above stuff out of the way. I took a look at the rockers from the parts car this weekend, and while they are pretty clean as far as rust, they are not exactly perfect (lots of little dings). Still debating if I want to go to all the trouble of using them, or just cut out what I need to cut out on Ms. J and weld in patch panels. Won't know until I can see what I am working with. Wish me luck. |
|||||||||
|
answerman Member
|
The weekend passed and I actually got a lot done! Over Saturday and Sunday, my assistant (the 18 year old son who is anxious to start welding and is planning on this car being his someday) and I made a huge dent (pun not intended) in the disassembly process. First order of business, after removing the battery, was to remove the doors, bonnet, convertible top, boot lid, front bumper, and gas tank. That all went fairly quickly. Then, since I had way more time to work with than I thought I would, off came the headlight pods, headlights, and the left front fender. Not bad for 6 hours of work. I was pleasantly surprised with the condition of the gas tank (my guess is that my leak isn't coming from the tank, but rather from the fittings and/or hoses) and the boot floor itself. Some surface rust, but it seems mostly solid. Sunday, I went back out and decided to tackle her again. Besides removing things like the hooks that hold the top down at the rear, all the snaps that hold the top in place, the taillights, the vertical stainless trim in the door jamb, and the curved trim pieces at the rear of the car, I also removed the left rear fender. Now, THAT was a job. I experienced my first significant rust along the way, and while I was pleased with the condition of the rocker/sill at the front fender (it's actually quite clean) the condition behind the door is pretty atrocious. I was expecting the worst after seeing the bad Bondo job one of the POs had done, and I wasn't disappointed. In order to remove the rear fender, after removing the myriad of bolts and rivets (and having to melt the lead to get at a couple of the rivets), I ended up having to take a Sawzall to the fender in the little section in front of the wheel where it bolts to the rocker since the bolts were covered with about a half inch of Bondo. Once I did that, I was able to wiggle it off. There's basically nothing left to the top of the rocker in the area where the rear fender and the stoneguard attach. After chipping away all the Bondo, the center of it is basically a big hole. Next step will be to get the stainless trim off of the bottom of the door jamb (where it's basically glued to the rocker) so I can assess just how far it's rusted. I remember removing the stainless trim panel from my parts car and it was a hassle... not sure what they used to glue it down but it's seriously strong stuff. That reminds me... they used the same, or something similar, to seal between the top of the rear fender and the edge of the frame where the weatherstrip for the boot lid is. What is that stuff? Some kind of caulk? I found that heating it up only makes it even harder. Anyway, a good weekend of work. Looking forward to next weekend when the other two fenders come off and I can finally assess just how much work we are going to have to put into fabricating metal patch pieces for the rockers. Last edited on 01-14-2014 08:53 pm by answerman |
|||||||||
|
answerman Member
|
By the way, an aside... I thought I'd share an organizational idea I came up with during disassembly. I went and got myself a couple of boxes of Ziploc storage bags, both the quart size and gallon size, a Sharpie, and a pack of index cards. Then, as I remove items, I put them in an appropriate size bag along with an index card stating where they came from. So, as an example, I have a bag with a card labeled "Front Left Fender" which has all the fasteners I removed, along with the side marker light. Another one labeled "Stainless Trim" with the screws from the door trim, the curved trim pieces from the rear of the car, and the little retainer clips for said curved trim pieces. Obviously, the larger parts don't need to be bagged since they are quite apparent as to their identity, but the fasteners that go with them aren't... hence the labeled bags. You get the idea. I would hope that this will aid immensely in the reassembly portion instead of having a box filled with all the nuts and bolts that came from various places in the car all mixed together. |
|||||||||
|
subwoofer Member
|
Pictures, or it didn't happen! :-) PM me if you can't figure out how to attach pictures. -- Joachim |
|||||||||
|
answerman Member
|
Pictures? Oh, I got pictures :-) Tomorrow, I need to get them off my phone. |
|||||||||
|
answerman Member
|
OK, pictures at various stages during the weekend. Here's phase 1, after all the easily removable bits were removed:  And here's where I went farther and took most of the front, and the front fender:  And finally (bad lighting here) the end of the weekend with the rear fender removed.  I'll get some better pictures of the rocker and associate rot a little later, perhaps when I get the other side disassembled. Last edited on 01-14-2014 08:52 pm by answerman |
|||||||||
|
answerman Member
|
Spun Ms. Jenavieve around on her roller skates last weekend to get the fenders off the passenger side. That actually went surprisingly well. Expecting some pretty extensive rust issues at the front of the rear fender/rocker joint, and I wasn't disappointed. The rear fender was basically just Bondo'd to the sill. The "tab" at the bottom of the fender wasn't even there. As promised, closeups of the rocker/sill calamity: 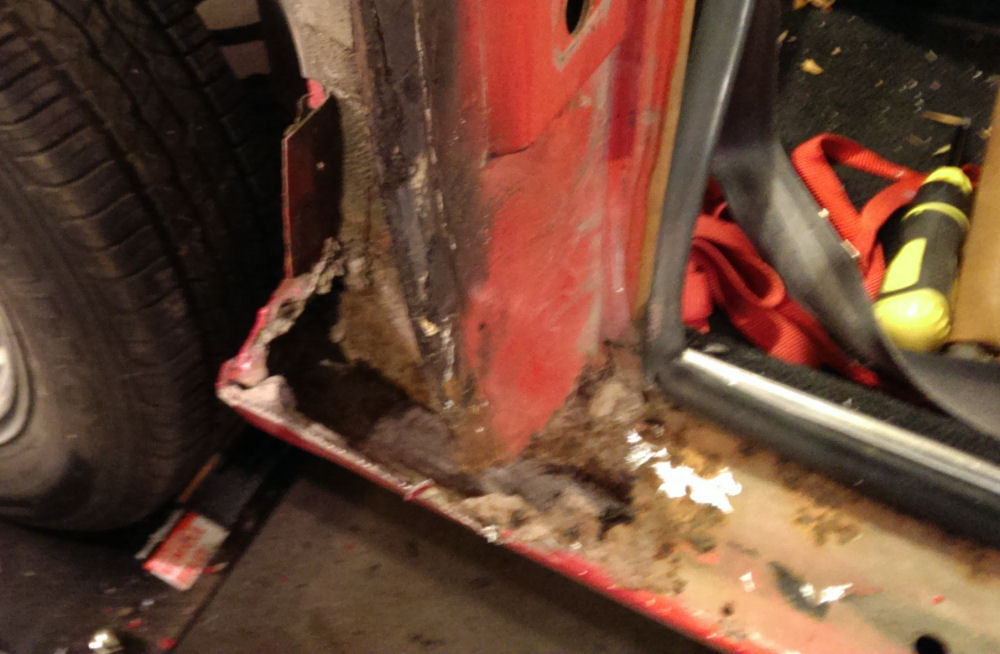 Ummm... the top of the rocker is pretty much gone! Also, the door jamb is pretty much gone in the bottom area.  Another view of the same area. Haven't hit it with the grinder yet, but there's not much to work with there. 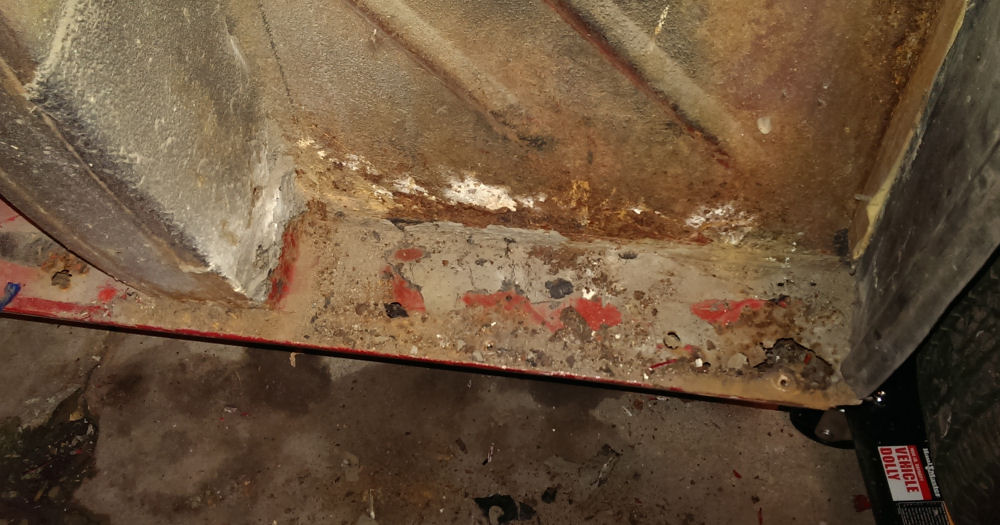 At least the front is mostly in once piece. Obviously, there are likely rust issues on the inside that I can't see at this point, too. Debating whether to just cut out and weld sheet metal as needed, or perhaps chopping up the rockers I took off my parts car to patch in the front and rear bad spots, while leaving the middle (though I know I need to cut out a "window" and weld in new metal in the center under the door). The fewer spot welds I have to drill out, the better. And of course fabricate a patch piece for the bottom of the door jamb. This is getting fun! Last edited on 01-22-2014 07:12 pm by answerman |
|||||||||
|
answerman Member
|
Rant time. We were looking at the passenger side rocker/sill from different viewpoints, and decided that since it's in pretty good shape (other than the obvious spot behind the door) the most straightforward route would be to chop the rocker I took from my parts car a few inches into the door opening and weld it in to replace the existing rotten area (basically making the rearmost 12 inches or so new from about the drain hole in the door jamb back to the wheel cutout). After fighting with it for the better part of yesterday and today, it's just not worth it. After drilling out about 30 spot welds, I still don't have the outer panel separated from the rest of the sill on the piece I want to put in. Not to mention that I haven't even started trying to remove the associated parts from the car. The rear corner of the rocker/sill is the wackiest welding job I have ever seen. Counting the outside (visible) panel, the inside stiffener, the end triangular piece that closes it off, and the inner sill, there are 4 (yes 4) layers of metal that are welded together at the rear. Going to take a day to lick my wounds (and wait for it to warm up a bit, supposed to hit -25 degrees F tonight) and then look at it again and see just how hard it would be to fabricate a new piece or pieces to patch what needs to be patched. I'm trying very hard to do this all "right" but I keep losing sight of the fact that most of this repair will not even be visible when the fender is re-mounted. So, the plan at this point is to make a couple of new pieces to fill in the big hole, welding to the inner unibody panel and then wrapping over to meet the rocker at the point where it changes from red to black in the picture above. Then, patching the bad spot behind the front wheel, cutting out most of the visible flat part of the rocker under the door and welding in a new flat piece of metal. At least this is the bad side. The drivers' side is in much better shape... really the only bad spot is behind the door and it's not half as bad as the passenger side. I'll get past this, but just frustrated right now. Last edited on 01-28-2014 04:34 am by answerman |
|||||||||
|
Art DeKneef Member
|
Oh, I so understand the frustrated part. You're correct with the funky metal layers and removing the rusted metal. But it can be done. First thing I would do is remove all the paint, tar, sealer, etc. from the areas and get down to bare metal to actually see what you are working with. And I would start with the front to hone my skills so to speak before working on that rear section. Those rear pieces aren't that difficult to make with basic hand tools, just time consuming. If you need some pictures of those areas let me know. I have another car under restoration that is apart in those areas if you need some pictures. |
|||||||||
|
answerman Member
|
Thanks Art. I just needed to vent a little because I thought my original plan was going to work better than it did. I didn't expect that it was going to be such a hassle to remove the outer rocker from the assembly from the parts car, and I feel like I wasted an entire weekend. Definitely going with plan B... clean up all the paint and tar and such to see what's salvageable on the car, de-rust as best I can, and cut out the nonsalvageable stuff and weld in new. As long as it's structurally sound, that's all I'm worried about... like I said 98% of this repair won't even be visible when the car is reassembled. |
|||||||||
|
answerman Member
|
Just an update, or lack thereof. The past few weeks have been kind of busy so not a whole lot getting done on Ms. J. When I've had a spare hour or two, I go out to the garage and pick a part to strip the paint off of. Lots of cleanup to do from things like the headlight rings and trim having overspray from the PO's bad paint job. Things get much calmer after this coming weekend, and then I will start having more progress to report. January kind of got away from me, so I need to get my nose back to the grindstone. The Jensen East meet is coming sooner than I would like... gotta be ready! Last edited on 02-17-2014 08:00 pm by answerman |
|||||||||
|
answerman Member
|
Good news for a change. Took Art's advice and spent some time cleaning up the chunk of rocker/sill that I chopped off my parts car. Got it pretty much down to bare metal, and it became much clearer how everything was welded together. I swear those Jensen welders must have gotten paid by the spot weld... Anyway, once I was able to see what was holding everything together, I was able to drill out the welds I needed to in order to separate the outer rocker from the rest of the sill. Then, I moved on to Ms. Jenavieve and did the same. I figure about an hour of final cleanup this weekend, and then I will be ready to graft the nice new piece of outer rocker into place. That will be a huge load off my mind. Feeling much better about the project now. |
|||||||||
|
answerman Member
|
Another mostly productive weekend went by, with only one calamitous discovery (which I was kind of expecting anyway). First, the good. Yesterday, we finished the graft of the "new" section of rocker panel to Ms. Jenavieve. Came out pretty good. Apparently two semesters of welding classes have made an impact on my 18 year old. Ground down the seam and with a little filler you won't even see the seam. Also spent a LOT of time with a sander/grinder this weekend. All paint is removed, down to bare metal, on the rear valance, the rear deck (between the convertible top well and the trunk opening) and both rockers and door jambs. All that's left to do of the "unibody" is to finish paint removal and prep of the trunk interior and the engine compartment. Then, prime and paint. I'm taking a week off from work (it's nice to be self employed) next week to spend several full days working on her. The goal is to have this work all done by the 15th of March. Now, while I was doing all this, I also stepped to the side and started the paint removal of the hood, because I had a nagging feeling that all wasn't well there. Of course, I was right. Armed with a 50 grit sandpaper disc and backing pad on my angle grinder, I went to work. After I got through the Maaco paint job layers down to the original finish, I started running into body filler. Yup, someone creased the hood at some point. They did a pretty good job with the filler, it wasn't even noticeable other than the paint had cracked over it (which was my clue, it was right over the area where the telescoping hood strut would have been if it was still installed). Of course, I didn't discover it until AFTER I hit it with the sanding wheel, so the filler got gouged up pretty bad. I ended up just going down to the bare metal there as well, and can see all the peen marks and such where they bashed it back into shape. No more than 1/8" of filler, but that's enough, and though I'm pretty fair with body filler this looks like a bit of a challenge with all the contours of the hood. I may ring up my body shop friend and see what he'd charge me to do it right. Anyway, still not ahead of schedule, but at least not behind. |
|||||||||
|
redracer Member
|
answerman: there is a very nice fix for "the bend" in the hood caused by someone inadvertantly trying to close it without lifting up the release catch first.(I saw this first on Clay Gleason's J-H--he called it "LUCIE", Seattle, WA.) I have fixxed one myself, even though I am not a "body" man. If interested, call 404-261-2552 or SKYPE "RockClimber52" me. |
|||||||||
|
answerman Member
|
Talked to my body shop friend and he thinks he can get the hood properly filled and shaped for about $100. Going to take him up on it, since I'd probably spend half of that just getting the proper supplies and tools, and no guarantee it would be done right. This looks best left to the pros. |
|||||||||
|
answerman Member
|
Well, today was productive, though some unplanned time got added to the project. I thought I was close to priming and painting the "concealed" parts of the unibody (engine compartment, door jambs, etc). All prepped (or so I thought) and masked... bare metal on some, and sanded and scuffed on the rest. So, I spent an hour at the auto paint store, and got a lot of free advice as part of the deal (remember I am hardly a professional at this restoration stuff and the last time I did it was 25 years ago). Long story short... something I didn't even think about. He basically explained the different kinds of paint to me and told me that the 2k urethane primer I was going to use would likely lift the old lacquer finish right off the car. Oh boy. Not what I wanted to hear. The whole reason for the repaint is to get rid of the Maaco bubbles! So, the project has altered slightly now: she will be a true bare metal restoration. Hadn't planned on it all the way through (I'm doing the "visible" panels such as doors, fenders, etc. because I have to remove the horrible Macco paint job) but now it ALL has to come off. Including the parts from the parts car. Not horrible, but time consuming. I got most of the engine compartment done tonight, will finish tomorrow after I get a new drill (burned up my 25 year old Black and Decker tonight) and hope to finish it tomorrow. What seems to be working well is to use a pretty aggressive chemical stripper (Zinsser StripFast), let that sit for a half hour, scrape off most of the old finish (it doesn't seem to have any trouble going through most of the layers) and then hit what's left with a 3M SandBlaster disc on my drill or grinder, depending on the angle I need to hit it at. It's always something... but in retrospect it's probably a good thing since it's forcing the engine compartment to be cleaned really well. I'm doing this with the engine still in the car, using aluminum foil to mask off anything I don't want painted. The Zinsser stripper, in addition to removing the paint, also does a fine job of removing most of the possibly 40 years worth of grease buildup. We'll see how it goes. |
|||||||||
|
Art DeKneef Member
|
What paint/primer exactly were you planning to use? A paint product with hardener will cause problems like that. You could have used a sealer to cover the old paint and then applied your regular paint over that. I'm having a hard time visually with you painting the engine bay with the engine in it though. |
|||||||||
|
answerman Member
|
Yes, it's a 2K PPG urethane primer, and the topcoat will be a PPG single stage urethane paint with activator. Most of the old paint had to come off anyway since it was such a badly done overspray, but I hadn't planned on all of it. Oh well. It's off now, at least on the unibody, and it's probably the right way to do it, right? Primed today, will be topcoating tomorrow (got it up to a nice 82 degrees in my garage). And yes, the engine is still in place. Basically what I did was to Reynolds Wrap anything I didn't want painted. Works better than paper and tape, just mash it around whatever you're masking. The complete engine bay won't be painted, just down to and including the structural channels about halfway down. I think it'll be ok... not going for show quality, just an improvement (a DPO apparently decided it was a good idea to spray part of the engine compartment black at some point and about half of it peeled or just wore off). I'll post before/during/after pics when I'm done. Once all this is done, I can tackle the fenders, doors, and boot/trunk lid, all of which have been removed for some time and will be much easier to work with. The bonnet/hood is already stripped. Last edited on 03-14-2014 07:41 am by answerman |
|||||||||
|
Jensen Healey Super Moderator
|
Just a note on toxicity of 2k paints. http://www.sigmaaldrich.com/analytical-chromatography/air-monitoring/applications/paints-and-coatings/binding-agents.html You need to consider harm to yourself and others. |
|||||||||
|
Art DeKneef Member
|
Removing the old paint is the best way to go. You remove all the variables that might arrive from going over old and different paint. That's what I did for my major restoration project. Your garage temp was our outside temp today. And now I can picture what you are doing to the engine bay. Makes sense. Then the fun really starts when you do all the other pieces. Oh yes, I agree with the toxicity of today's paint. The best way to spray is with a fresh air hood and good ventilation. Even with the waterborne base coats, the clear still has ISOs in it. |
|||||||||
|
Randallclary@icloud.com Member
|
Has anyone used Kleen Strip Aircraft Paint Remover? It was recommended to me by World Class Restoration out of Riverside, CA. I read posted reviews, not from the JH Forum and they looked pretty good. My 13046 has both the original factory yellow and black when the car was last painted back in the late 90's. I am doing a to bare metal restoration and a 2.2 Stroker Crank upgrade with the 104 and 107 cams with the 45 mm Delloroto Carbs. Called the money pit. Maybe that will be the name of the car. |
|||||||||
|
Brett Gibson JH5 20497 Member
|
Yes I used it, painted it on with a brush placed plastic wrap over the top and let it sit for 5 to 10 minutes then just used a scrapper to peel off one layer after another, the plastic wrap helps to keep the solvent from evaporating to quickly. Good quality product. Brett |
|||||||||
|
answerman Member
|
Pics if anyone's been wondering what I've been doing. I'm calling the unibody done at this point, fenders and bonnet/hood are all stripped and ready to paint (once I repair a little Bondo work I unexpectedly ran across on one of the front fenders). Then, all that's left is trunk/boot lid (should be simple) and doors (will probably be a pain). Against the advice of several here, I did decide to paint her in stages and then reassemble the already painted panels. Planning on being uber careful when remounting everything, and if I scratch things up it's my own damn fault (though I have to say that the urethane finish dries like a rock, not easy to scratch). A couple of "before" shots: 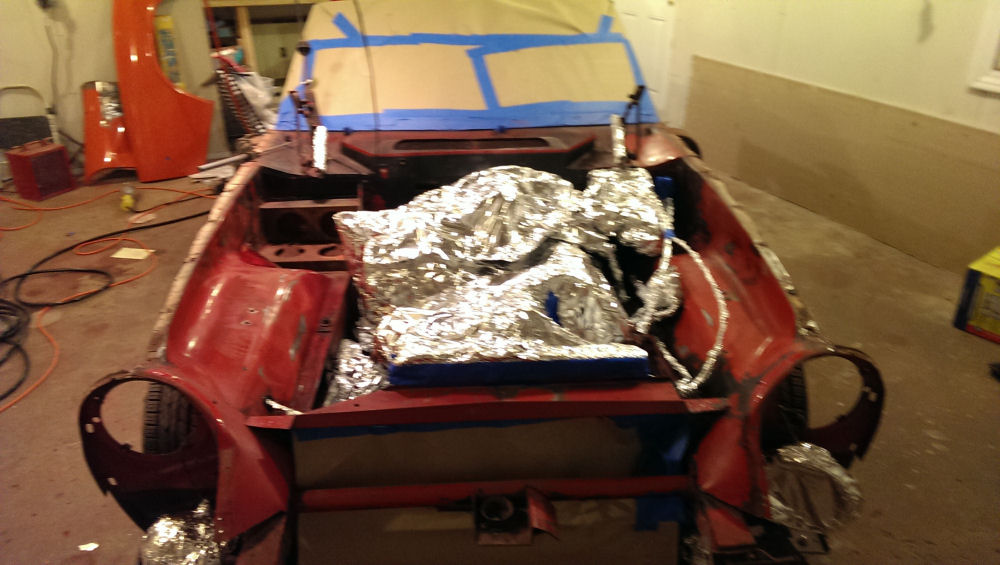 The engine bay, showing the deteriorated condition of the original paint plus what's left of what appears to be a quick black overspray with Krylon. I've got things masked off with Reynolds Wrap, ended up taking it all off to redo after I stripped the paint (more on that below)   The rear valance and taillight surround with most of the old paint removed... And then I proceeded to strip the engine bay. 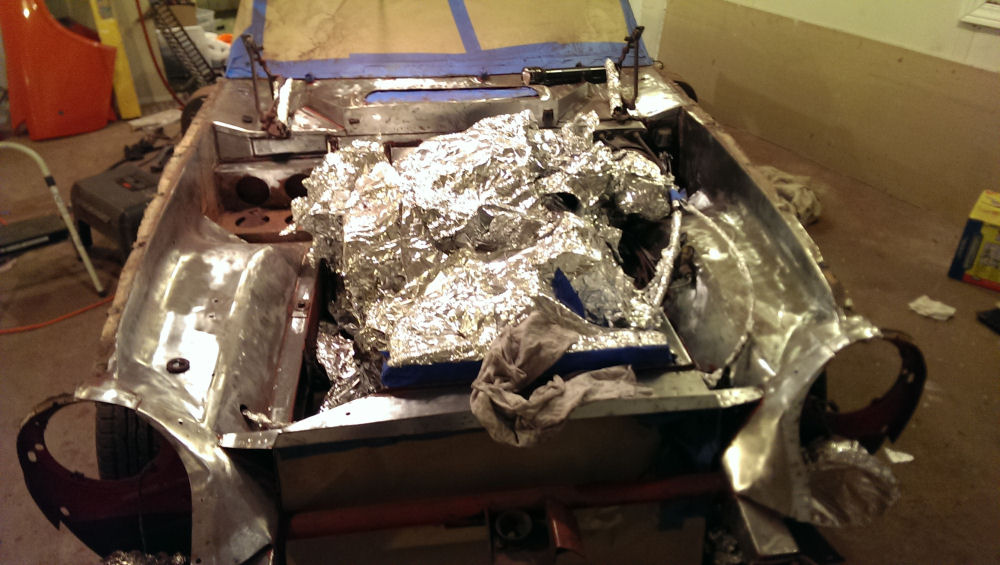 This was an adventure. Stripping wheels on the grinder and drill, and a tiny little flap wheel on my Dremel extension for those hard to reach places. Remasked with foil and ready to spray. And finally, after 3 coats of PPG 2K urethane primer, followed by 4 coats of PPG Cardinal Red single stage urethane... 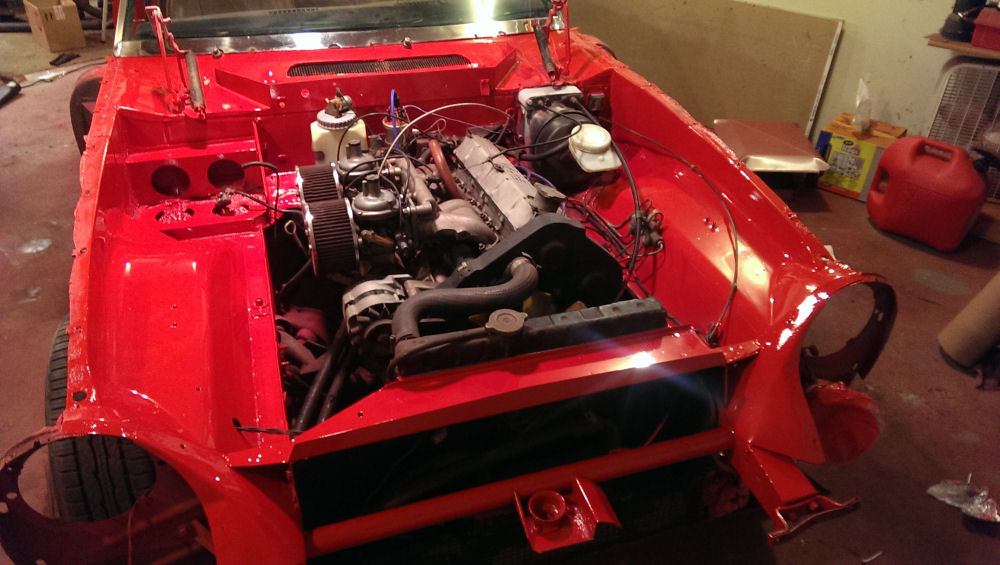 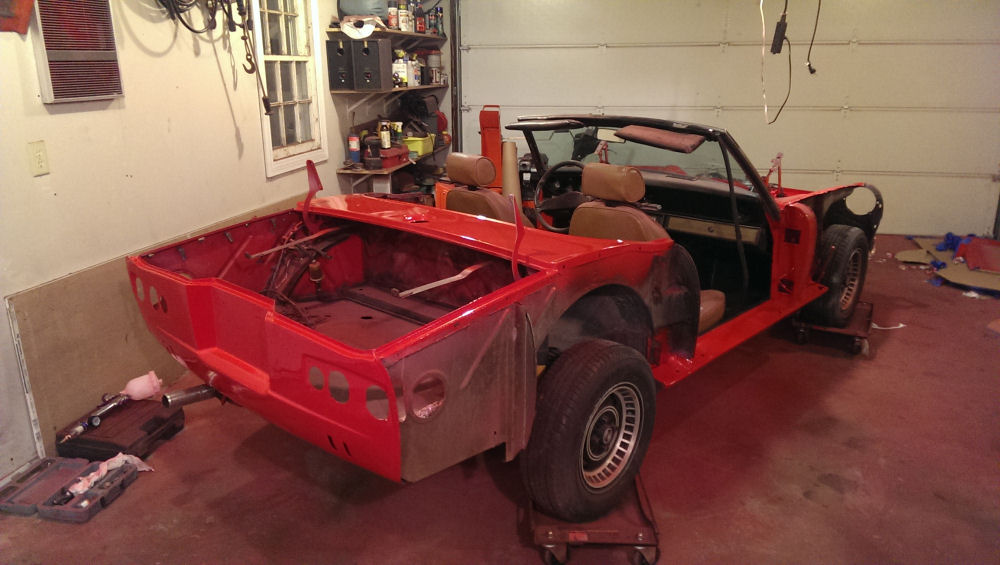 Quite a difference. This was my first time working with this type of paint. I have to say it goes on nicely, easy to work with, and cures to a rock hard finish. Of course, having the garage heated up to 92 degrees for 48 hours aids the process. These bad boys are next up, stripped and mostly ready.  I still need to do the Bondo work on the bonnet/hood and one of the fenders just under the headlight pod cutout. That should be done tonight, and the plan is to get them primed and painted before the weekend if all goes well. Last edited on 03-18-2014 08:05 pm by answerman |
|||||||||
|
answerman Member
|
A reasonably productive weekend. Friday, decided that since I'm done with the chassis for now until I get the fenders, etc. painted, I decided to take Ms. J over to the 10x20 storage unit I'm renting. This will make the garage much easier to get around in for painting the assorted panels, and I don't have to worry so much about overspray hitting her. As I thought about it, I realized that the only thing keeping her from being "drivable" was that her battery and fuel tank were removed (and in the storage unit with the other bits removed from her). So, went over there (it's only about a block from the house) and grabbed both those bits, brought them back, and charged the battery for about a half hour while my son and I put the fuel tank back in, at least temporarily. Was more than pleased that she started more or less right up (she's never been what I would start an easy starter), so the only thing keeping me from driving her over to the storage unit was the "legality" of it. Was that going to stop me? No, of course not. So, with Mrs. Answerman tailgating me with her 4-ways on, I drove her over in the condition you see above. No doors, fenders, bonnet, or boot lid. Got a few funny looks but it went pretty uneventfully. Then, I spent the rest of the night doing the Bondo work I needed to do on the bonnet, as well as one of the fenders (unearthed a repair when I was stripping her paint off, and of course I wrecked the existing Bondo in that process). That went fine and they are ready to prime and paint. I think I am going to strip and prep the boot lid and the doors beforehand though, so that I can paint everything needing to be painted at once. One thing came up during all of this, which initially was an "oh crap" moment but actually turned out ok, was that it was easy to see where my fuel leak in the boot is (with everything being removed and cleaned up}... it's definitely a leak in the bottom of the tank. Well, at least now I know what it is. So, I called on a local radiator shop on Saturday morning and it turns out they can do a complete recondition on the tank (chemically clean, weld/solder anything needing to be repaired, and then coating the inside) for somewhere between $100 and $150, depending on how much repair needs to be done. Not a bad price considering the alternative of sending Jorge $400 for a tank that may not even go in right. I can live with it. So, the tank will go off to the shop tomorrow and be reconditioned while I'm doing the rest of the painting. About a month ahead of schedule at this point. Getting excited for spring to get here! |
|||||||||
|
answerman Member
|
More painting today. Primed and painted the fenders and headlight "sugar scoops", and primed the hood/bonnet and trunk/boot lid. I'll be painting those tomorrow, didn't have enough room in the garage to hang everything properly and while I had the fenders on sawhorses to prime them, it's a heck of a lot easier to paint them if they are hanging. At least that's my experience. So, at this time tomorrow, all that should be left to refinish is the doors, which I haven't even started yet. Those look like they will be a gigglefest to disassemble. |
|||||||||
|
answerman Member
|
As promised, got the lids painted yesterday. Hood/bonnet and trunk/boot lid are a nice shiny red now. Plus, I had to sand and reshoot the headlight surrounds as I had a couple of drips I didn't notice the first time around. Note for successful painting: LOTS of light so you can see what you're doing. The photographic evidence: 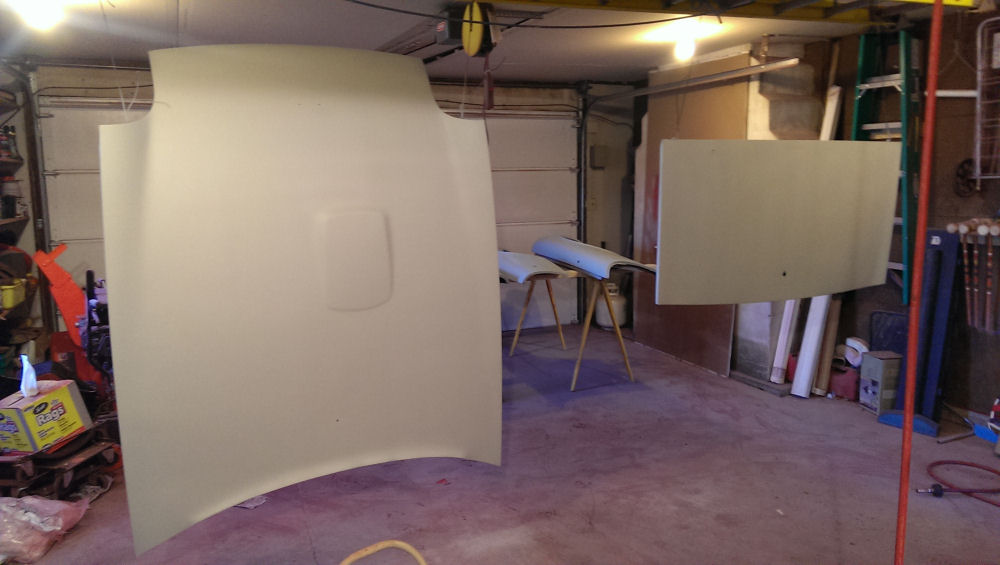 Saturday afternoon, after priming was complete. 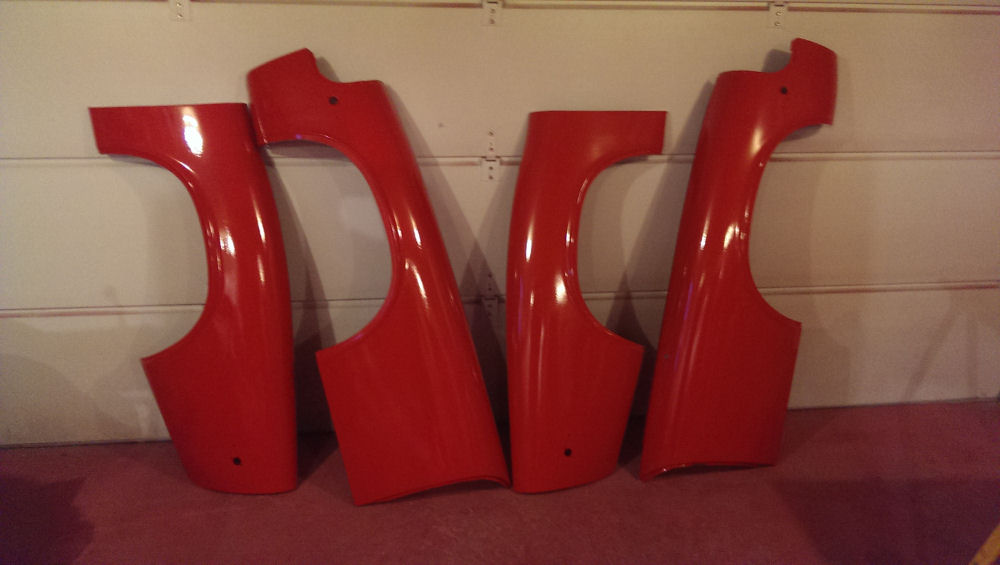 Nice red fenders! 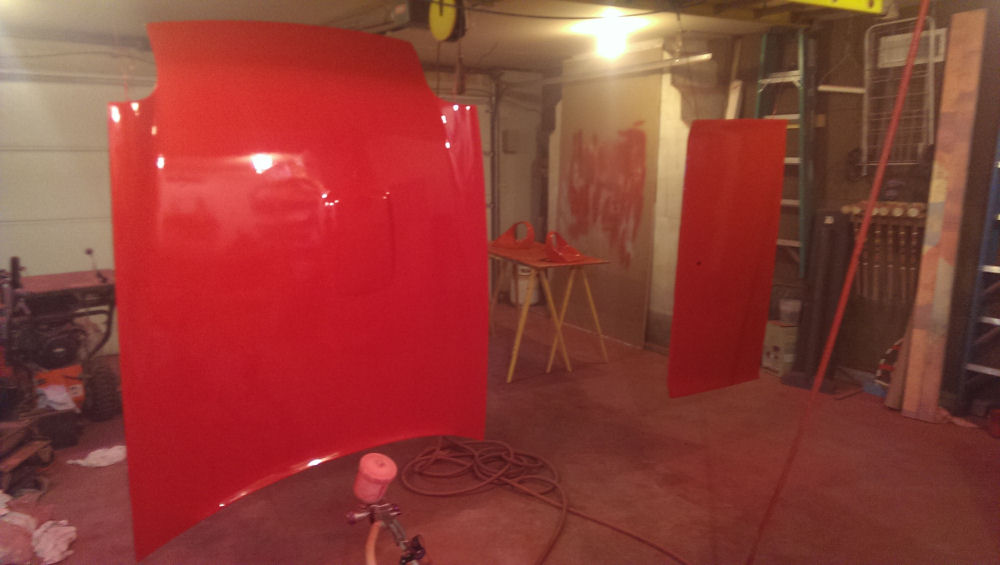 Bonnet and boot to match... 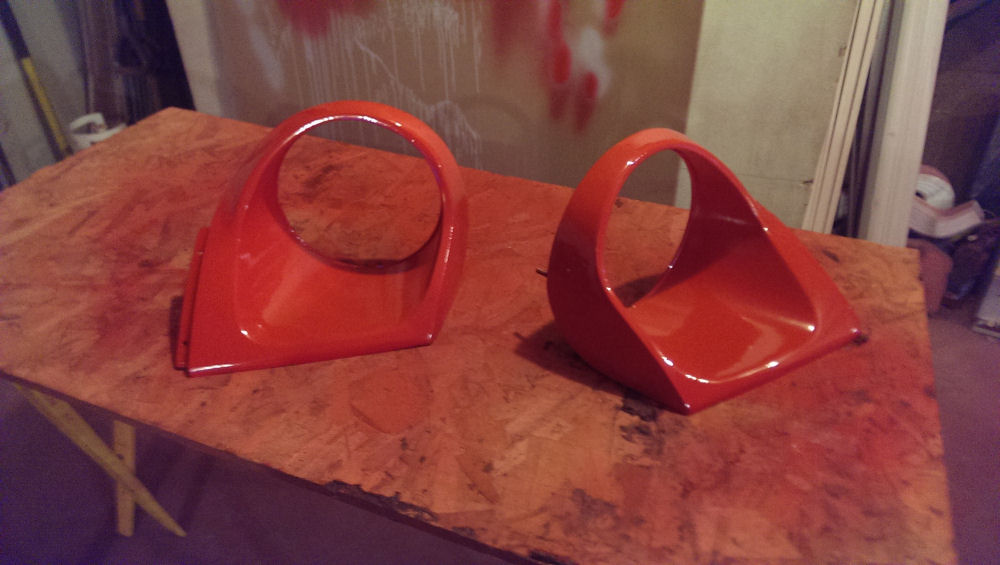 And the sugar scoops, post oopsrepair. Only thing left to strip and repaint are the doors. At this point, if my repaired gas tank is done today or tomorrow, I am thinking it's time to bring Ms. J back home and reassemble what I have disassembled before tackling the doors. I've got the resurfaced rotors and drums from the parts car all ready to swap onto Ms. J, and my club store order arrived last week with new pads, new shoes, a new rear brake hose (I replaced the front last year), and a new filter element for the factory airbox. I plan to do the brakes before anything else since I've got more room to work with with the fenders removed, and after that do the application of the truck bedliner on the rockers. Once that's done, it's time to start the remounting of the fenders and everything else that's been removed... we'll see how good of a job I did of labeling everything I removed. Expecting more that one instance of "ok, where did I remove this from?" and the inevitable "why do I have parts left over?". Last edited on 03-31-2014 07:16 pm by answerman |
|||||||||
|
answerman Member
|
Another milestone, got the rotors and drums replaced. New rear brake hose. New pads and shoes. All bled out and the brakes *seem* to be good now (can't exactly take her out to road test her right now but the pedal is nice and firm). I'll be curious to see if I got my pressure differential switch recentered as part of this... my brake warning light has been on for over a year. On to the reassembly of the body! |
|||||||||
|
answerman Member
|
So, I have this big box of parts removed during the reassembly, and it's time to sort through and find what I need to put her back together, right? Here's where I see how organized I was with my Ziploc bags. First order of business, after a cleanup and respray, was to remove the K&N filters from the Strombergs and reassemble the original airbox and filter assembly. 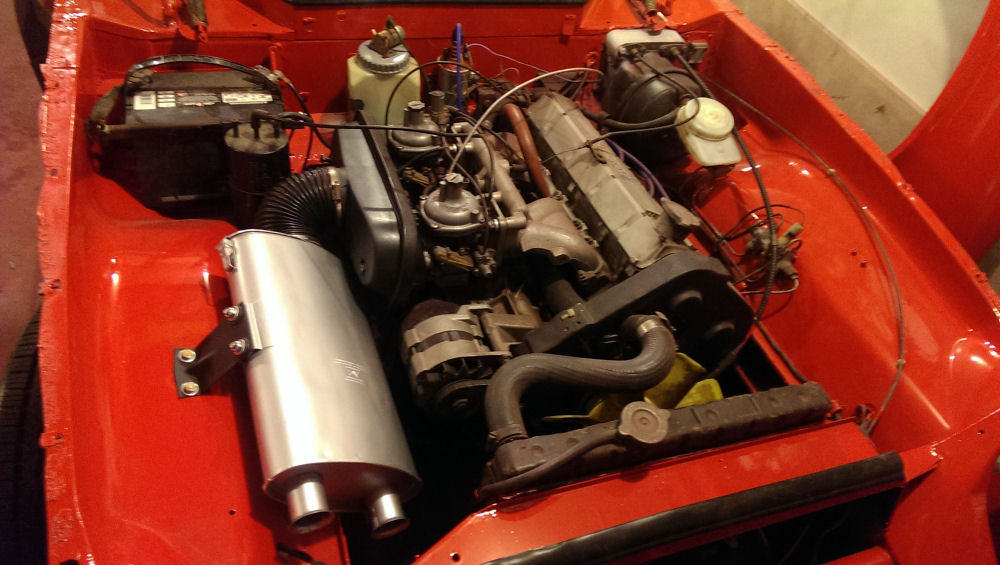 Used a high temp ceramic engine enamel to respray the "muffler". It's a little shinier than it probably should be, but it's somewhat close to the original gray. Now, I've been doing some perusing of the archives here about the way it should all be put together, especially with the crankcase ventilation. What the DPO had done was to remove the factory airbox, install the two K&N pancakes, and just shove a little K&N filter into the hose coming from the crankcase and just leave it stubbed like that. From what I've read here, there doesn't seem to be a whole lot of advantage to reconnecting it, so I am thinking of just leaving that is and plugging the port on the airbox that the hose is supposed to connect to. Unless someone tells me that's a bad idea. Then, I temporarily hung the fenders on the drivers side just to see how she looked:  It makes me feel better to see the fenders in place, you know? On to the re-bolting of the front fenders. Brett wasn't kidding about "getting everything to line up". The front passenger side is mostly on now, though I am thinking that I am going to replace all the fasteners instead of fighting with the old ones. Hoping that tonight I can finish that, get the drivers side fender mounted too, reattach the sugar scoops, and *maybe* see about remounting the hood/bonnet. It all has to be done, and it will do my heart good to see the front end complete. Still haven't heard from the radiator shop, so no idea when I'll have my gas tank back. Getting anxious. Last edited on 04-09-2014 07:03 pm by answerman |
|||||||||
|
Tom Bradley Member
|
The only reason I know for connecting the crankcase ventilation to the air box is for pollution control: the blowby gets sent back into the engine to be burned rather than vented to the air. If the rings and valve stems are good, there should be very little. I cannot feel any flow coming out of mine right now, but I still connected it to the air box on general principles. Not that big a deal. I am also looking to get my gas tank repaired/replaced. I was surprised at how low a price you got. The only local radiator shop that would do mine said it would take about $200 and a week to do all the cleaning, derusting, etc. At your price, the shop may be treating it as a "back burner" project. Or maybe they are dong a very thorough job. I was considering getting an aluminum replacement from Jorge, but the price is now asking on ebay just went through the roof, so I guess it will be a repair job. I am enjoying seeing what you are doing. It is still going to be months before I get to the repainting stage, but seeing yours makes me hope that I will be able to get mine back to looking good again too, though i doubt it will be as good as what you are doing. |
|||||||||
|
answerman Member
|
Actually, I just got back from the radiator shop. It's still in the chemical cleaning stage. His line was that they have to do a treatment, let it do its thing, rinse, dry, repeat and that it's a slow process... if they just let the chemicals sit it could blow right through the tank. Plausible, but your theory's crossed my mind too regarding it being a back burner project. I did let them know that I was hoping to have her back together and drivable within the next week and a half to try to light a bit of a fire under them... he then said that it should be done next week. We'll see. And thanks for your kind words... the paint didn't come out quite as nice as I had hoped, a little orange peel. Hoping that I'll be able to sand and buff it out. Regardless, even as is it's a huge improvement over what I started with, and I'm not talented enough to create a concours quality show car. She just needs to not embarrass me as a fun semi-daily driver and last a while with the couple of thousand miles a year she'll probably get. |
|||||||||
|
answerman Member
|
Had a bit of a family emergency, so I've been lax for a week or so. Back at it. From a paint perspective, all that's left is the doors. As predicted: a joy to disassemble. Spent most of Saturday afternoon on them, and after about 2 1/2 hours on the drivers side door, the passenger side only took about a half hour. The big puzzle was how to remove the fixed triangle window and attached window guidetrack. I finally figured out that the easiest way was to remove the back guidetrack first so that the window pane wasn't so tight against the front one. The rivets that hold the bottom of the triangular frame to the rest of the assembly seem to have given up the ghost on the drivers side (nothing really holding them in place) so I'll have to address that before the reassembly. Worst case scenario is that I use the one from my doors from my parts car, but I'm trying really hard to keep those intact for future use by either myself or someone else. Question: did Jensen have elves on the payroll to mount the door handles? Getting them removed wasn't easy to say the least, and I am not looking forward to trying to reassemble them after the paint is done. Is there a special tool or something to loosen/tighten the bolts? Accessing everything through the opening on the interior of the door is painful to say the least. Anyway, hit the doors good with the Zinsser paint stripper on Sunday and scraped off about 2/3 of the existing paint layers. At this point I think I'll move on to the stripping wheel on the grinder to finish them up tonight or tomorrow (waiting for it to stop raining so I can do it outside and not add any more pink dust to the garage). Also, now that I have officially disassembled everything there is to disassemble during this project, I called Delta with my laundry list of "stuff" that is either missing, broken, or basically useless. Mostly rubber pieces to replace the rock hard ones I removed (or broke in the process) such as the interior and exterior window wipes, the door seals, door handle gaskets, etc. and lots of push fixes for badges and trim. My body shop friend took the front bumper stainless panel and is going to sub it out to his English wheel/metalworking expert to work out the dents. He seemed pretty confident that he could get it really close to original, and for the $150 he's going to charge it seems well worth it as I don't think I could replace it for that, even if I could find one in the first place. Oh, and my gas tank should be done in the next couple of days. I *think* I'm still on target. |
|||||||||
|
answerman Member
|
OK. I think I'm done with paint, as long as I don't ding things up too much putting the doors back on. Doors are curing in the garage after primer yesterday and paint today. Now the fun begins. Gas tank is *supposed* to be ready tomorrow. Doors are painted. Nothing holding me back from reassembly except, well, me. I am going to wait with the doors until I get my order from Delta, since there are a number of parts (gaskets, window wipes and various push fixes) that I figure will be easier to deal with with the doors still removed from the car. Hoping they arrive in the next couple of days. Oh, and no go on the front bumper stainless. The "expert" figured once he saw it that it would be closer to $400 to $450, and he's not even guaranteeing that it will be perfect. Delta can get a new one from England for $550. If I'm going to spend that much, I'd rather pay the extra for one that I know will be perfect. It'll wait for now, not a huge priority. Next weekend is looking like a distinct possibility for completion... at least the weather will be lousy all week so I won't be looking outside thinking "wish I could take her out and drive her", but those days will be coming soon. I now have (once I get the gas tank back) everything I need to finish, except for the JHPS club store performance exhaust system which I've been waiting to do till last (didn't want to have to worry about getting paint on it). Once she's together and verified running and driving, then the exhaust gets ordered. |
|||||||||
|
answerman Member
|
The things a Jensen-Healey owner gets excited about... Finally got some news from the radiator shop. They did in fact find leaks in my gas tank! Funny that it makes me happy. Anyway, the sealing is happening now and I will be picking it up either tonight or tomorrow. It can wait a few days as I have to reassemble the doors with all the rubber parts and push fixes that arrived from Delta yesterday, and I suspect that is going to take me a while. Still, it's progress. |
|||||||||
|
answerman Member
|
Gas tank cleaned, rust removed, leaks repaired, recoated inside and out, and verified leak free. Finally! |
|||||||||
|
answerman Member
|
OK. As detailed in another post, had a running issue (stuck float in the front Stromberg) which is now resolved. Gas tank is installed and NOT leaking (yay!) though the radiator shop managed to knock the float off the sender, so my fuel gauge isn't working. Fished the float out of the tank and set it aside... I'll deal with that presently. For now, I just want to get her drivable. She's basically together other than the bumpers, the inside trim (no door or window handles) the top, and all the trim. Going to hit her hard this week and hope to be more or less done by the weekend. |
|||||||||
|
answerman Member
|
Almost ready to go! Got the bumpers painted last night, and reinstalled all of the interior trim panels, handles, etc. (along with the left front stoneguard which I forgot to install when I did the others for some reason). Tonight: put the bumpers back together and mount them, bolt the top back on, and she's roadworthy other than all the stainless trim and JH badges, etc. Also going to fabricate and install my custom hood prop tonight (came up with an interesting approach using something that will fit under the hood but still allow lots of headroom for working on the engine). About $6 worth of raw materials and an hour or so to make it. I'll have pictures after it's installed. |
|||||||||
|
answerman Member
|
Roadworthy! Even took her to the office today since my Expedition is off getting the air conditioning fixed. On Wednesday, she goes to the exhaust shop to get her Delta performance exhaust system installed. Looking forward to hearing her growl instead of whatever the cheapy and rusted muffler she has now sounds like. Otherwise, all assembled with just a few minor points to resolve yet: - still need to reinstall the fuel sender float - still need to replace the trunk/boot carpeting (the old stinks of gas) - still need to work on getting the doors properly aligned - still need to make my custom hood prop Otherwise she is good to go! The last step yesterday was to run a half can of Seafoam through the engine oil and then change her oil and install a new oil filter. Now if it would just stop raining... |
|||||||||
|
Brett Gibson JH5 20497 Member
|
Cant wait to see it at the WI show. |
|||||||||
|
answerman Member
|
New Delta exhaust system is installed and she sounds FABULOUS! Went pretty uneventfully except that they had to weld one of the leaky front connections on the Y pipe (I still have the stock headers). Told them to go ahead since if I ever decide to do anything with it from that point forward, I'll probably go with a replacement header anyway. Then, the fun began. Had a little time last night, so I thought I would knock a couple more things off of my "to do" list. If you remember, when I got my fuel tank back from the radiator shop, the fuel sender float was taped to the top (apparently they must have knocked it off as part of the reconditioning process and didn't bother to put it back in). So I decided to pull the fuel sender out of the tank so I could put the float back on and see if it made the fuel gauge work right. The good news: her fuel gauge works now. The bad news: along the way I had a bit of an ummm... mishap. So, I pulled the gas tank out, took about 10 minutes. Getting pretty good at it (for future reference, I think I could pull the sender out without pulling the tank). Anyway, got the tank out, took it to the driveway. Undid the locking ring, pulled the sender out, pulled the sealing gasket out, snapped the float into the sender, put the gasket back in, put the sender back in, and put the ring on and tightened it up. Whole process took about 5 minutes. Then, put the tank back in. Grabbed a 5 gallon gas can and went to the gas station across the street to get a couple gallons of gas (since I had to drain the tank before I did any of this, and I didn't want to put that gas back in because the tub I drained it into wasn't exactly clean). Got the gas, came back, put it in her tank... started her up... watched the gauge rise a little...YAY! Then, I figured I would take her across the street to put more gas in. Did so, filled her up, and when I got done... (here's where it gets fun) as I was hanging up the hose, I got a nagging feeling... "I probably should have checked for leaks before I filled her all the way up..." So I looked under, and gas is streaming from under the trunk at a fair rate. Opened up the trunk and it's basically filling up... eek! So... best I could come up with was to rush her back home (it's just across the street), pull her into the driveway, go grab a couple of containers, and get underneath and pull the drain plug. Drained out what I estimated to be at least half, to get the level below the sender, and then put the plug back in. Now I'm wearing more than a little of the gas, but at least it's not leaking any more. Since the crisis was mostly averted at that point, I mopped out the trunk, hung the gassy towels outside to dry, went inside, showered, and had supper. Afterwards, I went back out. By this time, things had dried out pretty well, so I pulled her back in the garage, got a flashlight, inspected, and as I suspected (and actually hoped), only 2 of the locking ring tabs were engaged. The third had... missed for lack of a better word. The whole ring was in at kind of an angle, so it wasn't compressing the fitting against the gasket all the way around. I could see it wasn't straight just looking at it. How I missed this the first time, I don't know. So, popped it back off, straightened it out and spun it back on being much more careful this time to make sure it was engaged properly. Whew. Crisis averted, though I think I lost about 2 gallons of gas during all of this. The remaining fuel that was drained out went into two gas cans, which means I probably won't have to buy gas for the lawn tractor for quite a while. I think it's all good now, I didn't fill it back up to find out yet. I want it to all dry up first. At least I hadn't installed the new trunk carpeting yet. Moral of the story: after working on a gas tank, check for leaks before reinstalling the tank, and definitely BEFORE you fill it up. |
|||||||||
|
answerman Member
|
Further update: All is well. Gas tank is no longer leaking, and she is deemed roadworthy. Trunk carpet is in, hood prop is fabricated and installed (though I still need to pull it out to paint it... pics forthcoming when that's done), drivers door is aligned (passenger side is still giving me fits), and I've put about 100 miles on her over the past week just because, well, that's why I worked so hard on her, to enjoy driving her! Now that the new exhaust is in, on the to-do list is to fix a leaking exhaust manifold issue (you can hear it much better now that the rest of the exhaust is good). After reading through the forum posts on that job, I may just see if I can live with it for now and deal with it next winter, because I don't know if I have enough vino to cover the job. Otherwise, at this point, all I have left is to try colorsanding and buffing her new paint to see if I can knock some of the orange peel down. I am probably going to have to reshoot the hood and the taillight surround at some point since I didn't do a good enough job of prepping (I didn't block at all) and some of the grinder marks are still apparent through the paint. Lesson learned... block sand EVERYTHING and have lots of light on the subject. Ready for the Jensen East meet next week! |
|||||||||
|
Jensen Healey Super Moderator
|
Your build is truly inspiring! Have fun at Jensen East! Kurt |
|||||||||
|
answerman Member
|
I've been quiet here, but not elsewhere: instead of working on Ms. Jenavieve, I finally get to reap some of the rewards in driving her and showing her off. Had a fabulous time at Jensen East (really surprised no one's posted pics here) and this past weekend took part in our second British Car Field Day in Sussex, WI. Once again, I was the only Jensen there (honest, I recruited people at Jensen East) but it was still fun, even though she got classed as a big Healey again.  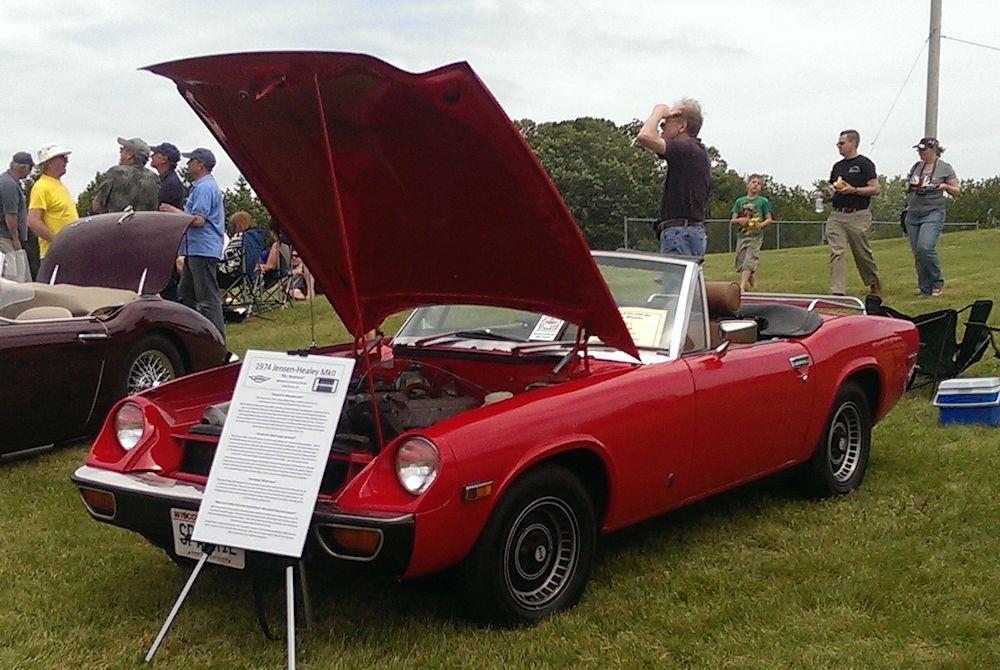 From the front... lots of people stopped to (1) read the sign, and (2) ask why she had a muffler under her hood. I told people it was a spare in case the rear one fell off :-)  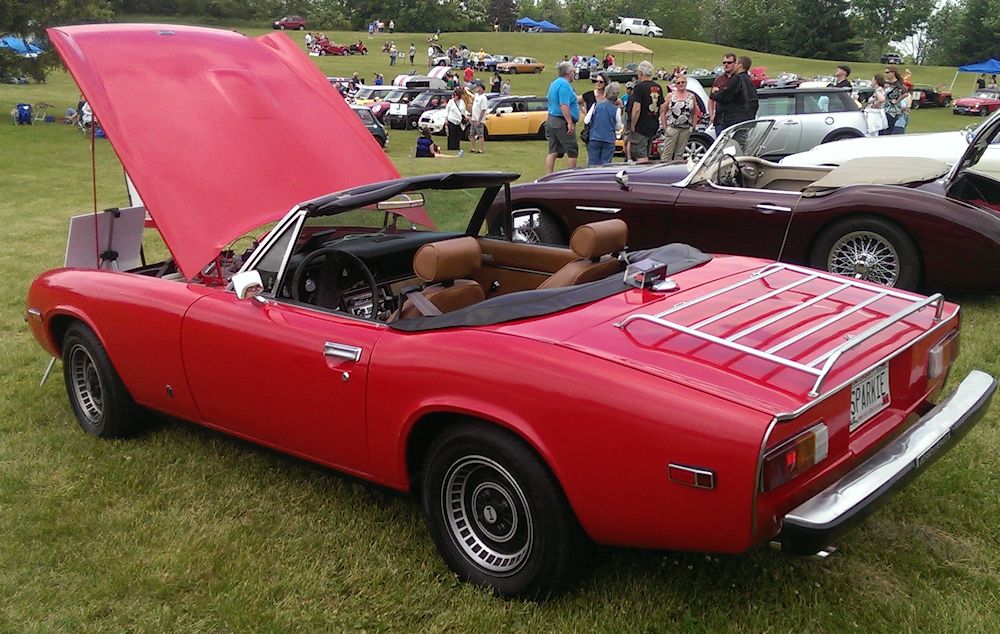 From the rear, obviously. Spent 6 hours the day before scrubbing down the orange peel with 1000/1500/2000 grit wet sandpaper, followed by a couple of grades of Meguiar's cutting polish and finished with caranuba wax. Did all but the hood (that has its own set of issues and I didn't want to bite off more than I could chew that day). Came out nice, in a way it's almost a bit more authentic finish since I lost just a little bit of gloss overall. Had a few people ask if it was her original paint.  And the view of all her cousins. Austin-Healey 100s and 3000s. Obviously they got all the votes in the class. It was fun just being there though. Last edited on 06-16-2014 09:22 pm by answerman |
|||||||||
|
answerman Member
|
Since I haven't "had to" work on Ms. Jenavieve this summer, there hasn't been much to report here. However, I remembered that a while back I promised to detail the custom bonnet prop I created for her. While I'm not tall, I do like to have as much headroom as possible when working on her. The factory prop (which was lying in her boot when I got her, which was probably a good place for it) doesn't allow a lot of headroom. One of the previous owners had removed it and installed what looked suspiciously like a prop from a 1970s Ford Pinto... just a rod which was attached with a cotter pin, stored atop the radiator, and could rotate up to a vertical position to set into a hole drilled in the underside of the bonnet. While this solved the bent bonnet problem from the original prop, it still didn't allow much more headroom, basically because the rod could only be "so" long to store across the radiator. So, I had a brainstorm, and my son (the master welder) and I created a much improved prop. All it took was a length of round stock, and a short piece of tube stock, along with a couple of washers. The pictures aren't the greatest, but hopefully you get the idea... 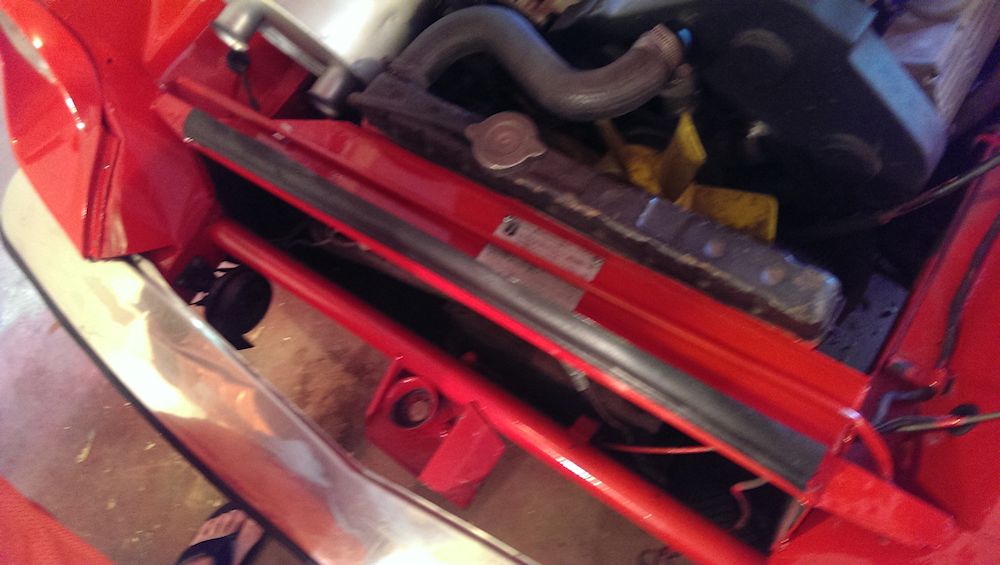 First order of business was to custom cut and bend a new rod, similar to the "Pinto" one she came with. You can see it in the pic, lying across the data plate, with a couple of bends near the end on the right so that it can "hinge". There is a washer welded about an inch from the end to act as a stop, with the remainder inserted through a hole in the sheet metal near the headlight and then held in place with another washer and a cotter pin. The left end, you will note, has something else... 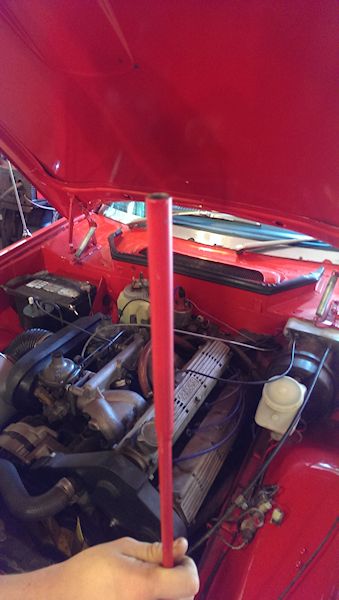 With the prop in the upright position, you can see that we welded a short piece of tube stock to the end of the rod. For quick "under the bonnet" jobs, this is all we need as the end of the tube can just be inserted into one of the recesses in the underside of the bonnet. However, for more room... 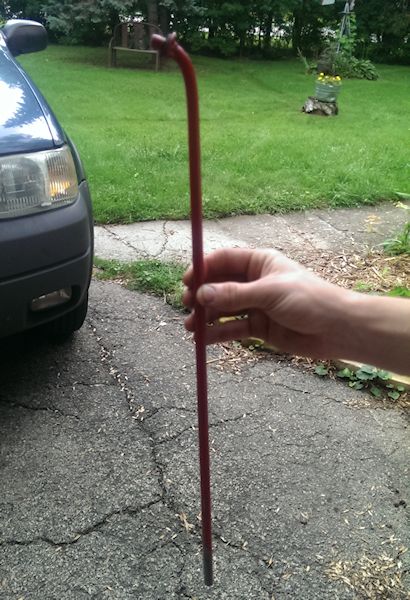 ... we need an extension. This is another piece of the same rod stock, with a bend in the end and another washer welded to it...  ... which inserts into the tube at the end of the prop...  and into a strategically drilled hole on the front edge of the bonnet. This makes working on Ms. J's engine much more pleasant. Lots of headroom, and it's not in the way. While it's a small chore to use (for now the extension sits in the boot... looking for a couple of clips to clip it under the bonnet) it's quite functional and easy to work around. And again, I don't "have" to use the extension if I just need to do something quick. Now I can put my 4 foot level away... which was my "temporary" prop while I was working on the restore. No more broom handles, either! Last edited on 08-30-2014 11:53 pm by answerman |
|||||||||
|
Jensenman Member
|
The car looks great! I did the GT hood prop thing on mine when I got it, the bonnet was in good shape but I had horrors of some oaf (likely me) not knowing about the stock prop rod operation. I need to extend mine to keep it from banging my ugly head. |
|||||||||
|
answerman Member
|
Well, Ms. Jenavieve is off the road for the winter. Last week I walked out in the garage and thought "ok, I am not going to realistically drive her any more this year... why am I putting it off?" I do have some work to do on her before spring, but I figure I'll probably wait till March or so to get started since it's not the sort of thing where I need her in the garage for months (new exhaust manifold, and I want to sand her down some and respray to fix a few issues with the paint job I did last spring). Plus now I can finally put my Expedition in the garage, just in time to not have to scrape ice and snow off the windows in the morning. Of course this simple little task didn't go without a few little glitches. And these are not serious, just amusing. Had to share. So, last Thursday afternoon I decided "it's time". Hadn't driven her in a couple weeks, so when I started her up I was dismayed, but not terribly surprised, to find that I had no brake pressure. I obviously have a leak somewhere, but I have never found it. Anyway, with the pedal to the floor she does stop, so I figured "I'll deal with it next spring". The storage facility is only about a block away from the house, so I wasn't too concerned. Drove her over to the storage facility, which is one of those "self-storage" places with lots of buildings (I rented a 10x30 stall) and a security fence... you punch in a keycode to open the fence gate to get in, and then you just drive up to the gate from the inside to open it to depart. This becomes important later in the story. Being a LBC, of course she isn't the neatest car in the world... a few drips here and there from various fluid reservoirs in the car. I had this bright idea to spread out a sheet of painter's plastic under her to catch said drips. So, I pulled up to the storage stall, opened the overhead door, and drove in partway. Got out, got my roll of painter's plastic, and unrolled about 20 feet of it and spread it out. The stuff is not much thicker than Saran Wrap, so it was an adventure to get it to lay down. Having done all this, I got back in Ms. J, started her up... and as I slowly started to move forward the thought crossed my mind "I wonder if maybe it wasn't such a good idea to drive..." and at that moment there was a loud FOOMP and the plastic was gone. Just disappeared. Already knowing what I was going to find, I shut her down, got out, and opened the bonnet, and of course found 20 feet of painters plastic wrapped around the fan and belt. Just like a big vacuum cleaner, that engine is... (at this point I crossed myself and thanked the heavens for still having my cam belt cover installed, apparently I am like one of 12 people in the world who still has it). I don't even want to think about how much of a mess that would have been if the plastic had gotten into there. So, I made a couple of feeble attempts to pull the plastic out, realized that quite a bit was between the fan belt and pulley, and basically said "heck with it, I'll deal with it next spring". So, I pushed her back out a bit, put another piece of plastic down, and this time PUSHED her onto it. Which is what I should have done in the first place. I took the pieces that I had pulled out and wadded them up and shoved them into the steering wheel to remind me not to try to start her up again until I get the fan cleaned up. Called it good enough, dragged her cover over her, walked out of the stall, closed it, locked it, and started the short walk home. Got to the security gate... and realized the flaw in my plan. If you remember, you need a key code to get in, and then you drive up to the gate to actuate a sensor to get back out. Well, that works very well IF YOU ARE DRIVING A CAR... Shook my head, got out my cell phone, and called my son to come over and spring me from the outside. Sheesh. What a day. Anyway, figured some of you could use a chuckle... and it's all part of Ms. J's story, so it's now recorded here for posterity. |
|||||||||
|
answerman Member
|
And Ms. Jenavieve is back home in the garage where she belongs. Decided that 4 months without her was long enough, and I'm kind of champing at the bit to start preparing her for spring. So, my wife, son, and I went over to the storage unit this weekend and brought her back home. Couldn't get her started over there, and with no light, no heat (it's been hovering around 5 degrees Fahrenheit here the past week or so) and only the tools I bring from home, we figured it was easier to just tow her back home with a rope and my Expedition (the storage unit is only a block from home). That was a little giggly because as noted below, her brakes are at about 1% functional... if you stomp all the way to the floor, she slows but panic stops are not an option, so I was praying the whole way home that Mrs. Answerman wasn't going to hit the Expedition brakes hard. Made it just fine though, at about 3 MPH. Now that she's home, the task list (notice I'm skipping #1, read further for why) for the next 6 weeks: 2. Fix her brakes. As detailed in another thread, she has a mysterious syndrome where her brake fluid just disappears on occasion... no puddles on the ground, but it's going somewhere, and the consensus is that her master cylinder is leaking into the booster. So... did some ordering this week. New master cylinder arrived today, and I lucked into a "slightly used" booster on eBay that was apparently purchased as a temporary fix by the seller from the club store several years ago. He then had his original rebuilt, and decided to sell this one (it looks like the one Greg used to sell, the kinda gold colored one). The master cylinder looks easy enough, but the booster looks more complex. We'll find out... it should be arriving this week. 3. Order and install her new exhaust header. Yes, I am going to tackle this thankless looking job. I'll be ordering the header from the club store, along with the copper nuts and gaskets, and also new motor mounts since I'm in there and I am sure the current ones are trash. I have what I believe to be the stock header and it's got some serious leak issue (and basically looks ugly, looks like a PO had done some welding on it). I'm giving myself a month to do the PB Blaster/wrench/swear/rinse and repeat process. Hopefully that will be enough. 4. Sand, block, and respray her bonnet. When I did the bare metal strip and respray last spring, I gouged up the hood pretty well and it's visible through the paint. Going to take my time and get it right this time. And that should be it other than the missing number, which I got halfway through tonight: 1. Finish unwrapping about 20 feet of painter's plastic from around the fan and water pump pulley. Eesh. That was a mess (as explained in the previous post). We loosened up the alternator and pulled the belt at the storage unit, and got about 80% of it off, but the rest waited till we got home. At this point it's about 98% removed, but there's still some very tightly wrapped around the flange and shaft on the water pump. It'll clean up with whatever I have to use to cut/scrape/burn it out. It's all worth it, though... so glad to have her back home, and ready to get her ready for spring! |
|||||||||
|
Tom Bradley Member
|
I am getting my car ready for repainting now and have had the same sort of issue with the bonnet. It seems to be the most finicky piece to get looking right. Actually, your experiences have been very helpful for me in getting mine ready. I have been much more careful about the prep work than I would have been otherwise. Even so, I have had to do more work after my first pass of blocking, priming and sanding. There were many more dings and such than I had noticed before. Fortunately, it is rainy here, so I am not missing driving it as much as I would have otherwise. Thank you for posting. Tom |
|||||||||
|
answerman Member
|
The last two weekends were productive (should have been just one weekend but I ran into a snag). Regardless, Ms. Jenavieve is now once again roadworthy, took her for her first drive of the year today. Not a terribly long drive since it only hit 49 degrees F today, which is really nice for early March in Wisconsin but not warm enough to be driving a convertible around :-) Finished up the removal of the painters plastic last weekend. It was actually fused around the water pump shaft. Ended up taking my Dremel tool with a little router bit on it to kind of drill into it and break through enough to peel it off, it was melted into what basically looked like a hard plastic washer. Anyway, that's done and her fan is all cleaned up and put back on, alternator and belt are reinstalled, and ran her a little bit to be sure there weren't any other gotchas. All good there. Then, I tackled the master cylinder/booster replacement. This didn't go quite like I planned since for whatever reason (as detailed in another post) the booster rod and clevis were not the right length, needing to be at least a half inch longer. I actually pulled the pedal box, took off the old booster, cleaned up the pedal box since I had it out, and then reinstalled it with the new booster. It went in but I noticed that the pedal was somewhat "sunk" to the floor, and the shortness of the rod wasn't even letting the pedal come back far enough to contact the brake light switch. So, this weekend, I took it all apart again, determined that there was no way to adjust the length of the rod and clevis, and decided to just put the old booster back in since it appeared to be working fine before removal. I did have to dump about a pint of brake fluid out of it, so I'm hoping that the internals aren't too damaged, but it seems to be working fine after reinstalling everything and mounting the new TR6 master cylinder. Brakes are nice and responsive again, and this should have solved my disappearing brake fluid issue. We had our annual meeting of the local British car club today, so I brought the replacement booster along and the guy we call our "resident MacGyver" took it from me... he thinks he will be able to retrofit a longer clevis on it so that I can drill the pin point in the proper place. No hurry on it as long as the old one is working... chances are I'll just stick it on the shelf and look at it again next winter. On to the exhaust manifold... just have to force myself to make the commitment to order it and actually go through the pain of replacing the old one. Still a little on the fence, but I think I will end up doing it over the next couple of weeks. |
|||||||||
|
answerman Member
|
I seem to remember myself saying that I had the whole month of March to tackle the replacement of the old exhaust manifold. Ummm... March kind of went by without me noticing. Well, most of it anyway. Regardless, on Friday I did go ahead and order (1) Delta 4 into 1 header, (1) gasket set, (1) set of new manifold nute, (12) new exhaust studs, and (2) front motor mounts. Once I get confirmation from Greg that the parts will be shipping and arrive here on or before next Friday, next weekend is set aside for the R and R of the manifold. Figuring that (again once I know the parts are on the way) I can spend an hour or two a day this week preparing... lots of PB Blaster, and a sharp new Sawzall blade or two. I'm pretty sure I have duplicates of all the wrenches needed, so if I have to modify one or two on the fly, I don't have to wreck my "good ones". If it all goes well, maybe I'll have the old header out before the weekend and ready to install the new one. I figured I'd replace the motor mounts at the same time since I have to remove the old ones anyway (or at least undo them) and it seemed to make sense. Wish me luck. I'm assuming I'm going to need it. |
|||||||||
|
Jensen Healey Super Moderator
|
I think the 4 into 1 exits lower, under the sway bar. You may have additional re-configuring to do. Good Luck |
|||||||||
|
answerman Member
|
See, when you obsess about things they never turn out as badly as you expect. Ms. Jenavieve's old exhaust manifold is lying on the garage floor in 4 pieces, and the whole removal process took less than 4 hours. I experimentally took a box end wrench to the bottom left nut on cylinder #1, and was shocked to find out that it easily turned. No extra help required, no PB Blaster, nothing. I kept turning it and the stud backed right out of the block (with the nut attached). Easy as pie. Encouraged, I tried the rest. Some interesting contortion involved, but I was able to remove all 12 studs with nothing more than a combination wrench and a socket with a long extension. And I didn't even jack up the engine, did most of it either through the wheel opening or from underneath (other than two of the top nuts which were just plain easier to get at from above). All nuts came out with the studs attached. None broken (which was my greatest fear). Some were a little slow, having to continually flip the wrench and go about 1/16 of a turn at a time, but they all came out just fine. Then, after a dinner break, I went back under with a Sawzall. Started by cutting both of the pipes right at the Y-pipe (which is still attached to the exhaust system, but since that was just clamped last year when I had the rest of the exhaust system replaced with the Delta performance exhaust) I don't anticipate much trouble there. After cutting those two, I went back through the wheel well and cut #1 and #4 up as close to the bends as I could, pulled those off, and then cut #2 the same way. Then, I cut #3 very close to the mounting plate (found my leak, it was breaking off of the mounting plate). I was almost able to break it off by hand... ended up shifting what was left of the manifold around so that I could cut #3 off right at the mounting plate. After all that, jiggered the mounting plate around (which had a few inches left of #1, #2, and #4 attached) until I was able to pull it out from underneath. Didn't even remove the steering shaft (though it probably would have made that last part easier). I figured since the header was going to be coming out in pieces, I'd wait to remove the shaft until after the header wasn't in the way any more. Tomorrow, I'll remove the shaft, unclamp and remove what's left of the Y-pipe, jack up the engine and remove the mounts, and with any luck I may get the new motor mounts and 4 into 1 header installed tomorrow night. I'm sure something will come up to complicate things, but at this point I have to say that this is going MUCH better than I anticipated. |
|||||||||
|
answerman Member
|
Wow, what a weekend (actually I started on Wednesday). Oddly enough, the removal of the old header and install of the new was probably the easiest part of everything I had to do, comparatively. My earlier concern about the header not mating up to the engine block correctly turned out to just be a little misalignment of the studs, and a little work with a file in the header mounting holes solved that. Got the gaskets in and the header bolted up nice and tight. I was able to do all of it from under the car without the engine jacked up, though in retrospect I can see where that might have made some of it easier. Anyway, the next step was to get the steering shaft back in. That was a battle, though not for the reasons other people have found. For the life of me, I could NOT get the upper knuckle to slide back onto the steering column shaft. It wasn't an issue of not being enough room, it just wouldn't go on. So I took the shaft back out, spread the coupling on the joint as much as I could in the vise with a hammer and chisel... still no go. In fact, I think I made it worse... it was slightly out of round. After fighting with it for too long, I finally just gave up, assumed the Lotus position, and removed the steering column so I could get both pieces on the bench and see what I was doing. After cleaning 41 years of grease, dirt, and whatever else out of both surfaces, and taking a needle file and sharpening up the splines, I got them to slide together nice and easy. Whew. So, the column went back in, and under the car I went again, and this time the shaft went right on. Again, whew. From there it wasn't too much of an issue to slide the coupling all the way to the firewall which gave me plenty of room to slide the lower end of the shaft back into the steering gear coupling (after cleaning that out as best I could with a toothbrush). This whole steering shaft issue was 4 hours I hadn't planned on, but such is life with a LBC I guess. At this point, I went back under and looked at how the exhaust (remember, I had a Delta performance exhaust installed last spring with the old header in place) was going to go back together. Well, that is another can of worms. Besides the fact that I have about an 8 inch gap between the back of the header and the front of the resonator pipe (still not sure why, they must have shortened that front pipe when they installed the exhaust to the old Y-pipe) there are alignment issues which are going to have to be addressed. I'll come back to that. So, time to install the new motor mounts. That actually wasn't too horrible. The left one came apart during removal, and the right one, while in one piece, looks about like you'd expect after being sprayed with oil mist for 41 years. Went to the hardware store and bought a handful of 1/2" fender washers, each about 1/16" thick, slotted them in the vise with a die grinder, and proceeded to install the new motor mounts, which went right in except that I had to jack the engine WAY up to get the shafts to clear the holes enough to slide them into place. But I got them in, and started the process of figuring out how many shims I needed to get clearance between the steering shaft and the header. Oddly enough, I don't see that the lower knuckle is an issue with clearance as others have brought up. It's not even close to hitting the header. The issue I ran into was up higher, about a third of the way up the shaft, where the shaft passes through the header pipes. It was a very fine line between hitting the pipe either to the left or to the right of the steering shaft, but after a lot of trial and error I settled on 9 washers as being the optimal number of motor mount shims... about a half inch. Decided I was happy with that, tightened the mounts down, tightened the pinch bolts on the steering shaft couplings, and we're all good there (though I am probably going to have to realign the steering wheel, I just kind of guessed and I'm sure it's not straight). Won't be able to verify that till the road test. An aside at this point... if you remember, the DPO on Ms. J had installed the upper cam cover upside down (putting the oil filler at the front instead of the rear). Not sure why, but this now has to be addressed. Since I raised the engine with the shims, it appears that the oil filler cap is now going to contact the bonnet when it's closed. Can't have that. So, I just placed another order with Greg at the JHPS store (if I was planning ahead I would have done this last week when I ordered the header) for a new set of cam cover gaskets and the associated hardware. I'll pull the covers off and put the top one on the way it's supposed to be on, with the Jensen-Healey lettering right side up and the oil filler at the rear. While I have them off, I'll see if I can clean and polish them up a little. Anyway... back under the car. I think I am going to have to take her back to the muffler shop to have them address the exhaust. The issue is that the header is terminating a little farther to the left than the old one did, and as a result the Delta performance exhaust system isn't lined up right. I kind of pulled it over to the header and put an intermediate pipe in, but it's not straight and the resonator is pressed up tight against the bottom of the car (not into the transmission tunnel), in addition to falling off the hanger in front of the axle. I took some measurements and determined that I need an intermediate pipe between the header tip and the resonator end that has about a 2" offset in it. It can be made to work, but it's just another speed bump in this task. I'm probably going to just take it to the muffler shop and tell them to just do whatever they need to to make the exhaust all go together properly. I do have to say that I did start her up, with the exhaust kind of cobbled together as I described above, and she definitely sounds different (a good different, I think). Can't wait to hear how she sounds once it's all properly together... all pipe from the engine back to the exhaust tips will be either new or less than a year old. The light at the end of the tunnel is pretty bright, all things considered. At least the temperature's not likely to get out of the 40s here in Wisconsin for at least the next week, so I'm not in a huge hurry, but I would just like to get this done, you know? Last edited on 04-07-2015 06:00 pm by answerman |
|||||||||
|
answerman Member
|
Hey guys... it's been a while since I posted any updates. Ms. Jenavieve is pretty much past the "project" stage now I suppose, though there is always more to do on these little cars, right? Anyway, let's see if I can get caught up. As I outlined previously, I got the new Delta 4 into 1 header installed, and then took her over to the local muffler shop to have them do some magic. Because of the way things lined up, they ended up having to custom bend an offset pipe to mate up from the end of the header to the front of the resonator, along with a flex pipe. Not quite original, but her exhaust is now pretty much brand new from the engine all the way to the exhaust tips (or less than a year old, anyway). And I have to say she sounds absolutely fabulous. It's a nice change to have all the exhaust noise coming out of the exhaust tips and none from under the bonnet. I also did install the new cam cover gaskets from the JHPS store, and cleaned up the cam covers while they were off. They are almost shiny now. Reinstalled with the "Jensen Healey" logo right side up and the oil filler at the back of the engine, instead of the front. Nothing too exciting in this process, went very smoothly. Then, I decided to go ahead with something I've been thinking about since last fall... a couple of weeks ago I made a phone call, drove over to look, and came back with a nice hardtop for her. The guy who had it had originally approached me at a show last fall and asked if I was interested, and I told him that I would think about it. Finally got back to him, he still had it (and was about to put it on eBay) so after a bit of haggling (with me in the drivers seat on the transaction since I was the guy in his driveway with cash and no need to ship this crazy oversize thing) we agreed on a fair price. And the top, while not original (it's an aftermarket from Custom Hardtops in California) is almost like new. He bought it new with the can back in 1974, it stayed in the garage most of the time, and for whatever reason when he sold the car, the buyer didn't want the top. Good for me, though. Actually drove her around for a week or so with the top on before I took it off for the summer. While I was still in "getting ready for spring" mode, I also finally joined the ranks of "official JH owners" with the rite of passage of installing a new timing belt and tensioner bearings. The old belt, from the records I got when I bought her, was changed about 9000 miles ago... but also about 12 years ago, so I figured I'd put it off long enough. The approach I used (got the idea from a friend who's a Lotus afficianado) was to set the engine at TDC with the 110 marks lined up, then take a bottle of WhiteOut and mark each gear (both cams, crank, and ignition) with a mark on one slot, and mark the old belt with a corresponding mark on the tooth in that slot. Once I had done that, it was a simple matter to remove the belt, line it up with the new one, mark the corresponding teeth on the new belt (counting the teeth between the marks to be sure) and then pop the new belt on in the appropriate location. Worked just fine, the whole process took maybe 3 hours from start to finish... I was in no hurry and I am sure it would go faster the next time since I now know exactly what has to be removed to get at it. For posterity, here's the order I did things (I used Greg's guide as a, well, guide, but there was more to be done than he had outlined: 1. Disconnect battery and coil wires, just because. 2. Remove top half of belt guard (I have the two piece guard) 3. Attempt to remove bottom half of guard. Grumble because it won't come out at this point, too much stuff in the way. 4. Loosen alternator, remove belt. Remove fan and pulley. Skin knuckles a bunch because of proximity to radiator. 5. Look down and realize that the lower guard still isn't going to come off. 6. Remove crank pulley. This went way better than I had expected... put a 19mm socket on my ratchet, put a pipe on the handle, and had Mrs. Answerman stand on the brake pedal (since I've never had a functioning hand brake) while I first hit my knuckle with a rubber mallet (ouch!) and then the pipe a few times to break it loose. Moved engine BACK to TDC since of course it moved during this process. 7. Now I can remove the lower belt guard. Did so. 8. Got my bottle of WhiteOut and marked one tooth/slot combination on each of the 4 gears. 9. Loosened tensioner and pulled belt off the gears. Loosened upper radiator hose clamp at top of engine, pulled hose off the fitting, and snuck the belt through there. Old belt is off! 10. Removed tensioner (that actually came out fairly easily). 11. Took tensioner to bench, followed Greg's process at http://www.jensenhealey.com/tech/bearing/bearing.html to disassemble tensioner and replace the bearings. The old ones seemed fine, but since I went this far I didn't see a compelling reason to NOT replace them. 12. Put newly assembled tensioner in place, loosely. 13. Take new belt, count teeth and make new WhiteOut marks corresponding with marks on old belt. 14. Put new belt on. Take belt off, put on again because I was one tooth off on the crank gear. Triple check all marks and deem it good. 15. Tighten tensioner till the belt tension seemed about like it was on the old one (was able to twist it about 45 degrees between the oil pump/distributor gear and the intake gear). 16. Think about it for a while and decide that I am going to be one of the 12 JH owners that still has the belt guard in place. Put the lower section back on. 17. Reinstall crank pulley and fan/pulley. 18. Reinstall alternator belt and tighten. 19. Reinstall top half of belt guard. 20. Reconnect coil wire and battery cables. 21. Say a little prayer, get in, and turn key. Starts right up and seems to run as well as she ever did. Whew. It really wasn't that bad of a process, though with all my careful planning I must have been "off" by a tooth on the distributor gear, because after a day of trying her out I found that she wasn't quite right. She ran just fine, but was hard to start (especially when hot) and didn't want to idle (again when hot, which led to a few frustrating restarts at traffic lights). So, off to purchase a timing light (which I've somehow gotten this far in life without) and checked her timing. Obviously there were no corresponding marks, but I would guess that her ignition timing was at about 15 degrees ATDC. Yes, that is AFTER TDC, not before. Well, that would explain things. Loosened up her distributor and gave it a little twist and after a few stops and starts got it set to about 15 degrees BTDC (with the vacuum hose attached because, well, I forgot to detach and plug it). Amazing difference in how she runs now, for the first time in forever she actually idles right (though a bit fast, can't get her idle down below about 1200 RPM) and is much smoother on takeoffs. Now it's time to shine her up and drive, because, well, that's why I have her, right? |
|||||||||
|
Tim Murphy Member 
|
Hi. Good outline of changing timing belt. One thing I was told to do that I would like to add. Before starting engine, turn the engine one revolution by hand (using socket wrench on crank nut) to make sure then is no contact between pistons/valves. It is a good way to check that nothing has been set wrong or left loose. Take care Last edited on 05-05-2015 07:34 am by Tim Murphy |
|||||||||
|
answerman Member
|
Decided it was time for a completely unnecessary upgrade, just because I've wanted to do this for some time. Placed 3 orders with 3 different vendors: 1. Madera Concepts for the full dash wood kit, including the gauge panel surround, because it looks sooo nice. 2. APT Instruments for replacement trim rings for all the gauges. Stock was black, but the new ones will be chrome. I've seen pictures and the chrome rings just make the gauges "pop" in the woodwork. 3. Delta Motorsports for 6 new 5W gauge bulbs, so I can actually see the gauges at night. Figured since I had to pull the gauges to install the trim rings anyway... Also ordered from Delta a new windshield washer nozzle (I wrecked the old one when I stripped her bonnet down, and I've been driving around with a hole in the bonnet ever sinze) and a new shift boot to replace the 41 year old rather ripped up one she has now. Appearance is everything (plus I already had the other stuff coming so the shipping was covered). Pictures when it's all done... Madera figures about 3 weeks for the woodwork. |
|||||||||
|
answerman Member
|
Decided to tackle the trim rings and bulbs tonight, since they needed to be done before the woodwork anyway. As usual, the part I figured would be difficult was the easy part, and the part that should have been easy... well, you know... Pulled the steering wheel and cowl off, and undid the screws that hold the top of the cluster in place. Of course, that didn't allow me to remove the cluster. After looking at it under the dash for a bit and contemplating different ways of prying the rusty center pin loose, I decided to take a chance. Reached up behind and undid the speedometer retention nuts, and pushed it out through the cluster. Popped the bulb out and disconnected the cable, allowing me to remove the speedometer completely. Now I had a place to grab the center of the cluster... reached in through the vacant speedometer hole, got a good grip on the center of the cluster, and gave it a yank... and it popped right out. Whew. I wasn't looking forward to fighting with that rusty spike from underneath. Disconnected the oil line and the two harness plugs, and out came the cluster to the kitchen counter (Mrs. Answerman is getting used to seeing JH parts in the kitchen). From there, it was pretty simple to remove the gauges and replace the black trim rings with the chrome ones, cleaning the glass inside and out in the process. Reassembled everything, and the cluster was ready to go back in. At this point, I had spent maybe 45 minutes on the job. Moving along nicely. So, after supper, I went back out and laid the cluster on the steering column stub, reconnected what needed reconnecting, and decided that before I put it all back together I should probably make sure everything was working right. Tried the dash lights and the new bulbs are a HUGE improvement. So far so good! So, I turned the ignition key to "run".... and nothing. No movement on anything. Hmmm. OK, must have a bad connection somewhere, right? So, I checked all the connections... they all seem good. Still nothing when I tried it again. So, just to make sure there wasn't more mischief afoot, I started her up. She started right up, but still nothing on the gauges (other than the oil gauge of course which is purely mechanical). Well, this isn't good... About this time I notice that the radio didn't come on either. A HA! Must be a fuse!!! So, up went the bonnet and sure enough the #2 fuse was blown. I'm guessing that maybe the cluster wiring touched something it shouldn't have when I had it loosely lying there. So, I pulled the blown fuse and put in a new one. Turned the key back to "run" again, and this time the voltmeter moved up and the radio lit up. OK, progress. So, I start her up again. This time, the voltmeter and tachometer behaved as they should have. Feeling a little better about things, but I'm still wondering why the temp and fuel gauges aren't moving. While I am pondering this, checking connections AGAIN, she starts to misfire. This CAN'T be good! So, I shut her off, think about things, check connections under the bonnet (maybe I damaged the coil somehow? Who knows) and then start her up again. Harder to start, and she was not running right at all. After about 10 seconds, despite my efforts to keep her running, she died and I could not get her restarted. By this time I am seriously freaking out, wondering what I could possibly have damaged. I'm already paranoid after changing her timing belt, and I went to the trouble to get her at TDC and check the cam marks just to be sure the belt didn't slip. Fortunately, that's all good. Whew. So, I get back behind where the wheel would be if it wasn't lying on the floor, and I tried to start her again. Still nothing, just turning over but not catching. As I'm doing this, a little bulb goes off in my brain... "you know, I am not hearing that lovely noisy fuel pump clicking away..." OK, now I have something else to troubleshoot! So, up goes the boot lid, and a quick test with my Fluke meter reveals that I am only getting about 2V at the pump. OK... so, after consulting the wiring diagram in the owners manual, I go back under the bonnet and idly wiggle and spin the fuse I replaced in the fusebox. Then, back to the boot, and now I am getting 12V at the pump. Much better. Reconnected the pump wiring, got back behind the missing wheel, and she started right up. Huge sigh of relief. Apparently the fuse wasn't properly seated in the fusebox. I guess I should go in there and clean things up. So, the mystery of the misfire now solved (basically, she ran out of gas) I could go back to pondering the nonfunctioning fuel and temp gauges. After doing more testing with my Fluke, I established that there was no voltage on the "I" side of the voltage stabilizer. That would explain why those gauges aren't working. To confirm, I moved the wires on the stabilizer so that they were basically just a jumper (both wires on the "B" terminal) and the gauges moved right up, though obviously not accurately since they were now getting much more than the 10V that the stabilizer provides. Apparently, whatever caused the fuse to blow also took the stabilizer with it. So, after Googling around a bit (the club store doesn't have them that I could find) I found a replacement solid state voltage stabilizer at Moss Motors (which means I get to look forward to getting all kinds of catalogs and email offers for the MG that I don't own). Since I was ordering one, I ordered two (I like having spares of hard to find items). Good thing I wasn't planning on driving her for the next week... they should arrive before I get back from vacation. The fun continues... and maybe my Madera Concepts woodwork will arrive about that same time... |
|||||||||
|
answerman Member
|
Well, got my voltage stabilizers from Moss Motors, pulled the dash apart again, and got one installed, and my gauges are now working properly once again (though the speedo is a little jumpy, just ordered a new speedo cable from Greg since I'm pretty sure that's the problem). Good to know how much fuel I have in the tank again. That being resolved, I moved on to installing the Madera Concepts woodwork that arrived on Friday. First order of business, after pulling the gauge pod out once again, was to finally "fix" the trip odometer reset cable. In the process of pulling the gauge pod out multiple times, I managed to break off the little plastic tabs that hold it to the back of the speedo. After trying a few different solutions involving silicone glue, I finally cut a piece out of a PVC electrical switch box, drilled a couple of strategically placed holes, and here's the result. Not pretty, but at least the cable can't come out, and it's not like anyone is going to assume the Lotus position to see it: 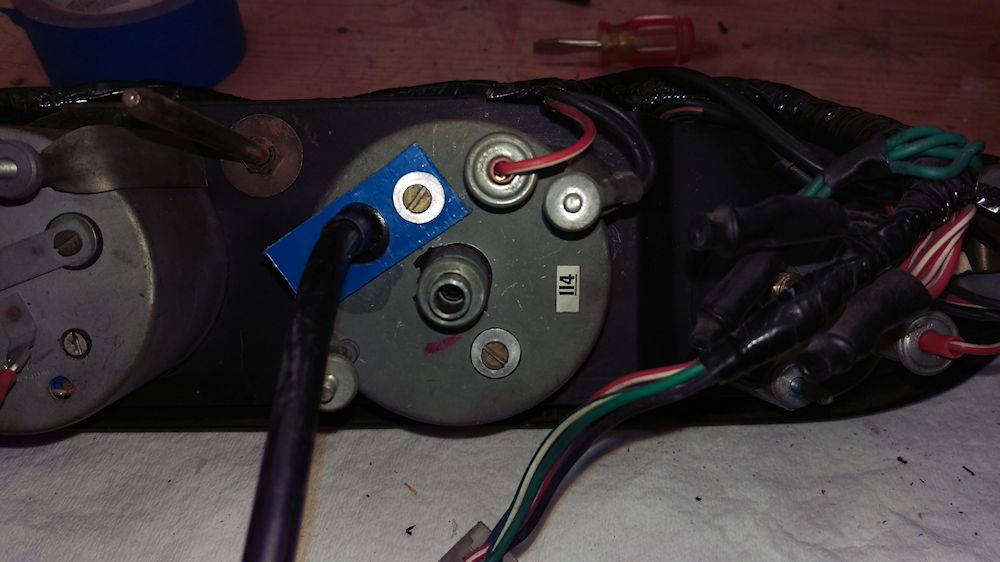 Now that that's fixed, I moved on to getting the woodwork installed. That actually went pretty well, didn't have to do any customizing other than making the hole for the hazard light switch a little thinner (it's not the original switch, and the panel was just too thick for it to mount properly). The one concern, which I spent way too much time trying to fix, is that the gauge pod doesn't sit flush with the opening in the dash (compounded by the fact that there's a Delta dash cap installed by the PO over it). I had the opportunity to look at another JH this weekend at a show, and I noticed his was the same... when the top of the pod is flush, the bottom is actually recessed into the dash about a quarter to half inch. Anyway, after obsessing about it, removing the dash cap (and finding out why it's there, her original dash is pretty cracked), bending the spike around on the gauge pod, and generally trying several different ways to make the pod fit flush, I finally gave up, went to bed, and the next day pulled the pod out and mounted the wood to it and just shoved it in, hoping for the best. It actually came out just fine, and I could have saved myself about 3 hours of work if I would have just done that in the first place. 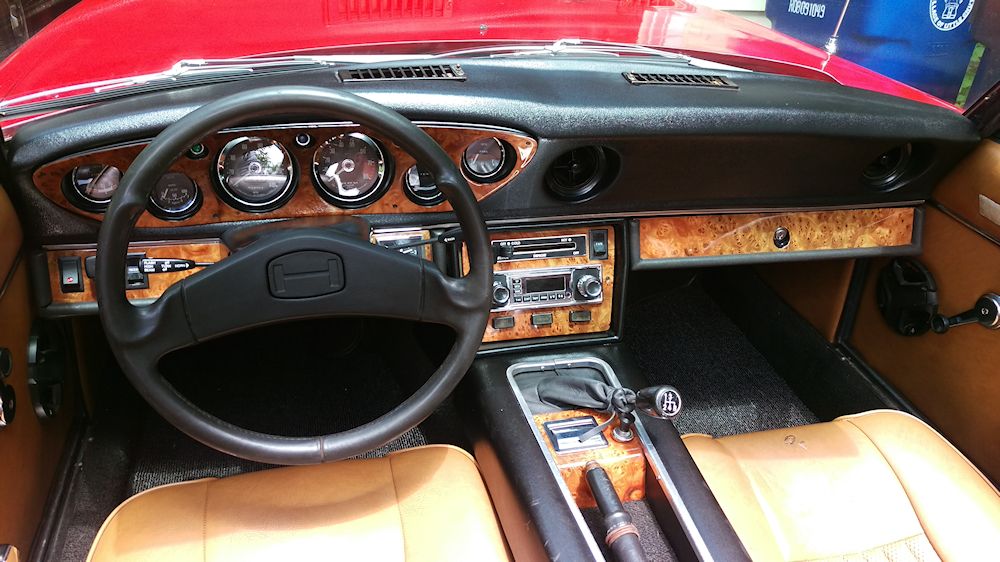 Last edited on 06-09-2015 07:48 pm by answerman |
|||||||||
|
Screenplay Member
|
The dash looks great - especially with the chrome trim rings. Is that the elm or the walnut? |
|||||||||
|
answerman Member
|
It's the elm. |
|||||||||
|
Screenplay Member
|
I have a feeling my dash is going to eventually look an awful lot like yours. Nice job! |
|||||||||
|
answerman Member
|
Well, I just caused myself an afternoon of work (hopefully that's all it will take). Those of you who were at the Jensen East meet might remember that Ms. Jenavieve had an odd running issue which we looked at while at the picnic: she started and ran just fine, but after she was warmed up she would miss and backfire a few times when accelerating from idle after running at speed for any length of time. Once she got over 2500RPM or so, then she would be fine until the next stop. So, I started thinking about what might have changed to cause this, and remembered that I had cleaned up the engine compartment while at the car wash right before we left for Rhinebeck. Figured it was worth a look inside the distributor, so I popped the cap and sure enough there was a little oily water in there. "My bad #1"... don't ever wash in there without covering the distributor, it's not exactly watertight. So, after removing all the airbox stuff to get at it better, I sprayed some electronics cleaner into the distributor as best I could (not like you can see into it without a mirror), blew it out with compressed air, and cleaned up the cap and put it back together. After I did all this, I decided to check the timing, so hooked up the timing light and it was way too far advanced. I then loosened up the distributor clamp to adjust the timing, and while I was doing that I thought "I should screw down the temperature compensators on the Strombergs like Brett suggested". So, I took them off, cleaned them up, screwed them down, put them back on, and went to start her up to see if it did anything, good or bad. This was "my bad #2". If you remember, I had loosened the distributor clamp a few minutes before. Oops. Of course she started, ran for about 2 seconds, and quit. Crap. So I went back under the bonnet and the distributor had pushed out about a half inch. At that point I decided it was too late in the evening and I was already making bad decisions, so this afternoon I will try to undo the damage I did. I guess the good news at this point is that I might as well take the distributor out all the way and clean it up good and check the points and such before I wrestle it back into place. Not what I had planned, but you know how it goes... |
|||||||||
|
Brett Gibson JH5 20497 Member
|
Mike. loose the points go with electronics, also dont forget to put a full face gasket on both bypass valves on the carb's. You also should bring the crank up to TDC and align the cams insert the dizzy and make sure your rotor is pointing at the #1, might save you a bit of trouble. Good Luck. Brett |
|||||||||
|
answerman Member
|
Spent quite a bit of time trying to track down Ms. Jenavieve's misfire issue. After doing all of this, it still remains. To recap: she starts, idles, and mostly runs fine under most circumstances, but once warmed up, when accelerating from an idle after a stop, she misfires and backfires once or twice. Then, she's fine till the next stop, and then it happens again. I can not reproduce this at speed (when cruising, I can stomp on the accelerator and she reacts like she should without any misfires). It only happens when accelerating after she's been idling for a few seconds or more. Here's what I've done so far: Carbs were balanced at the Jensen East meet courtesy of Ron Mau and Brett Gibson. Didn't seem to affect anything. Screwed down temperature compensators. No change. Took distributor out, cleaned it up inside and out, relubricated the wick, inspected points (seemed to be fine). Reinstalled distributor, set timing to about 5 degrees BTDC. Seems to advance fine when blipping the throttle. However, the problem persists. Properly gapped and installed new NGK plugs. Old plugs looked ok. No change. Removed timing belt cover, disconnected coil, manually turned engine to TDC. Everything lines up as it should: 110/110 on the cams. Removed bypass valves, cut and installed full face gasket. No change. I then removed most of the vacuum hoses, removed the vacuum switch, and capped all ports. Here's a before and after view, using Mark Rosenbaum's diagram, which I edited a bit for the "after" diagram: Original routing:  After removal and capping (caps are shown in red, I also capped the vacuum retard port on the distributor which isn't in the diagram): 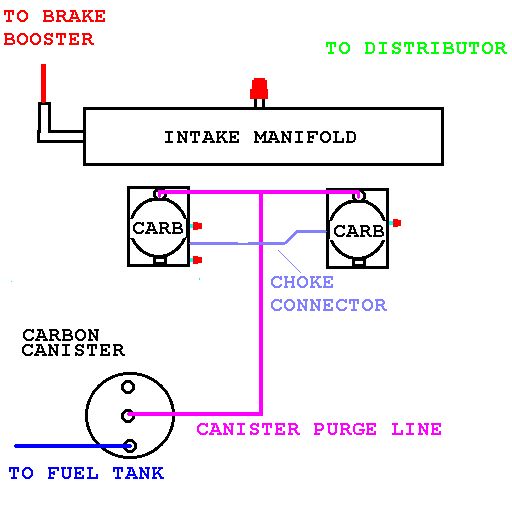 The only vacuum lines in place now are the canister purge line and then T'd to the carbs (the pink line in the diagram). Obviously, the choke connector is still there as is the dark blue line to the fuel tank. All light blue lines are gone, the vacuum switch is gone, and the line to the distributor vacuum retard line is gone. Caps installed on the front carb throttle bypass port, the two rear carb ports, and the port on the intake manifold that was feeding the green lines to the vacuum switch and the vacuum retard on the distributor. Then, reset the ignition timing to approximately 12 degrees BTDC, reset the idle to about 1000 RPM, and it advances to just over 30 degrees at higher RPMs (I couldn't see the tach and the timing mark at the same time, so I'm guessing I was at about 3000 RPM). Whew. Yet, the problem persists. I'm running out of ideas. I really think it's an ignition issue, and my next step was to talk to Mike at Delta about a Pertronix distributor and coil. I know it's a good idea, but I hate to go through the expense and time if it's not going to solve this issue. Anyone? Last edited on 07-14-2015 06:36 pm by answerman |
|||||||||
|
Jim Sohl sn 11210 Member
|
Forgive me if this has been covered before, it is a long thread. On acceleration from an idle, a very temporary rich mixture is needed. Many carbs do this with a squirt of gas from an 'accelerator pump,' Dell's do this as do Webers. The Stromberg method is different. The air valve, the large cylinder that goes up and down with air flow, is prevented from going up as fast as the air flow goes up upon opening the throttle plates from low (idle) speed by a 'damper.' The damper is the piston-like thing that goes into the top of the carb. Unscrew the knob at the very top of the carb and gently pull the damper out. It should move freely, but slowly, as if it were a tiny shock absorber. If fact, that is almost exactly how it works, by forcing oil through a small passageway, thus slowing down the movement of the air valve. Check the oil level in the damper tube. It should be about half-way filled with oil. If not, there will be far less damping and the air valve will move up very quickly, quick enough that the temporary rich mixture goes away too soon, resulting in stumbles, misses etc. I do not frankly know what kind of oil is supposed to be used, I have used 20/50 in the past with no complaints. If your dampers have oil and are slowing down the air valve, you problem probably will be found elsewhere. I'm sure this has been posted by others, just an FYI. good luck! Jimmy |
|||||||||
|
Brett Gibson JH5 20497 Member
|
Mike, I believe at the show you mentioned that you have never rebuilt the carb's, so whats crossing my mind is if you have the ignition in good working order (I would switch out the points) then it's time to take the carb's off clean them up set the float bowl level's and make sure there are no air/Vac leaks along the shafts, basically give them a proper complete rebuild, it's not very complicated, put them back on and balance the air flow like we did at the show. Also I would put the vac hose line back to the distributor but check the vac piston on it to make sure it works. Brett |
|||||||||
|
answerman Member
|
Well, I was hoping Jim was on to something with the dampers. I checked the oil level in the dampers and it was indeed low. Topped them up with some 20W50 and they move nice and slow now, but after a test drive the problem persists. Brett, the Strombergs were rebuilt right before I got the car, about 4 years ago. I'm not discounting your suggestion, and if they need to be cleaned up I'm happy to do so, but I still think it's ignition related (distributor or coil). One thing I didn't mention in the original description of the problem is that it does seem to be heat related... the warmer the engine, and the warmer the outside temperature is, the worse the problem is. I've also noticed that she seems to be running just a little hotter than she used to (not overheating by any stretch, but enough to be noticeable). At this point I'll fiddle with it a little longer (maybe siphon the oil out of the carbs and replace it with new just to completely rule that out). Also check the shafts for vacuum leaks. Only other thing I can think of to check is compression... is it possible I have a sticking valve? I haven't done that yet since I need to have someone else to crank over the engine and everyone seems to be conveniently absent when I'm working on her. If I can't come up with another solution, then I'll wait for Mike from Delta to call me back with the news that they have the Pertronix stuff in. If I go that route, the plan is to just order and install a new complete Pertronix distributor, and a new coil. That way I can rule out pretty much anything having to do with the ignition. If I do go this route, I won't be able to reattach the vacuum line to the distributor as the Pertronix distributor doesn't have a vacuum retard. Last edited on 07-15-2015 04:32 pm by answerman |
|||||||||
|
answerman Member
|
Here's where I'm at. Still no joy. Hooked up a Mityvac at various places (not much to check since most of the vacuum lines are capped off now). Brake booster holds vacuum nice for at least 10 minutes, figured that was long enough for a test. When I connected the Mityvac to the main manifold port, the gauge bounced all over, which according to what I could find indicates a weak or broken valve spring. Very possible, but I don't think that's the cause of my issue. Used a can of spray carb cleaner to try to search out vacuum leaks around the carbs. None that I could find. Double checked the oil in the Strombergs. Definitely full, and the plungers seem to move very slowly like they should. I still wonder if heavier weight oil might make a difference (I just used the same 20w50 that goes in Ms. Jenavieve's crankcase) but I have a hard time believing that this is the issue since this is the same oil I've always used. I also, when I had her out this weekend, experimented with different choke settings while driving (when I came to a stop, I would pull the choke a little bit before taking off). Other than raising the idle, it didn't seem to make any difference, I still had the hesitation and backfire. So I really don't think it's an issue of being too lean under those circumstances. If anything, I think it's too rich which takes me back to ignition... I still haven't done a compression test, but I don't think that is going to solve anything (other than to point out other unrelated issues). I guess I'm at the point where I call Delta and order the Pertronix distributor and coil. Last edited on 07-20-2015 07:50 pm by answerman |
|||||||||
|
answerman Member
|
Just a little more info: Took her out for a drive last night, got her warmed up good, brought her back and checked the damper oil again. The dampers still move nice and slow at temperature, so I think I can rule them out. Also finally got around to pulling the plugs again (they look fine, no difference from one to the next) and did a compression check. Front to back: 120/120/120/125. Not exactly great but not surprising (the engine does have 98,000 miles on it), but more importantly no discrepancies between the cylinders to speak of. Called Delta yesterday and ordered a Pertronix distributor and Pertronix coil. Crossing my fingers that that will solve the issue. I'll be really ticked if it doesn't, because I am running out of ideas... |
|||||||||
|
answerman Member
|
Did a few more "just because" things last night just to further rule things out. Pulled the filter element out (K&N element in the stock "muffler"), cleaned it, reoiled it, and reassembled. It wasn't that dirty, and it had no effect as I suspected. I figured if it was too restrictive it could cause a rich condition, but no change. Played with the Strombergs for a while. I didn't adjust anything other than the idle speed since they were just balanced, but I did read up on their operation and ran a couple of tests to see what they were doing. I did the test where you lift the piston slightly and the idle came up just a little and then slowed right back down, so that seems to be good. I did notice several references to the piston having resistance on the up stroke but falling quickly with a "click". Well, mine are definitely not clicking, but they do seem to drop fairly quickly. I'm not sure if that's an issue or not. Also (side note) I finally installed the replacement interior light I bought from Delta over a year ago... the reason I never got to it was because when I had the car disassembled for the repaint, I had left the driver side door switch hanging inside the hinge cavity when I removed the door, and completely forgot about it when I reinstalled the door, so it's just been hanging in there for the last 16 months. Oops. Last night I removed the door, fished the switch out, and reinstalled the door and switch properly. Fortunately I didn't have too much trouble getting the door to line back up, got it on the second adjustment. Waiting for the mail to get here with my Delta package... |
|||||||||
|
answerman Member
|
Well. It's nice when things work out the way you hope they will. Pertronix shipment arrived from Delta this afternoon. After supper, went out to the garage and spent about a half hour mapping out "before and after" diagrams of the ignition wiring. I had to remove the ballast resistor and account for all the wires... it wasn't too bad actually. I was able to remove the ignition feed wire (white/slate if I remember right) from the ballast resistor and just pull it over to the coil and connect it directly to "coil+" (SIDE NOTE: I rebuilt my tach to RVC standards with the Spiyda kit a while back, so I don't have to worry about the infamous "my tach doesn't work with Pertronix" issue). This done, the old coil and ballast resistor were removed, and the Pertronix Flamethrower coil was installed. I had to wrap a few layers of rubber tape around it to get it to fit snug in the old coil bracket... I'll find a more elegant solution later. Then, I just taped and tied off the other wires for now since they aren't being used for anything (I also installed a gear reduction starter last summer so my direct feed to the coil from the starter relay is nonfunctional... both ends of the white/yellow wire are disconnected), Connected the tach feed to "coil-" and considered the coil done. Moving on, I turned the engine to TDC, pulled the distributor cap, and noted which terminal the rotor was pointing at, double checked the other end of the wire, and it was indeed #1. Numbered the plug end of the wires, and removed one at a time and installed them on the new Pertronix cap in the relevant positions. That done, and after a quick trip to O'Reillys to pick up a new coil wire (the Pertronix coil uses a regular push on connector while the old Lucas coil used a screw on) I was ready to start on the distributor. Unplugged the remaining wire (again not being used in the new system, the other end is tied off at the coil end), removed the retaining nut, and pulled the old Lucas distributor. Noted the position of the rotor, aligned the Pertronix rotor in roughly the same spot, transferred the mounting plate over from old to new, and installed the new distributor... just had to wiggle the rotor a little to get the shaft to seat in the oil pump housing. Tightened everything up, reinstalled the cap, pulled the plugs and gapped them to .035", reinstalled them and commected the wires, connected the red and black wires from the distributor to the coil, and figured it was worth a try at this point since I knew the timing had to be at least close. Connected the timing light, said a little prayer, and turned the ignition key. And... she started right up. Wow. I wasn't expecting that. A little rough, but running. Checking the timing light, she was about 5 degrees ATDC, so I loosened up the distributor and got her set to about 14 degrees BTDC at about 1100 RPM idle. And, after tidying up a bit, took her for a drive for about 20 minutes, hammering her pretty hard, and not a single bit of hesitation. She's never run like this. So, after all of this, I just should have listened to everyone who said "ditch the points and go electronic". I would have saved myself about a month of hassle, and the conversion was actually pretty painless. Of course, all the other stuff like carbs, plugs, air filter, etc. is now checked over so in hindsight it probably was a good thing that I went through all this troubleshooting. Tomorrow, I'll go back in and route the wires properly and figure out what to do with all the extra wiring that isn't being used any more. And come up with a better way to mount the coil. Just happy to have Ms. Jenavieve running like she should again. |
|||||||||
|
Art DeKneef Member
|
Don't you love it when a plan comes together. Good job. And you still have a few months of driving up there. |
|||||||||
|
answerman Member
|
After some time just enjoying the summer, got quite a bit done on Ms. Jenavieve this weekend. First order of business was to revisit the whole steering shaft/motor mount issue from this past spring when I replaced her header with the Delta 4 into 1 header. I've never been happy with the way it turned out and since I had some time, I decided to take my time and try different approaches to get it right. The problem was that when I installed the header, I could not find that perfect point where the steering shaft didn't contact one header pipe or another where it passed through. It was hitting pretty hard on the right side at a half turn of the wheel, so I proceeded to make some shims out of large washers (notched to slide on easily) and shim the left side of the engine as suggested. Problem was, in order to get the shaft to stop contacting on the right side pipe, I had to raise the engine so high that the shaft started contacting the pipe to the left at about a quarter turn to the left, while just barely touching the pipe to the right. Wow, that was hard to explain... but if you've done this you know what I'm talking about. Anyway, at 9 washers (a little over half an inch of shim) I called it as good as it was going to get and that's the way it's been the past few months. The engine was way too high for my taste, in fact I had to remove the cam belt guard since it was hitting the bonnet. And finally, this weekend, I got back to it. This time I wasn't in so much of a hurry (I had the whole header and exhaust issue to deal with back then) and I decided to take my time and explore all my options. I spent a couple of hours pulling shims out, putting them back in one at a time, taking careful note of how it affected the steering shaft interference. What I finally figured out is that (and this was exactly the opposite of how I thought it worked) "shortening" the steering shaft (by collapsing the upper U-joint) actually gives the shaft less lateral movement. I thought straightening it out and making it longer would make it "smaller" in the turn radius, but that's apparently not how it works at all. So, I loosened up the lower pinch bolt, slid the shaft to its "shortest" point, and it made a huge difference. I was able to go from the 9 shim washers I had all the way down to 4 (a little less than a quarter inch) and now there is no interference at all (though it's still awful close). Much, much better. Having done this, I reinstalled the upper cam belt guard, since it fits right now, and then decided it was time for an oil and filter change, which went as uneventfully as oil changes go. Then, I decided it was time to see about the rocker switches I recently pulled off my latest parts car (which I never wrote up here other than in the VIN database thread... it was a complete rustbucket with no motor or transmission, but most of the interior parts came out nicely including the dash and all switches and gauges, along with the brakes, steering column and shaft, and all exterior lights and Mk I style headlight buckets and a mostly perfect rear bumper). Anyway, I spent a few hours disassembling, cleaning, and reassembling the headlight, hazard, and fan switches that I pulled from the parts car, and they are now in Ms. Jenavieve replacing the ones that were in there. None of hers were original: the hazard and fan switches were the squarer, sharp-edged replacements that Delta had a while back, while the headlight switch was just a SPST rocker that I found at the hardware store. Now they are back to original. Next step is to see if I can rehabilitate the turn signal/wiper switch from the parts car (Ms. Jenavieve has the MGB turn signal switch) to get even further back to original... the switches seem to function fine as far as I can tell, but the mounting collar is cracked so I'll have to see if I can JBWeld it or whatever. Oh, and I think the dash from the parts car will be going in as well (I really don't like the Delta dash cap that Ms. Jenavieve has, and removing it is not an option since her dash is really in bad shape). The dash from the parts car has one small crack by one of the defroster vents but is otherwise pretty much perfect. No big hurry, though. |
|||||||||
|
answerman Member
|
Not an intentional part of the project, but just when things are going well, Lord Lucas strikes again (though it's technically a mechanical issue, not an electrical one). Went to a car show about a half hour from home on Sunday, one of the typical shows in the area (meaning that if your car wasn't built in Detroit, very few people are interested). Still, it's a good way to kill a day. Anyway, as we arrived, I noticed a new, interesting, and not very good sound coming from under the bonnet. Consistent with engine speed, kind of a scraping sound. "This can't be good"... After we got parked and registered and all that, I popped the bonnet (because you can't show a car with it closed, that's just wrong!) and took a quick peek under there... didn't see anything obviously amiss. After a couple of hours I decided to look further into it. Started her up, listened while walking around trying to pinpoint where the scraping was coming from, and zoned in on the alternator. Turns out that the alternator fan was just barely touching the alternator body. Hmm. Guess I tightened the belt too tight a couple of weeks ago? So, now that I know the engine isn't going to blow up, we enjoyed the rest of the show and then drove her home. Nothing out of the ordinary other than that scraping sound. Once home, I pulled the alternator out (it's the Lucas alternator) and took it to the bench, and it appears that the shaft is slightly bent... there is a noticable wobble to the pulley and fan when they spin, though the bearing seem tight enough (which wasn't what I was expecting to find, figured it was loose bearings). Did a little forum reading, tried a couple of the shops like O'Reillys and Auto Zone, trying to find a single wire Delco 10si (since that seems to be the non-Lucas replacement of choice) with no luck. Then this morning, made a call to Mike at Delta just for comparison's sake, and as luck would have it he had a Lucas 14037-HD, brand new, in stock. Apparently the "HD" means heavy duty, it's rated for 63 amps instead of 43, but he found no reason that it wouldn't be a direct replacement. So, I went ahead and ordered it along with a new plug kit since I haven't had the original plug in years (I replaced the connectors right when I first got the car with crimp on female spades just to get her going) and should be back up and running later this week. Maybe the new larger capacity alternator will actually be able to keep up to the headlights. |
|||||||||
|
answerman Member
|
Ms. Jenavieve is off the road for the winter, and she's in her winter home at our British car clubhouse on a hoist. Preparing to pull her engine for a new rear main seal and other engine stuff (aside: I do have to say that it's MUCH easier to get at the exhaust manifold nuts when you're standing under the car). Questions: I assume I have to pull the clutch and flywheel before I can mount the engine on an engine stand. Is it possible to do the rear main seal with the engine on a stand? Also, does anyone know what size bolts (I know they are metric but that's it at this point) are needed to mount to the stand? I assume the bell housing bolts won't be long enough. |
|||||||||
|
Brett Gibson JH5 20497 Member
|
Pulling the seal cover can be done on a stand but it is a tight fit and would be easier off. Threads are all standard non metric. |
|||||||||
|
Arvin Appelman Member
|
When you install the seal make sure you hold it back aprox. 0.100" or it will leak like a sieve. |
|||||||||
|
answerman Member
|
Thanks for the input, guys. Still haven't gotten an answer on the size of the bell housing bolts as far as mounting to the stand. I guess I'll just pull a few and take them to the hardware store and match them up with longer ones. Otherwise, the engine is basically ready to come out: peripherals are all removed, and all that's holding it in are the bell housing bolts and the two motor mounts. Planning on pulling it on Saturday, and before going any further mounting it to the stand and taking it outside for a thorough degreasing... it's a mess! |
|||||||||
|
answerman Member
|
Engine came out last weekend without too much hassle and is now sitting on/strapped to a workbench I built just for the occasion, since it became pretty obvious that I wasn't going to get at the rear main seal too easily while the engine was on a stand. It's a gunky, goopy, oily mess, as expected. The inside of the bell housing is covered in oil and gunk (though the clutch and flywheel are surprisingly clean). To pull the engine, the approach I took was to unbolt the exhaust manifold from the engine (MUCH easier when the car is up in the air on a hoist, I have to say) and then lift the engine up and out, leaving the manifold in the car (since the entire exhaust system is welded together, there was no easy way to separate the manifold from the rest of the exhaust). We'll see how much luck I have getting it back together when the engine goes back in... I'll cross that bridge when I come to it. The short term goal at this point is to get the new rear main seal installed, and then I can put the engine properly on an engine stand for further work. To that end, I ordered the upper and lower gasket sets from Greg today. I'm not convinced I will go far enough into the engine to need all of them, but if I ordered just what I thought I was going to use my luck would be that I'd miss the one that would hold up the project while waiting for it to arrive. |
|||||||||
|
answerman Member
|
After a thorough degreasing and pressure washing of the engine, the new rear main seal was installed this weekend. It went pretty uneventfully. Tip: to get the spacing from the edge of the housing correct, I did a little measuring with my digital caliper and found that a "stack" of two CDs (I had some blank ones lying around) measure at .095" thick. They made a nice spacer when pressing the seal into place. The rear flange cleaned up nicely (no groove, just a mark where the old seal rode which cleaned up with a Scotchbrite pad and a little WD40). Honestly, centering the seal housing wasn't that much of an issue. The new seal fits much more tightly than the old one (which likely explains the leak) and it pretty much centered itself. As far as I can tell, it's centered to within a thousandth of an inch and I guess the only way to see if it was a success is to wait till the engine goes back in. Next step: removing the cams (forgot to bring my turkey baster to suck the oil out of the cam housings) and pull the head to send off to the machine shop to have them assess and do their magic. |
|||||||||
|
answerman Member
|
Cam towers are removed (learned a bit about how to keep the shims in place in the process, only had two fall out but I know where they came from). The buckets and shims are bagged and labeled, and the head is removed. Seeing the tops of my pistons for the first time. Lots of carbon in there... Now, the head goes off to the machine shop, and I can turn my attention away from the engine for a while and start working on repairing the floors (the only thing I didn't address during the big stripdown and repaint a couple of years ago). |
|||||||||
|
answerman Member
|
Whoops, duplicate post. I'll save this for the next time I have something to report. Last edited on 11-06-2015 03:46 am by answerman |
|||||||||
|
Brett Gibson JH5 20497 Member
|
Mike are you having the cam tower O-Ring grove machined or is their already |
|||||||||
|
answerman Member
|
I am assuming it's already there (the head was removed about 7 years ago), I wasn't quite sure where to look for it. I will check later today. Hard to find pictures of this stuff. |
|||||||||
|
answerman Member
|
An update, because it's been a while. Just heard back from the machine shop: the head is in very good shape overall, nice and straight so no skimming necessary. His only concern was that the valve guides seemed a little loose, so since it's all apart I will be ordering a complete set of 16 valves, guides, and springs to be installed when it goes back together. Just going with the stock valves, not the stainless ones. I am going to go with the uprated springs from the club store, though. Not going to touch the block this time around since everything looks pretty good other than the usual carbon buildup. Question while I'm waiting to hear back from Greg: does anyone know if the valve guides in the club store are bronze, or steel? The ones Delta has are bronze, while the originals are steel, and my machine shop guy would prefer steel if available. Meanwhile, I've been plugging away at the floorpan repairs. It was a bit of a mess as I suspected. The PO had riveted some sheet metal over the existing floor and then covered the whole mess with some kind of sealant, almost a half inch thick in spots. I still have no idea what was used there. It has the consistency of a hard black plastic. Here's what the floors looked like after removal of seats and carpet, and the riveted in metal... 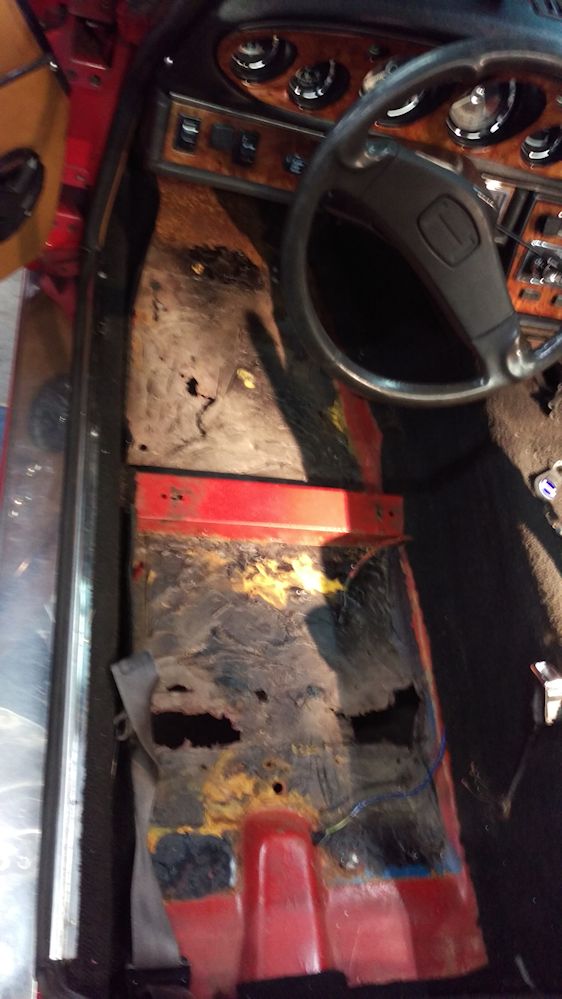 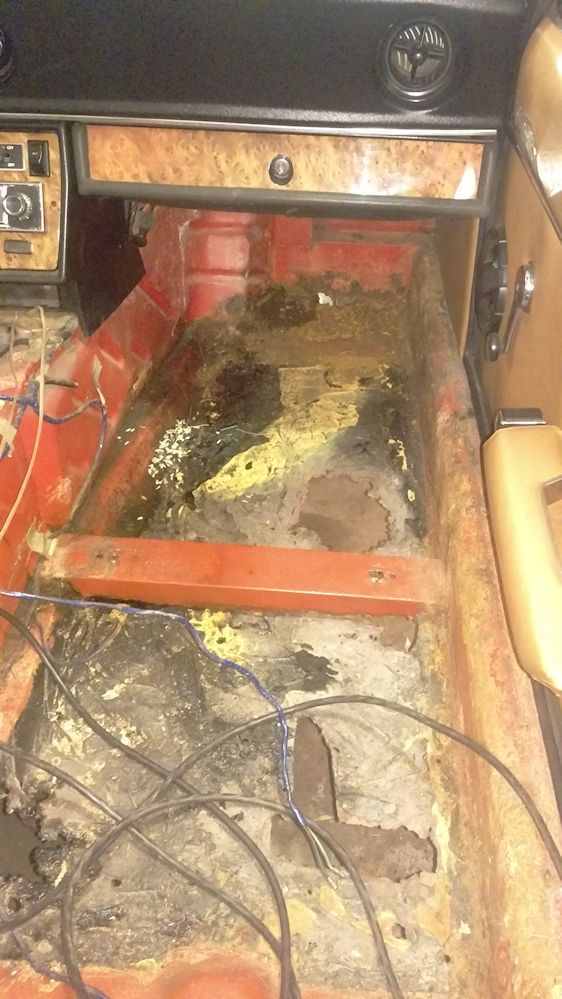 Anyway, it broke up easily when whacked with a hammer, and then the offending parts of the floor were cut out with a Sawzall and a pneumatic body saw. I looked into the replacement floor pans from Delta, but I just couldn't justify the cost. Since I have a metalworker in the family (my son) we decided that we could do it ourselves. It was an excuse to buy a couple of new tools: a 36" sheet metal brake, and a Milwaukee electric sheet metal shear which is the cat's pajamas for doing quick cutting work. So, the son and I created our own replacement floor. I went with 20 gauge cold rolled sheet steel (the original 19 gauge was not something I could find easily and 18 gauge seemed like overkill, it's not like I'm racing her). It was all bent by hand using a 36" sheet metal brake for the "square/straight" sections, and an anvil (an old section of railroad rail) and a hammer and torch to get the curves right near the gas pedal. Old school stuff I guess, and I'm learning as I go. A "during" shot of the drivers side: 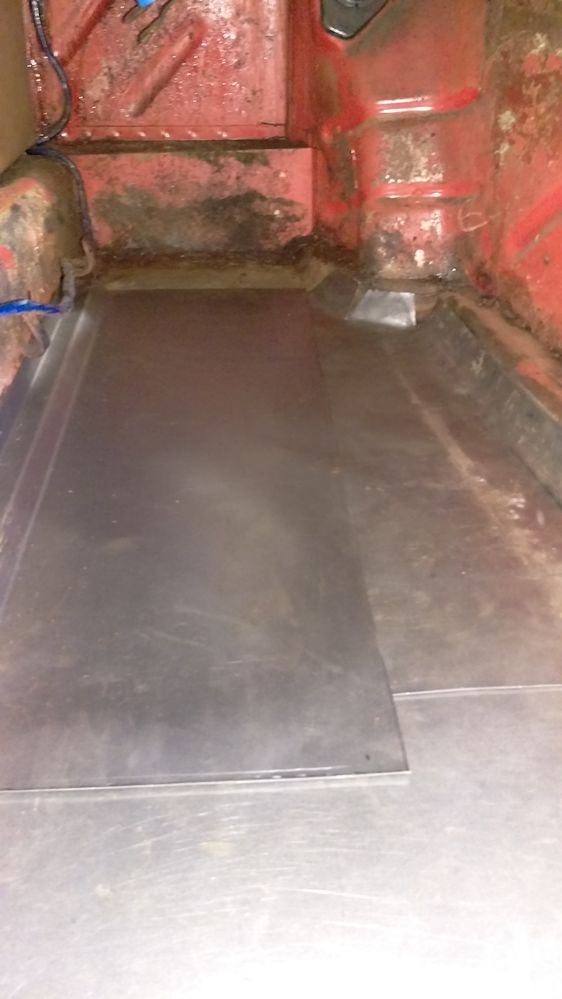 If you look closely you can see that there are 3 pieces to it: (1) the rear "under the seat" section which (from memory) is a basic rectangle about 22" wide and about 24" front to back, (2) the front left section which is a basic rectangle about 10" wide and about 26" front to back, and (3) the front right section which is about the same size but took a lot of cutting, heating, and hammering to get the curves into it. And finally, after it was all cut, heated, bent, hammered, and welded in place: 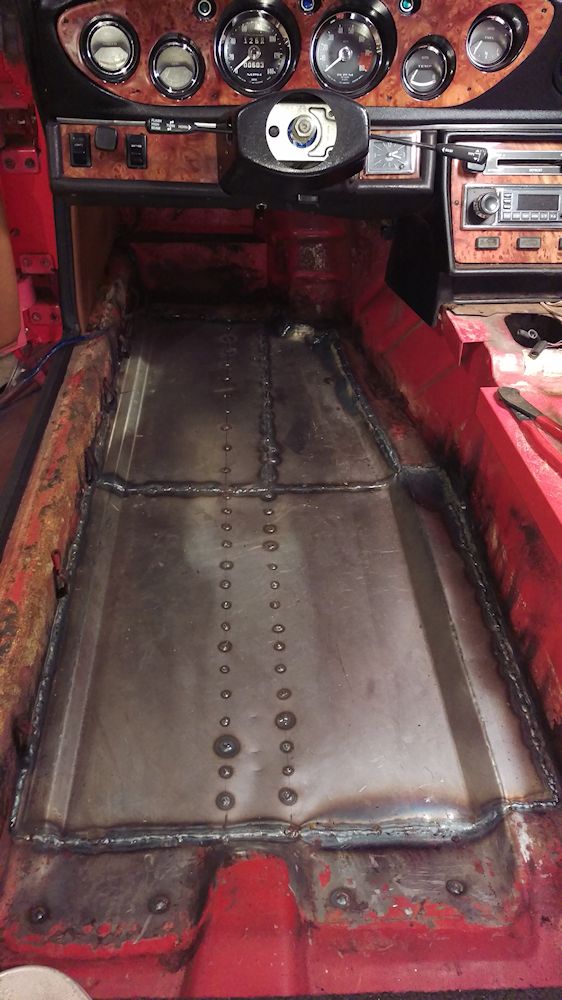 For the record: what you're seeing on the left inner sill isn't rust, it's old carpet adhesive. The whole thing came out of a piece of 20 gauge stock 24" x 60". I didn't roll any beads into it which may come back to haunt me, but it doesn't seem to be oil canning too badly Once the seat rails are welded back in that should give it a bit more side to side stability. Because of the channel that runs underneath front to back, there isn't more than 9' or so side to side that is unsupported so the rolled beads seemed like they wouldn't accomplish much. All that's left to do is get in there with a grinder and clean up the welds a bit. Then (waiting until after the passenger side is done), I'll need to fabricate new seat mounting rails, which should be the easiest part of all of this. The old ones look like someone chewed on them on the bottom edges. Now, on to the passenger side. That has its own set of issues: I cut out the old floor last night. More ugliness. It almost appears that it was replaced once before with very thin metal, the metal doesn't look anything like the drivers side (it actually has a texture to it, not smooth). And then, of course, this was all covered with the same black plastic filler. We're going to have to figure out the "box" at the firewall since the rust is actually creeping up the vertical there above the floor pan. Also, we will be addressing the rust underneath the battery tray... I can see through there into the car in a couple of spots. Hoping I can just remove the battery tray, patch in underneath, and then fabricate a new battery tray. This should be interesting... but the good news is that once this is done I can declare her rust free, or as rust free as they get, anyway. Last edited on 01-08-2016 07:23 pm by answerman |
|||||||||
|
answerman Member
|
Ms. Jenavieve's engine is reassembled and back in. Last night I finally got to the point where I could fill up all the fluids and turn the key on the engine for the first time since last fall. Of course, no go. She's turning over but no fire. Tonight, I'll be troubleshooting more, but here's the current status: My timing light shows that #1 is firing right at 0 degrees (forgot to mark the Pertronix distributor position before the head came off, so I just set the engine at TDC and eyeballed the rotor to point at #1). Obviously not right, but you'd think it would be close enough to get a few puffs. Once I have more promising results, I'll adjust the distributor to the right position. Fuel pump (one of the Facet aftermarket ones) makes all sorts of clicky clicky noise so it's obviously got power, but I'm not convinced I've got gas at the carbs yet. I tried a shot of ether to see if that would catch, but nothing there either. Next step is to pull the fuel line from the T and find out if it's actually pumping. Oh, and the radiator sprung a leak sometime in the last few months while it was lying in the garage. Ordered one of the Champion aluminum replacements today since the old radiator had been repaired several times already, and I just can't see sinking any more money into a 42 year old radiator. It'll be weird to see that shiny aluminum in there but at least it'll work. Note to self, and anyone else who might be doing the same sort of work in the future: when you have the engine and transmission (4 speed) out, it would be a VERY GOOD IDEA to make sure you loosen the transmission fill plug while it's easily accessible. Don't wait till you put it back in the car like I did. I spent nearly an hour trying to get the plug loose (for all I know it was the first time it had been removed since 1974). Not much room to work in there. I finally ended up putting a jack under the transmission to support it, and then removing the nuts for the transmission support so that I could gently let the transmission down a couple of inches, enough to get a better angle on the plug with a box end wrench. Last edited on 05-02-2016 06:13 pm by answerman |
|||||||||
|
answerman Member
|
Kinda laughing at myself tonight. Two issues, one caused by impatience and the other by not paying attention for like the 12th time I've done this. End result: got Ms. J fired up tonight. Running a little lumpy but she is running. Can't do a whole lot more till my new radiator arrives... with the radiator leak I don't want to run her more than a few minutes. But I'm calling tonight a success (actually 2 successes, one having nothing to do with Jensen Healeys but I'll take my victories where I can). Now, what was I doing wrong last night? Well, regarding the fuel pump: I just needed to be more patient. After pulling the Pertronix wiring off the coil so it didn't get wrecked, I pulled the fuel line off the T and stuck a hose on it into a bucket. Turned the key to "on" and just let it click away... after about 40 seconds the clicking quieted and sure enough fuel flowed into the bucket. After having the system basically dry, apparently it takes a while to prime things back up. Connected the fuel line back to the T, turned the key on again and within seconds had fuel in the carbs. Good. So, now that I knew I had fuel: let's try timing again. I printed out Tim Engel's very comprehensive explanation of how to static time, which I ended up not using (you'll see why shortly). Just for fun, I went back and tried starting her again, and she caught a couple of times. Ooo! Very cool. So, I hooked up the timing light and had Mrs. Answerman turn the key while I watched... and the timing mark wasn't even visible. Huh? Ok, let's try the static again. I set the engine to TDC with a wrench, and pulled the distributor cap to see where the rotor was. Looked close, but retarded a bit. So I loosened it up and gave it a little twist to see if it made a difference. Tried starting her up and success! Barely running, but running. OK... let's hook up the timing light again. The mark is now visible, but about 30 degrees ATDC (obviously a guess, since the marks are BTDC but you get the idea). Headscratcher. I loosened the distributor up and gave it another twist, and started her up again. Better. Not perfect, but better. At least she was idling. Now I can take another look with the timing light... (this is where I admit to my not learning from previous experience) and the mark is right at 0 TDC. That can't be right... oh. Did I mention I hate my timing light? It has a knob on the back to set your advance and I always forget it's there. It is very loose, it turns if you just look at it, and of course that's cranked to something crazy like 40 degrees BTDC. So... turn the knob down to 0, try it again, and now things make more sense. It's idling at about 30 degrees BTDC. So, I gave the distributor a little more adjustment and now it's somewhere around 10 degrees BTDC which is in the ballpark of where I usually run it. Good enough for now till the radiator gets here and then I'll fine tune. Bonus (the unrelated thing): we have a couple of the Chinese 150cc scooters and they have been getting progressively harder and harder to start over the last year. Finally hit on a potential reason while Googling today (after cleaning the carbs, replacing the air filters, running Seafoam through them, etc): apparently, they are notorious for the valves requiring frequent adjustment. Nobody told me that. So, the reason I bring this up tonight is that if you want the polar opposite of valve adjustment on a Lotus 907, try it on a Chinese 150cc GY6 engine. Whole process took about 20 minutes per bike (and a good part of that was getting the plastic body bits off to get at the motor). 4 bolts and the valve cover comes off, loosen the locknut for the intake valve, back the adjustment screw out a few turns, stick a .005 feeler gauge in there, tighten the adjustment screw till you get a drag, tighten the locknut, pull the gauge out, and repeat for the exhaust valve. Easiest thing I've ever done, and they both start and idle instantly now. On both scooters the exhaust valve clearance was so tight that I don't know if it was ever closing. It's now on my scheduled maintenance list for the scooters. |
|||||||||
|
answerman Member
|
Wow, looking through old posts and realized I haven't posted in this thread in forever. I'll get some pics together and update soon, but the short version is that Ms. J got completely reassembled and had a very nice summer with very little repair required. Kind of nice for a change. Not planning on doing much with her this winter since, to be honest, there isn't much left to do. Plus, I acquired another project so Mrs. Answerman can have her own LBC, and this winter will be spent reassembling our "new" somewhat disassembled 1958 Nash Metropolitan convertible. Kind of the polar opposite of Ms. J: the JH is my "go fast" car while the Met will be more of a "looks nice, wins trophies at shows, everyone thinks it's cute, and if I can get it to go over 60MPH that's a bonus" car. |
|||||||||
|
UKJames Member
|
Glad to hear the JH is on the road again, I've enjoyed following your progress on this thread. There was a Nash Metropolitan in the next road to me, cute car. Interestingly it lived in the driveway of the house where they filmed 'Fahrenheit 451'. For those that remember it, it was the bungalow where the fireman lived. |
|||||||||
|
answerman Member
|
Another spring is here and Ms. J is on the road again. Did absolutely nothing with her this winter, as there wasn't really any reason to work on her and the Metropolitan kind of took up all my "throwing tools and cursing" time. But, the Met is finished, and I took it down to the British car clubhouse for our open house last week, and pulled Ms. J out as well since that's where she's been parked all winter. Then, they both came home. Here they are at our "mini-show", finally together.   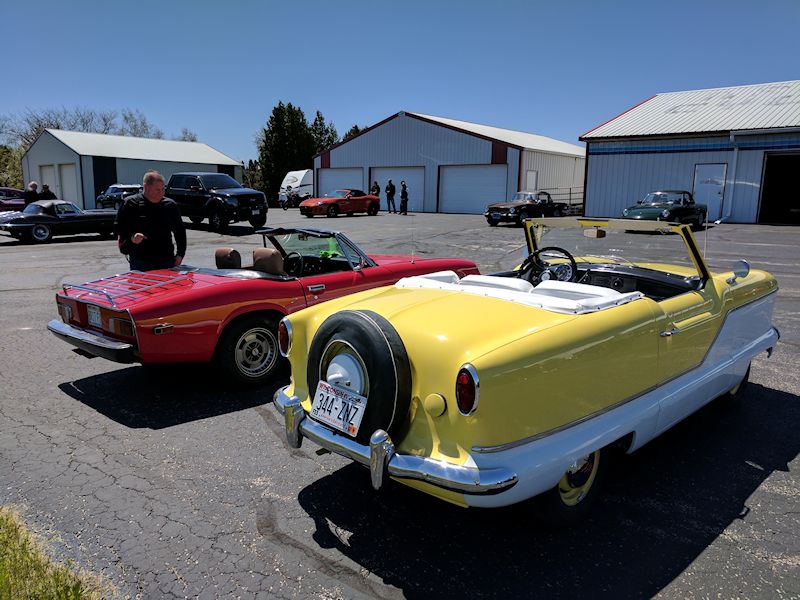 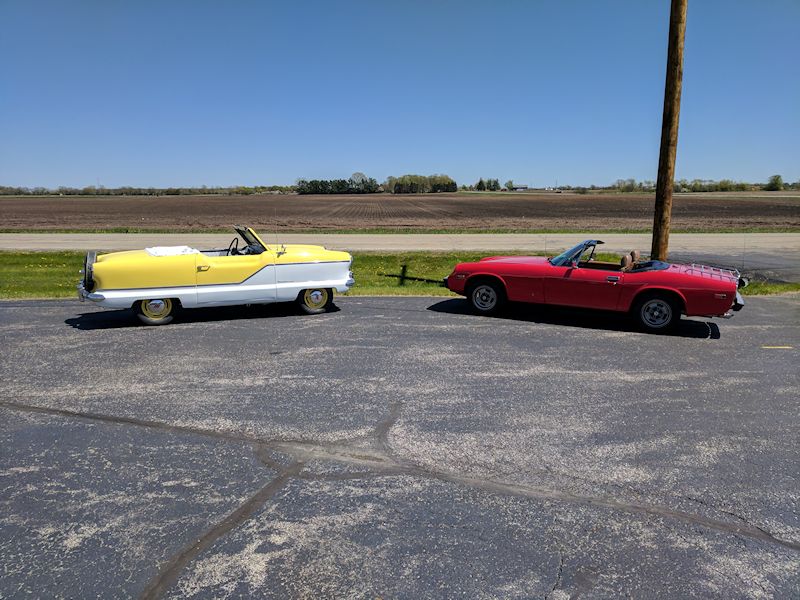 Small order of business for Ms. J over the next couple of weeks: install the new blue Gates Racing timing belt (it's been about 3 years and 10,000 miles) and at the same time replace her motor mounts with the Land Rover ones I bought almost a year ago to see if that helps with the whole "steering shaft through Delta 4-into-1 header" issue. The Rover mounts are a little bit thinner and should give me more leeway for adjustment so that the timing belt cover doesn't hit the bonnet. Once that's done, I'll be all ready to take her to Vermont for Jensen East. Last edited on 05-10-2017 06:30 pm by answerman |
|||||||||
|
allstateguy Member 
|
Great pix, glad you posted! |
|||||||||
|
redracer Member
|
Mike D'Olimpio at DELTA got some better engine mounts in that will likely fix your "height" adjustment. The former ones that were sold had to short a tread for shimming. |
|||||||||
|
answerman Member
|
It's still a project even though I've been driving her for over 5 years, right? So this is still an appropriate place to post? Anyway, over the next couple weekends I am FINALLY going to get around to installing the stuff I've been sitting on for way too long. It's time to get the blue Gates Racing timing belt installed: it's not doing any good having occupied space in the boot since last spring. Also, I need to install the new motor mounts (Land Rover) that I've had for almost 2 years. The logic behind this (ok, it works on paper) is as follows: I currently have the aftermarket motor mounts from Delta from about 3 years ago, in addition to the Delta 4 into 1 header. When I shim the motor mounts to allow clearance for the steering shaft through the header, it raises the engine up enough so that the timing belt cover contacts the underside of the bonnet. The temporary solution was to remove the top half of the cover, but in doing some measuring and playing with it I found that if I can actually lower the right/passenger side of the engine, I don't have to shim the left side as high since I can get more of a "twist" to the engine rotation. So, I'm going to try the Land Rover mounts since they are not quite as thick as the Delta mounts. I'm probably not going to put the cover back on anyway (the bottom half will come off when I do the timing belt change) but this seems to be the time to experiment with it. Finally, I need to replace the external O-ring on the distributor shaft to see if that solves my oil leak. What's happening is that I've got oil pooling in the little "pocket" on the block outside cylinder #2 (opposite the spark plug side), which then makes its way down to #3, #4, and out. I've verified that it's not the cam cover gasket or the head gasket, which basically leaves the distributor if I'm not missing something here. Hopefully the new O-ring will be the solution. That should be it for Jensen-related stuff for the winter: she'll then be ready for spring and I can move on to project "B" which is to (a) rebuild the front suspension on the Metropolitan, which is its own adventure (though it looks to be much simpler than the Jensen), and (b) install the 3.90:1 differential pumpkin that I picked up at British car show this fall (it's from an Austin-Healey Sprite) to replace the stock Metropolitan 4.22:1 pumpkin. Hopefully, I'll be able to get the Met up over 60MPH with this mod. Every little bit helps, right? Last edited on 12-28-2017 04:40 pm by answerman |
|||||||||
|
redracer Member
|
Good luck with the "shimming". As for the distributor oil leak, it is much more likely from the seal on the spinning shaft itself, located below the weight plate. Removing the shaft is not too difficult; first, knock out the pin holding the drive gear on, being sure to mark which side goes on which side of the shaft(so you don't get your ignition timing 180 degree off upon reassembly). You can now knock th shaft up through the top of the distributor and see the seal(some early J-Hs did not even have a seal!!). |
|||||||||
|
answerman Member
|
I'll take a closer look at the distributor when I have it out, Bruce. It's a reasonably new distributor from Delta, bought it a little over 2 years ago, came with Pertronix preinstalled. So, I would hope it's not wear since it's only got about 3000 miles on it since installation. Honestly, the reason I'm suspecting the external O-ring is that I don't remember if it actually had one installed when I installed the distributor. Easy fix first, then I look further. Unless you have another idea of where the oil leak could be coming from. |
|||||||||
|
redracer Member
|
Almost forgot; while you're at it, shim the pressure relief valve. Knock out the split pin into the distributor shaft hole, and add just under 6mm to the spring(the washers that the cam cover bolts used are a perfect size--maybe 3 washers will do it) |
|||||||||
|
Brett Gibson JH5 20497 Member
|
Bruce, why shim the pressure relief valve, ? I assume it would increase oil pressure, but isn't that a predetermined setting from the factory, and if you have decent oil pressure why would you do that. ? I have an engine I just rebuilt and if this is an improvement then I would make the mod. but would like to understand why first. Thanks. Brett |
|||||||||
|
redracer Member
|
Yes, increasing the oil pressure. The "factory" had the spring set for 55psi., which is really too low for a 7000 redline(rule of thumb is 10 psi/1000rpm. All the blow by oil goes back down into the sump.). It's not going to hurt anything and will give you the protection at higher revs. |
|||||||||
|
answerman Member
|
Thanks for the explanation, Bruce (and thanks to Brett for asking why). I'll look into it when I have the distributor out. I drive pretty sedately compared to most here so it's probably not that big of an issue for me (I rarely see over 5000RPM, much less 6000RPM) but since I'll have it apart anyway it would make sense to do it now. Right now, after the top end rebuild a couple of years ago, the hot oil pressure at cruise is right about the 55 to 60 psi you mentioned. Going back to the original question: does anyone have a size for the internal O-ring in case I do need to replace it? I have the external one already from Delta. Last edited on 12-29-2017 04:09 pm by answerman |
|||||||||
|
answerman Member
|
Well, the distributor portion of things just got more complicated: more below. First, I did get the timing belt changed to the blue Gates Racing belt, which was the first thing I wanted to do. Also, I finally joined the dark side of all you JH owners and left the belt guard off on reassembly. So, that's one thing checked off. Now, about the distributor. I pulled it out and I appear to have leaks from a couple of different places. First of all, the external O-rings were indeed in place, but it was still pretty oily on the shaft past the O-rings. Not sure just how much oil should be stopped by them but some is definitely getting through. More troubling, though, is that the distributor had quite a bit of oil inside the cap. So, it appears to be leaking internally too. What complicates things is that it's not an original Lucas 25D distributor, but a Pertronix Flamethrower replacement purchased from Delta. So, there seems to be some question regarding whether there's even a seal in there, or if it's the same as the Lucas distributor. I talked to Delta today and they are going to look into it and get back to me tomorrow. I found a source for the Chicago Rawhide internal seal for the Lucas 25D, but before I start ripping things apart I want to make sure that the Pertronix distributor accepts the same seal. Also, while I'm in there, is there a seal inside the oil pump housing that I should be worried about? Confused? Stay tuned. And if anyone has any other suggestions, please feel free. |
|||||||||
|
redracer Member
|
Not sure why one would need a Falmethrower distibutor as the regular Lucas 25 or 45 with the Petronix inside work fine? |
|||||||||
|
answerman Member
|
It was just a simpler solution at the time, Bruce. I knew I wanted to replace the distributor anyway and it was just easier to have Delta get me the Pertronix distributor than to buy a new/rebuild Lucas 25 and install the Pertronix module. |
|||||||||
|
redracer Member
|
Rebuilding the Lucas distributors is fairly easy, so if you still have it you may want to go that route. |
|||||||||
|
answerman Member
|
We'll see what Delta has to say first. Also, about my other question: is there a seal of some sort inside the oil pump/aux shaft housing that I should be worried about while I'm in there? |
|||||||||
|
redracer Member
|
yes; you already have the Chicago Rawhide # for the inner seal(according to your earlier email) and the outer "O" ring is easy to replace. If all this seems too much, I'll be happy to do it.(I'm sure Mike D'Olimpio at Delta could do it as well) |
|||||||||
|
Brett Gibson JH5 20497 Member
|
I must be missing something with my Distributor's, I have taken them apart, in the past, and even have a spare on the shelf, and the only O-ring I have come across is on the outside dizzy body, None inside.... ???. Can you share a photo of this elusive little bugger. Thanks . Brett |
|||||||||
|
redracer Member
|
The inner item is a seal, not an "O" ring. It is at the bottom of the interior (visible after removing the centrifugal plates, etc. ) where the shaft protrudes through the hole. Now, many of the early distributors did NOT even have a seal as these same distributors were used in other vehicles that had the distributor mounted vertically so any "dripping" oil would go back down the shaft and not be a problem. I believe Tim Engel has covered this topic earlier. Please use the "SEARCH" tab at the top of the JHPS forum to help in the future: The shaft spins on 2 steel bushings and the seals I use to replace them need to have the upper steel bushing pressed down slightly. It is imperative that the top of the seal be BELOW the bottom "shelf" of the inner distributor, or the rubbing from the large thin metal washer above it will cause it to be ruined. here is Jim Ketcham's answer: im Ketcham Member Joined: 03-13-2005 Location: Salt Point, New York USA Posts: 192 Status: Offline You need an internal oil seal in your distributor. This has been covered in past posts here. From previous post from Mark Rosenbaum: DISTRIBUTOR INTERNAL OIL SEAL Description: Shaft seal, 0.50" shaft, 0.75" bore, 0.125" height. Material: Fuel- and Oil-resistant. Used on: Lucas 23D, 25D distributors. OEM P/Ns: Jensen: None. Lucas: Unknown. Source: Chicago Rawhide CR4912 (exact replacement). [Verified fit.] Source: Transcom TCM 13x19x3VG (nearest metric size). Source: McMaster-Carr 9505K17 (different seal style). [Verified fit.] |
|||||||||
|
answerman Member
|
Right. That's the post I found that gave me the Chicago Rawhide part number. In the meantime, I haven't heard back from Delta yet so we'll see what they have to say. I also noticed that there may be a leak at the oil cooler sandwich (not sure if it's a leak or if it's just oil getting there from another leak) so I'll be picking up a Fram 3682 oil filter to extract the rubber gasket from it per Brett's suggestion a while back. Another "as long as I'm in there" project. Last edited on 01-09-2018 04:24 pm by answerman |
|||||||||
|
answerman Member
|
And... not to beat a dead horse, but I'll ask this one more time: is there a seal of some sort inside the oil pump/aux shaft housing (NOT inside the distributor) that I should be worried about while I'm in there? |
|||||||||
|
redracer Member
|
There is no seal, "O" ring INSIDE the hole on the "auxiliary oil pump housing. Just the 2 for the distributor, the outer "O" ring and the inner seal. As for your possible leaking by the sandwich between the oil filter and the main housing, it may very likely be the square cut "O" ring on the sandwich located on the opposite side from the oil filter--DELTA carries these. |
|||||||||
|
answerman Member
|
Thanks, Bruce. That's the clarification I was looking for regarding the auxiliary housing. Regarding the oil cooler sandwich, that's what I was referring to: according to Brett, you can pick up a Fram oil filter and remove the rubber ring gasket from it to use as the square cut gasket between the oil cooler donut and the main housing. |
|||||||||
|
answerman Member
|
Well, just talked to Delta: the initial diagnosis is that the Pertronix distributor doesn't have an internal seal. So, as Jamie Hyneman would say, "well, there's your problem!". Mike at Delta is looking at solutions yet. |
|||||||||
|
answerman Member
|
And it's final: the Pertronix distributor has no internal seal, nor does it have an allowance for one. So, we're back to the drawing board. I need to look through my boxes o'parts and find my original Lucas 25D and see about having it rebuilt. If I'm going to all this trouble, I want everything in there to be as new and fresh as possible. |
|||||||||
|
answerman Member
|
Well that was easy! Ms. J's original Lucas 25D was in the first box I looked in. So, next step is to decide if I want to rebuild it myself or if I want the pros to do it. Like I said in the last post, I want to get all of this as "new" as possible so that I don't have to revisit it any time soon. |
|||||||||
|
Esprit2 Member
|
Jeff at Advanced Distributors can rebuild it for you. Also talk to him about modifying the Pertronix distributor to accept a seal. Jeff is very good, but he's opinionated. I can already hear him insisting that no other Lucas distributor needs a shaft seal, so the Lotus-Lucas doesn't either. Just politely let him know that the Lotus unit is the only one mounted horizontally, and it does need a seal. http://advanceddistributors.com/wordpress1/ He's in Shakopee, MN. Regards, Tim Engel |
|||||||||
|
answerman Member
|
Sent the distributor off to Greg at the club store: he didn't have any cores for rebuild in stock. Having it rebuilt by Advanced Distributor with the proper seals, etc. and also a Pertronix II ignitor. While I was on the phone with Delta, I did have them send me a new square cut O-ring for the oil cooler sandwich, so hopefully between that and the distributor I can finally solve these leaks. Last edited on 01-17-2018 10:35 pm by answerman |
|||||||||
|
answerman Member
|
Rebuild of the distributor is underway: expect to have it back in a couple of weeks. An update on the other thing I mentioned: the square cut O-ring in the oil cooler ring was sadly in need of replacement. Brittle to say the least. The new one is much more flexible and quite a bit thicker, so hopefully that'll help. |
|||||||||
|
answerman Member
|
According to tracking, I should have my rebuilt distributor back today. So, tonight's the night to get it all back together. Really looking forward to a hopefully leak free distributor. Once it's in, I'm sure I'll have to button down the ignition timing again (I made sure nothing moved when I installed the new timing belt, but the chances of it being perfect are pretty much none I assume). That'll complete my scheduled winter projects. While I was waiting for the distributor to come back, I refreshed the suspension on my Nash Metropolitan with all new urethane bushings, new shocks, and new tie rods, and cleaned up and painted all the associated stuff like control arms and coil springs. Since I finished that up last weekend, and since my soft goal was to be done with all the car-related stuff by March 1 or thereabouts, I have a little extra time on my hands. So, I think I am going to take one final shot at getting Ms. Jenavieve's bonnet perfect. I've painted the car twice over the past few years (the first time was kind of a learning experience) and while I'm happy with the paint on the rest of the car, the bonnet still isn't right... there's a little gouge right near the hood bulge that I managed to do while I was painting it last time, and the front edge is a little bumpy with some flaws showing through. I'm going to take it off, bring it home, and spend some quality time getting it properly sanded and leveled, and then give it one last shot with the gun. Why not, right? |
|||||||||
|
answerman Member
|
Well. Ms. Jenavieve has a Lucas 25D distributor once again, with Pertronix II. But not without a few foibles along the way. I went down to the clubhouse last night all ready to install the rebuilt distributor. Got there, organized a few things, and went to "test fit" the distributor, and realized... crap. The ignition wires were still attached to the Pertronix distributor that I removed back when this started. That would be ok, except that said distributor was on my workbench at home, 30 miles away. Again, crap. So, I think "well, I can at least get it bolted in and if I really want to try finishing it up I could run to the O'Reillys a few miles up the road and pick up some wires". Right? Ok, let's do that. So I go back to the test fit and realized.... once again, crap. The mounting bracket for the distributor is ALSO attached to the Pertronix distributor. Criminy. So, obviously I wasn't able to do much last night. I packed up a few boxes of odds and ends that I had left there from the Metropolitan refresh, and decided I might as well take the bonnet off and take it home since I had driven my Expedition down for just that reason. So, that was last night's accomplishment: drive 30 miles each way to bring back the bonnet and a bunch of leftover parts. Whee. We get to today. This time I remembered to grab the old distributor with everything attached. I get down there, and go through the gymnastics of trying to get it test fitted in place: set the engine at TDC and make an educated guess as to where the rotor should be pointing. Note to self: initial ignition timing setting would be much easier with two people, one to turn the key and one to hold the timing light. After a few failed attempts to start her, rotating the distributor a little in either direction, I realize that it's popped out. Why? Because the 6mm bolt that holds it in the bracket has severely stripped threads in the center of the threaded area. Well, that explains why I can't get it to stay in one place. So, off to the local home improvement store to get a replacement bolt (found one, whew) and back to the clubhouse. Now that I have a bolt that actually clamps things properly, I go back to the initial timing dance. After a few attempts (and of course attaching a battery charger because the battery has run down with all the failed attempts), I got to where she "tried to start". So, a few more tries and I got her to the point where she would stay running. FINALLY I can now hook up the timing light and see that I'm advanced about 50 degrees. A few more adjustments, and she seems to be OK at about 10 degrees. Good enough till I can take her out on the road for a proper test. Whew. Now just to work over the bonnet and get it looking proper. |
|||||||||