| ||||
> Jensen Healey & Jensen GT Tech > Projects > 1973 Jensen Healey #10777 Lotus "Colin Chapman" Edition "Gold Leaf" Build |
| ||||
> Jensen Healey & Jensen GT Tech > Projects > 1973 Jensen Healey #10777 Lotus "Colin Chapman" Edition "Gold Leaf" Build |
| Moderated by: Greg Fletcher | Page:   |
|
|||||||||||||
| 1973 Jensen Healey #10777 Lotus "Colin Chapman" Edition "Gold Leaf" Build | Rate Topic |
| Author | Post |
|---|
| Posted: 04-21-2020 06:50 pm |
|
21st Post |
|
Esprit2 Member
|
Off Topic, but... I've owned a number of Lotus 9XX powered cars, and worked on a lot of the engines... I feel I know them. But my favorite Lotus is the Europa, and I've logged over 400,000 miles using Europas as daily drivers. That picture you posted of a Europa in Post #5 is really pushing my buttons. I would love to have a Type 47 (Europa factory race car), and that green Type 54 S2 has 'the look' of one if you ignore some details. If you know the owner and they're open to it, I'd appreciate a name, if not an introduction. BTW, my current Type 65 S2 has Revolution wheels. The similar but different wheels on the Lotus racers you pictured are bespoke Lotus magnesium race wheels. The Elan 26R (factory race car) and Europa 47 racer did use them, but they're rare/ hard to find. But the Revolutions have the look if you squint. Regards, Tim Engel Last edited on 04-21-2020 09:47 pm by Esprit2 |
||||||||||||||
| |||||||||||||||
| Posted: 04-21-2020 11:05 pm |
|
22nd Post |
|
discogodfather Member 
|
Thanks Bruce, I will do that mod on the brakes. Makes sense. Yeah Tim, I had a feeling this will be the last ride for this head. It's good because it's one of the flattest heads I have removed ever, good gasket surface. It's bad because of all the fancy porting work done to it so many years ago. Last edited on 04-21-2020 11:05 pm by discogodfather |
|||||||||||||
| ||||||||||||||
| Posted: 04-21-2020 11:15 pm |
|
23rd Post |
|
discogodfather Member
|
Esprit2 wrote:
His name is Stefan and he's in Germany, posts under "Mecky" on the Lotus Europa Community board. He was selling some revolutions years ago and talked to him a bit about shipping but it was a little too expensive to the States from where he is at. I think he still has the car. The outfit is called YART racing. His instagram: https://www.instagram.com/yart_racing/  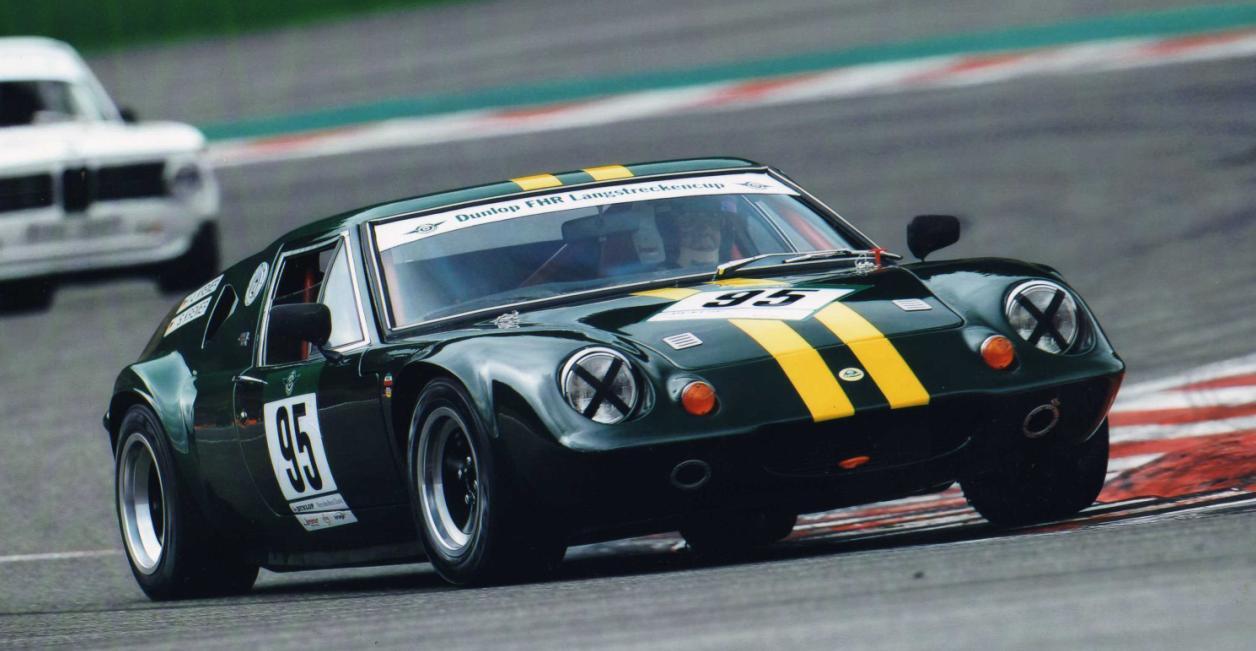 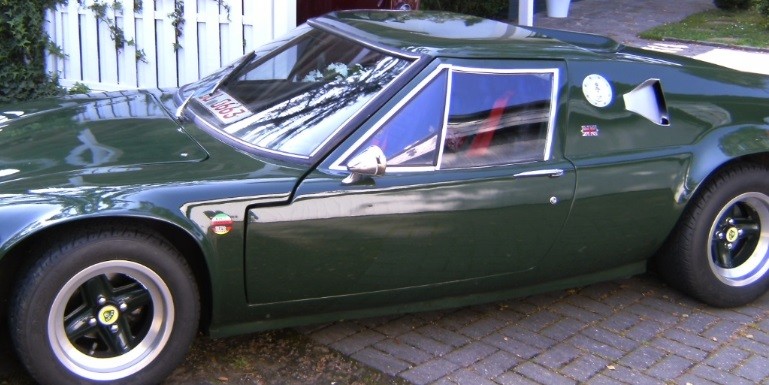 Last edited on 04-21-2020 11:21 pm by discogodfather |
||||||||||||||
| |||||||||||||||
| Posted: 04-22-2020 03:54 pm |
|
24th Post |
|
noomg Member
|
Tim, If you've got 400,000mi in Europas you're either small of stature or a contortionist. I'm a bit surprised that being a Lotinista you haven't run afoul of the Super Seven. One thing they both have in common is you don't really sit in them you wear them.
|
|||||||||||||
| ||||||||||||||
| Posted: 05-08-2020 10:37 am |
|
25th Post |
|
discogodfather Member
|
Got the valve job done. Cut a 3 angle with a friends Neway tools, then resurfaced the valves with his Gizmatic (also a Neway device). Hand lapped the valves afterwards. 16 valves is alot and these heads are so small and elegant. The seats and valves are such high tolerance. Lots of respect to the people working on these- they really are like swiss watches. Took my forever to get everything cut, the seat width correct, and the vacuum testing done. The valves on this head, especially the exhaust valves, seem different than stock valves. They seem thinner at the base (not due to resurfacing, the margin is the same) when comparing to another set of valves I know were stock. All the springs in the head are also not stock, maybe the old Dave Bean sourced heavy duty valve springs. Much thicker and stronger than stock. Next up: finished shimming the valves and ordered a new set to new sizes. Going to degree in the whole thing with a very nice setup from comp cams a friend loaned to me. I have some of the old marks on the vernier pulleys, so I will be able to see how badly these were off from a correct timing. ARP studs are all installed. 1 quart accusump also is plumbed but still trying to mount it. 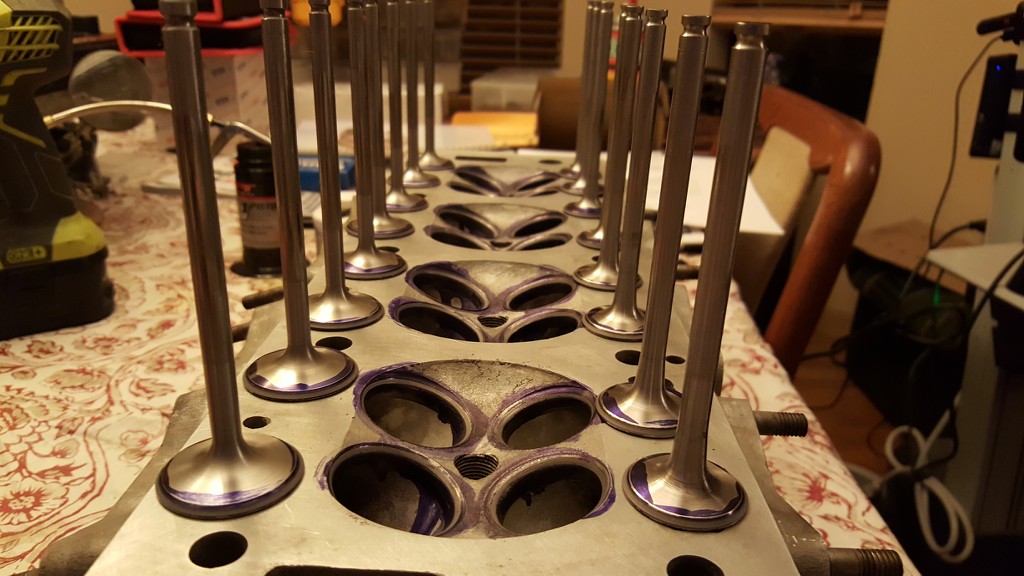 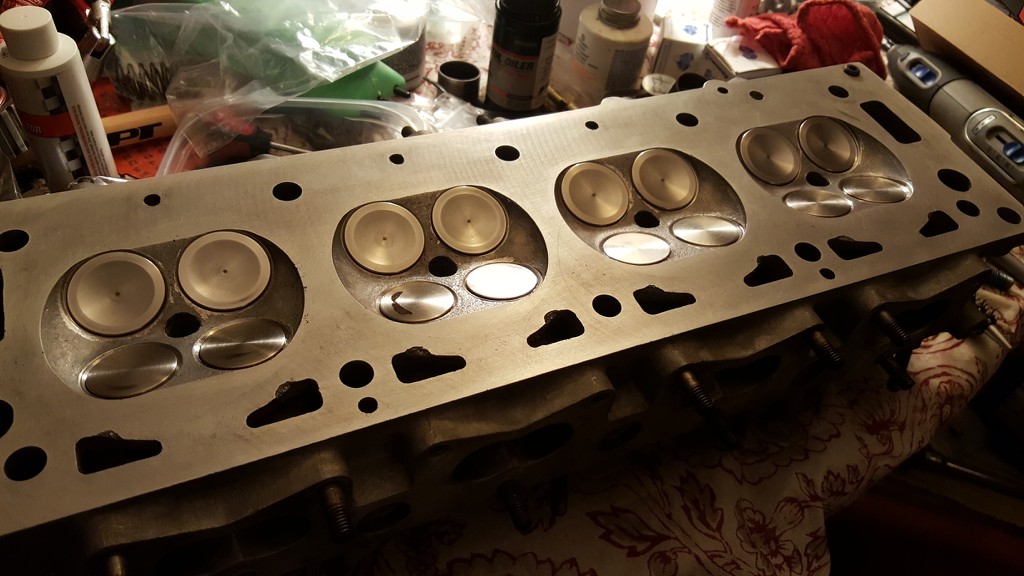
|
||||||||||||||
| |||||||||||||||
| Posted: 05-08-2020 05:36 pm |
|
26th Post |
|
mtechwim Member
|
That looks super 😁
|
|||||||||||||
| ||||||||||||||
| Posted: 06-28-2020 05:34 am |
|
27th Post |
|
discogodfather Member
|
Latest installment of the saga: Got her all together and degree'd the cam to a very fine resolution. Starts with ease now without any choke and hardly any priming or throttle. Had her out the last few weekends doing some tuning with the new wideband setup. Was starting to do some 4500-redline pulls to judge the top end throttle response and just as I was coming home of the freeway she stuttered and make some pops and then went to really low power, then shut off. Barely got onto the shoulder as I went for the nearest exit. In the last 20 years I have forgotten my cell phone at home maybe two or three times. Here was the forth. I found myself desperately trying to get her started with no luck. Plenty of gas, the entire ignition system brand new, and everything basically together and tight. No puddles of fluid under the car. No loud noises or horrible sounds- the starter just spun her around and around. I had a nervous breakdown in sitting on the side of the road, with the cars wizzing by at 90 mph. This is on 280 north right at the border leading into SF, a 6 lane freeway. I thought the worst- I broke a valve, something had slipped on the cam pulleys, a rod was loose- every nightmare flashed before my eyes. I took time to compose myself and realized I was only about a 1/2 mile from home. I put on the emergency lights and ran back home, phoned AAA, and got a tow. Took my other car and pulled up behind her. No cops, no nothing, as if no one noticed. She had been sitting there for at least an hour and a half. Tow guy was nice and we towed it back to my driveway. It was getting late so I let her sit, but broke down at around midnight and couldn't sleep thinking about what the hell was going on. I ran out in the night and did a compression test- 150 psi all the way around! So no major problems, I was so relieved. Today I tested spark- nothing. Cylinder #2 had a little, but the others nothing. I thought about my "custom" Lucas 43D I had ordered from the UK and then machined an oil seal recess for. So far it hadn't given me any trouble at all. I suspected the advance curve to be not great or well matched to a Lotus 907, but nothing major. I took the distributor out and set up a bench test with a 12v battery. I must have been a little tired because somehow I think I crossed a wire using some alligator clips, and as I turned to dizzy to see if the switch was still good I saw a puff of black smoke. YIKES. Now I couldn't figure out if the switch was bad before I had smoked it, but it did fire off fine for a few seconds. I felt like jumping out the window for a few minutes, then I again gathered myself and dusted off the old original distributor. I had rebuilt it before I got the new 43D, replacing the oil seal because it was leaking badly. I had stripped out my old Petronix Ignitor I years ago, and still had it in a box. I thought I had toasted the Petronix, but something told me to give it another shot. But it all back together and returned to the car to install. Things started to get super weird. I could not, for the life of me, get the distributor to snap into the socket and get the dizzy wheel to spin the rotor! It was as if something was not meshing in there, the dizzy pulley spun around and around and the rotor didn't even twitch. I always had problems with this in the past but it always eventually popped back into place. Getting frustrated, I pulled everything out and got the 43D back in there, and viola- it too DID NOT MESH! What was happening here? I felt completely lost. Then I had an epiphany. I had noticed that the dizzy pulley, before all this, was having some problems centering the cam belt. The cam belt seemed to be drifting towards the engine, and was off the pulley by 1mm or so. Since I had replaced the tensioner with a setup from Gary Kemp, I had always chalked this up to being a tel tracking issue with the newer style single piece tensioner wheel with the integral Flennor bearing. But wait a second- was the pulley wheel drifting outwards, away from the engine? When I removed the dizzy pulley months ago, I remember tapping on it with a hammer. So I got a rubber mallet, and gently tapped it back in towards the engine. It floated a few mm's and suddenly all problems were solved- the distributor now could mesh up with the drive cog, the belt was back to tracking dead center, and life made sense again. So I smoked my new 43D's switch, and now am running the old converted 25D with a new oil seal and my old Petronix I thought was dead. LOL. Funny times, but I will take. It caused me to realize this fact: the original advance curve and centrifugal weights is far superior to the "mix and match" mystery setup on the new distributors that these companies claim works with the 907. She is running a lot smoother and the ignition advance, even though it seemed to read the right degrees statically at the right rpms (around 5-7 degrees at idle, up to about 25 degrees at 2700 rpm) the curve is a lot different. Power and progression is better. I also switched away from my .7 ohm dry coil and but in a Lucas wet coil, I think a DB110. Running real nice. What an adventure for a weekend..........
|
||||||||||||||
| |||||||||||||||
| Posted: 06-30-2020 03:52 am |
|
28th Post |
|
discogodfather Member
|
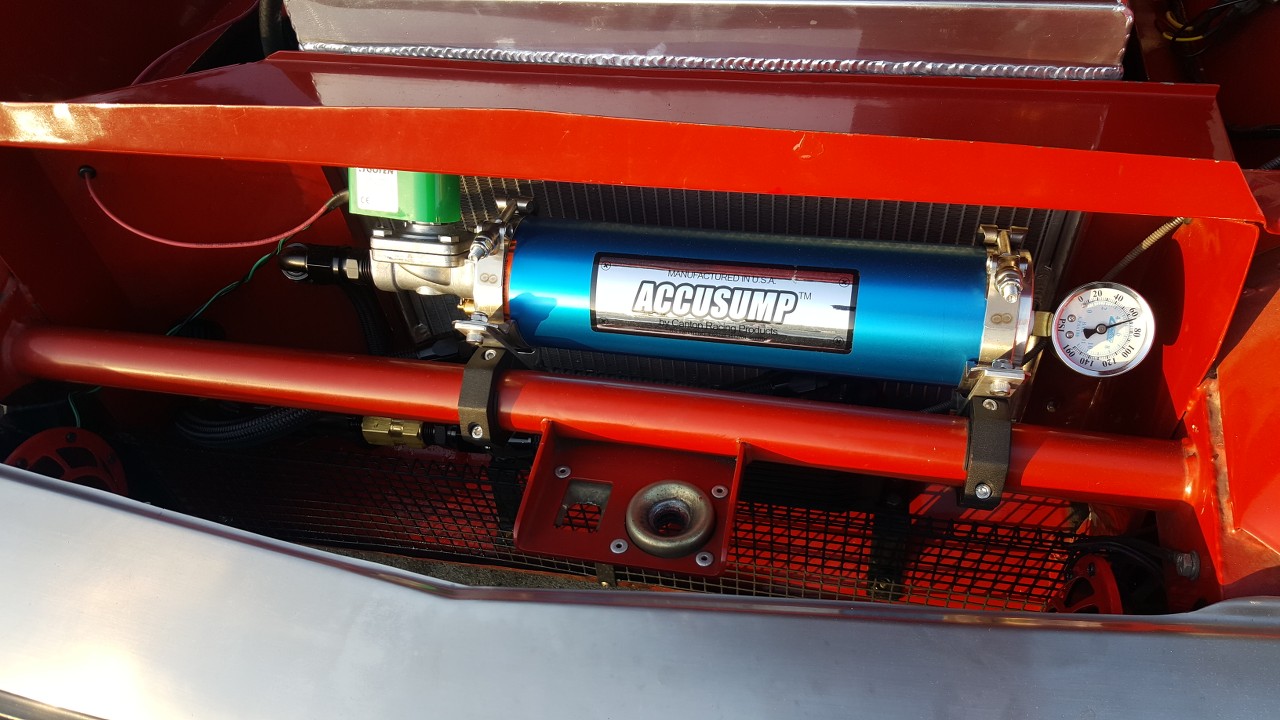
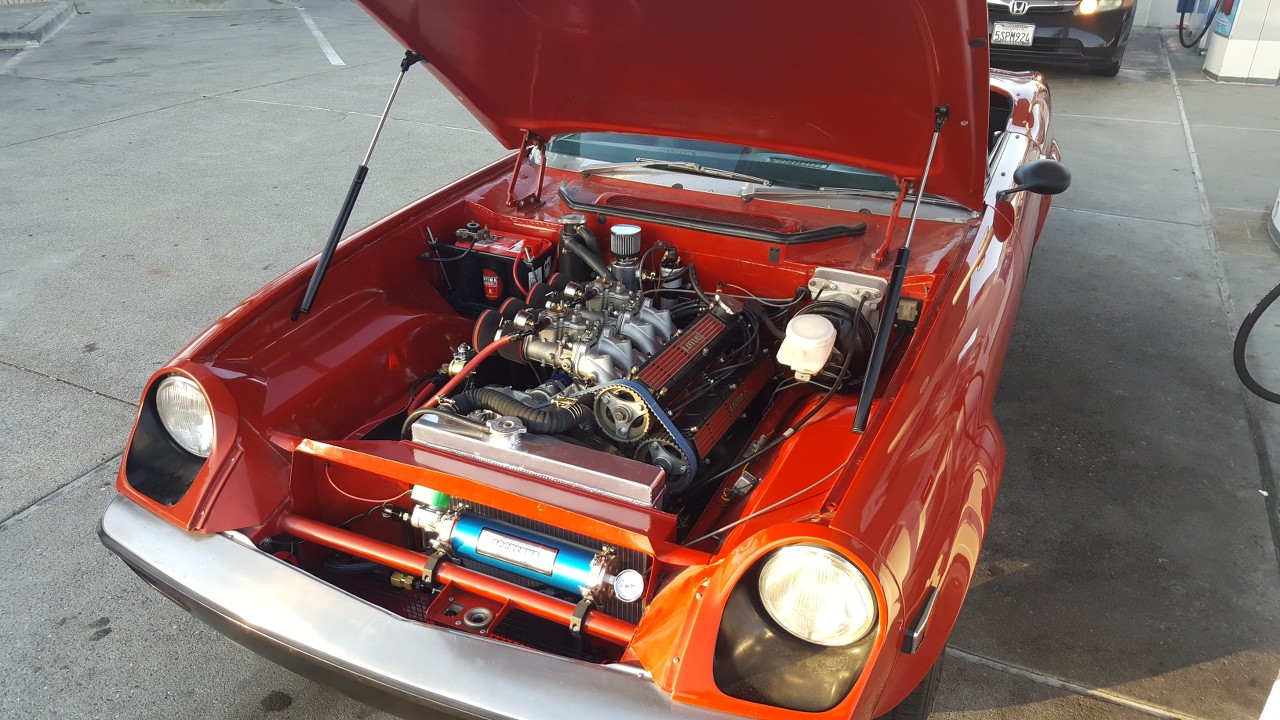
Looking good, also have the accusump setup installed and working great. A 1 quart unit mounts perfectly in the front of the radiator above the front brace bar. Gives me about 25 psi on cold starts. I got the electronic valve but with manual activation on the dash. You can see the gauge scheme I went with under the dash basically inside of glove box. Wideband, Amp meter, fuel pressure (an electronic gauge). Wired everything independently of the stock harness so no bad splices. When I don't need the info, I just close the glovebox. Does kill some storage space but I travel light with basically just the insurance info and a users manual. You can see the wideband is a speedhut unit and it works great, although I have to rev it to about 5k to get it to turn on. It's face was made up to look like an old smiths gauge. Matches pretty good, just like the Stewart Warner Deluxe's. Still running really long intake trumpets with some pipercross socks on the ends. I replumbed the crank and valve vents to go to a catch can, and that works well but it still stinks a bit like a race car, especially when hot. Decided to go to a Pipercross 600 series cold air intake airbox setup, will be my next project when it finally ships in. Going to a shorter set of full radius trumpets to see if I can optimize higher end performance. 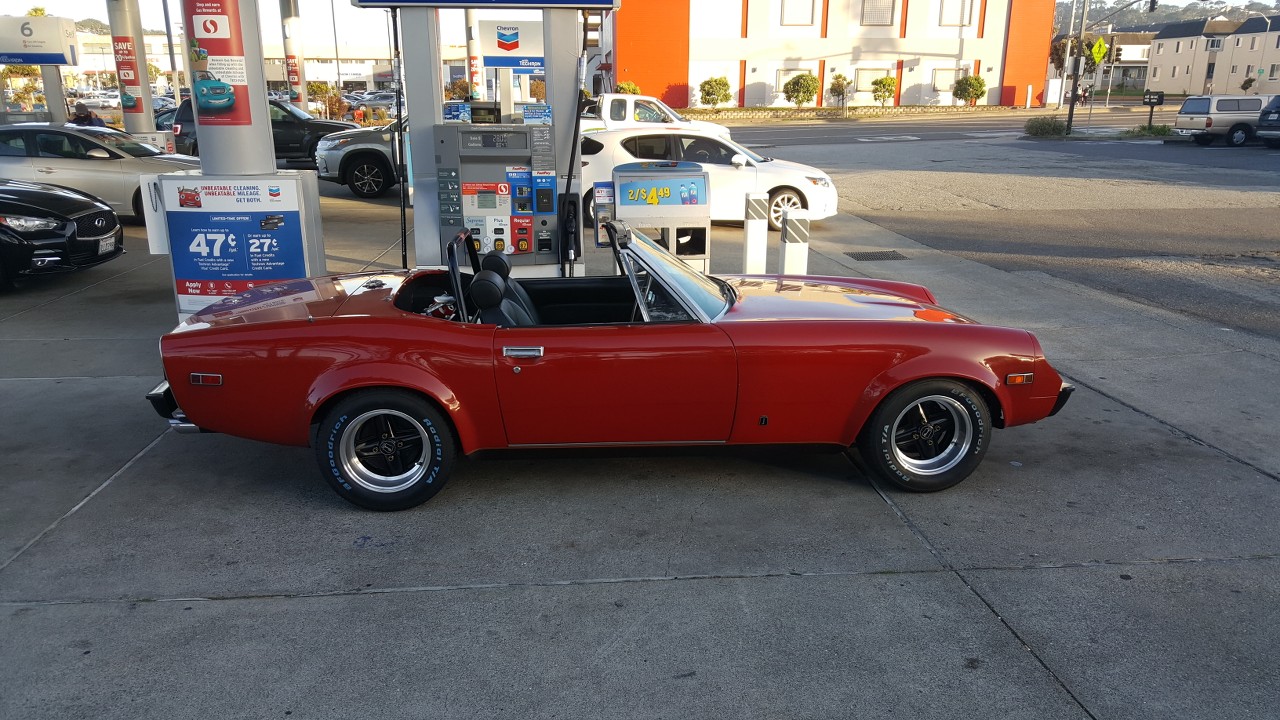  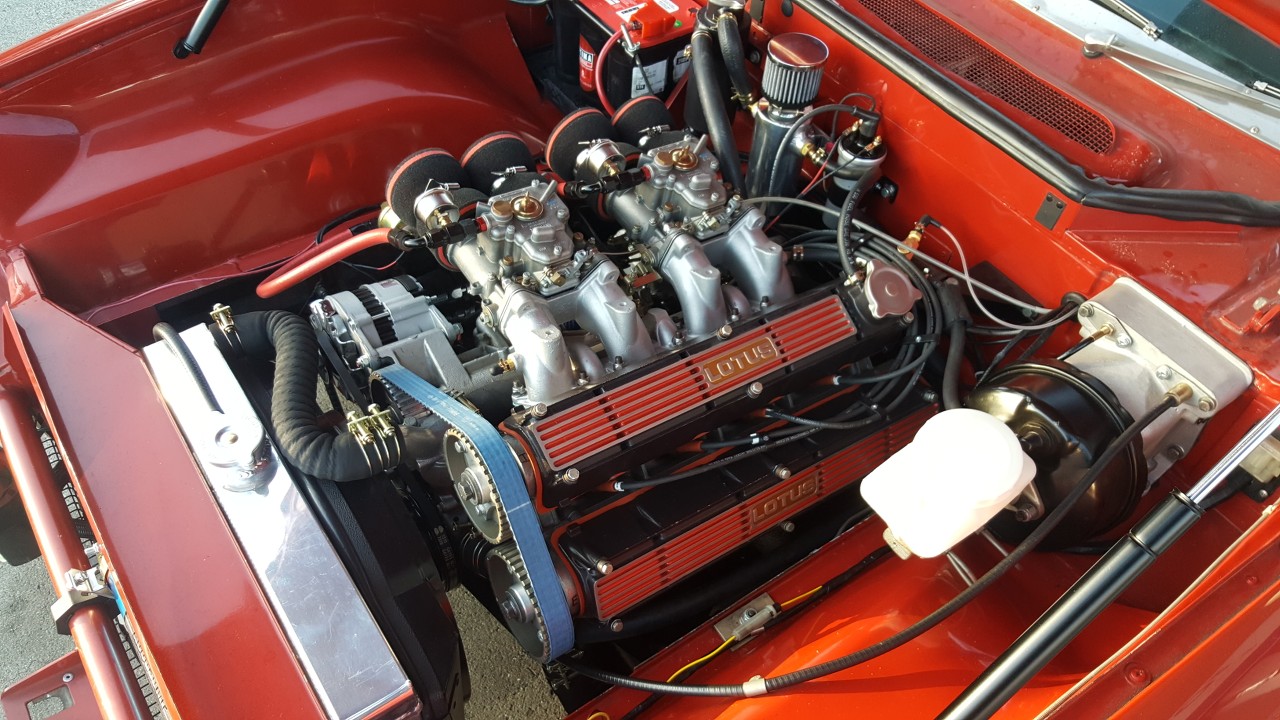 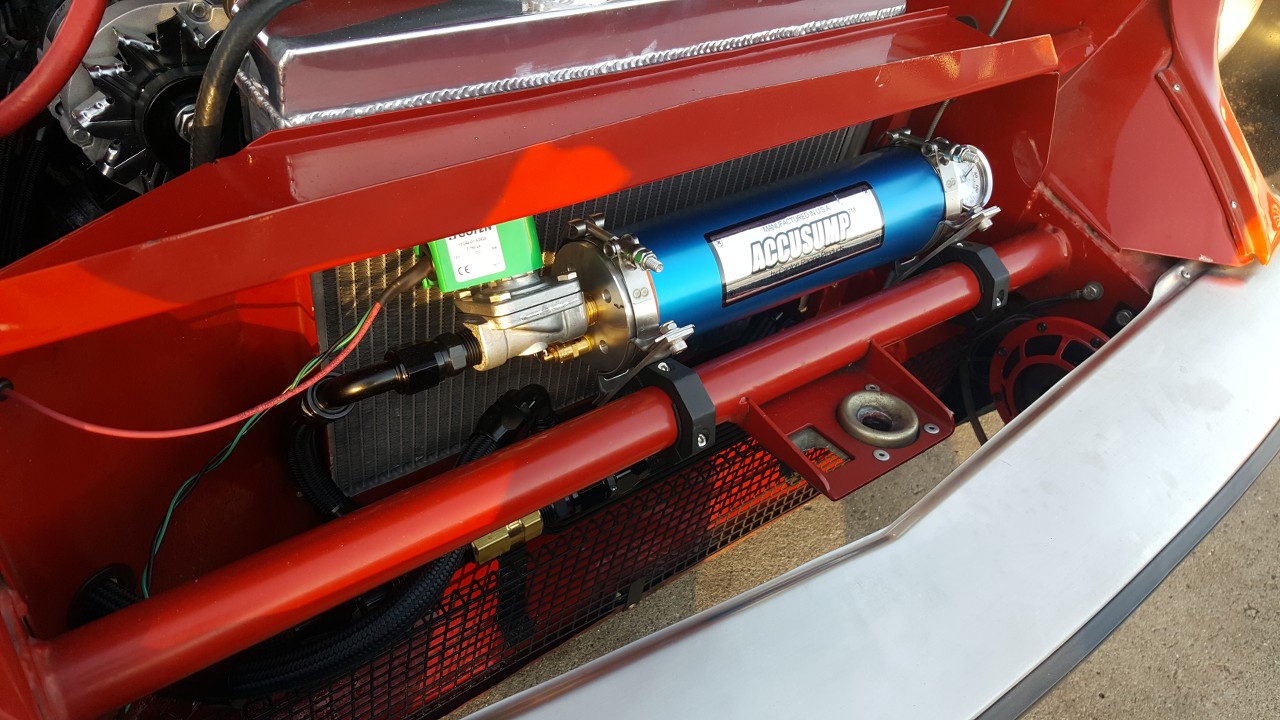 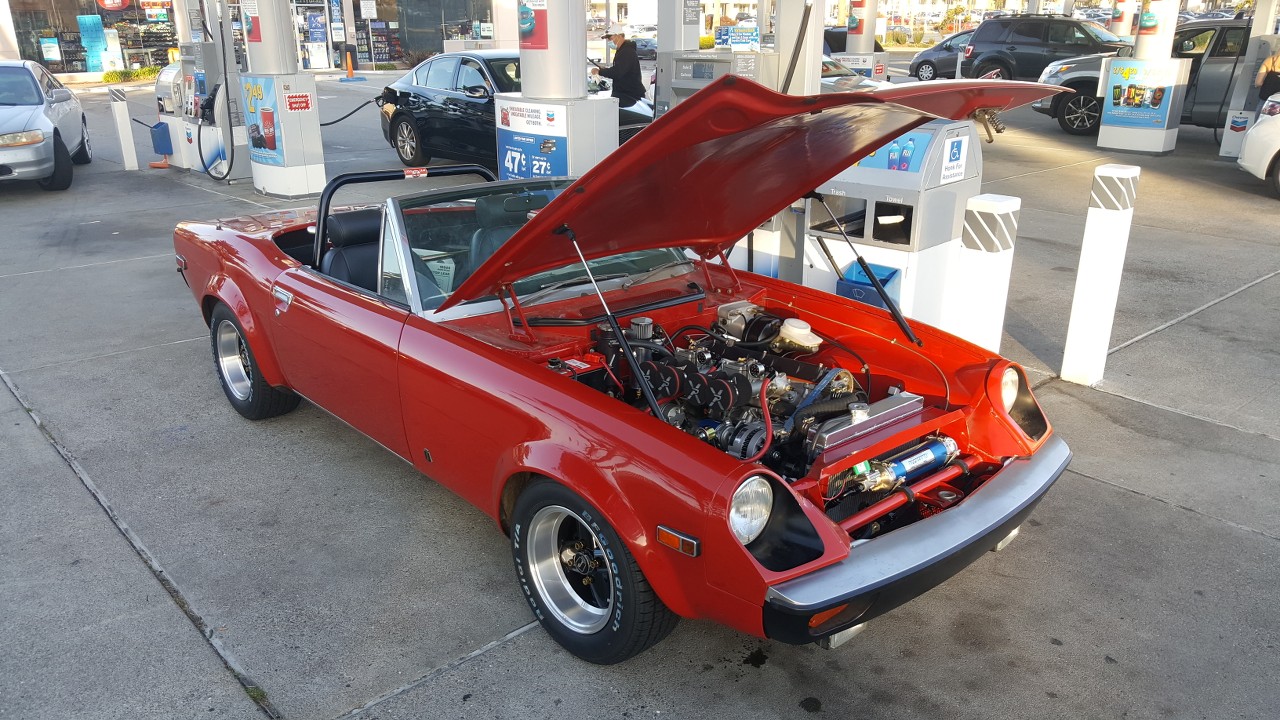 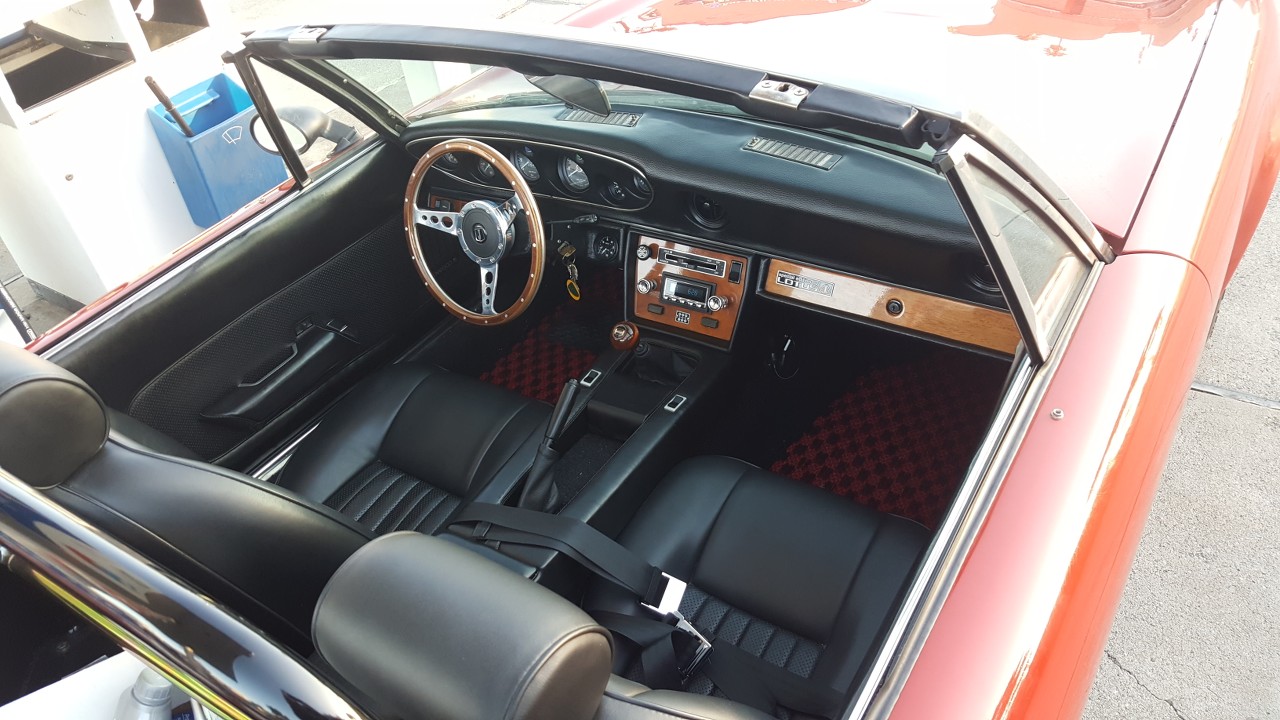 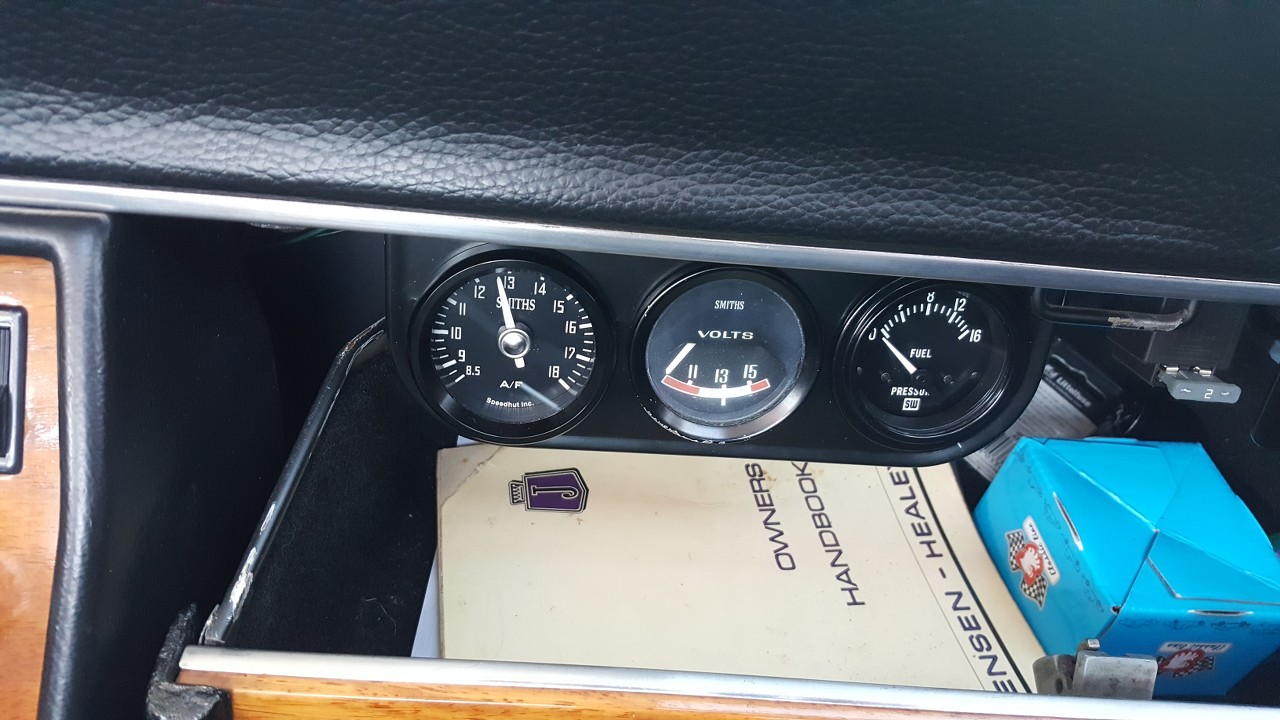
|
|||||||||||||
| ||||||||||||||
| Posted: 06-30-2020 03:55 am |
|
29th Post |
|
discogodfather Member
|
|
||||||||||||||
| |||||||||||||||
| Posted: 06-30-2020 07:02 am |
|
30th Post |
|
discogodfather Member
|
 
|
|||||||||||||
| ||||||||||||||
| Posted: 06-30-2020 01:58 pm |
|
31st Post |
|
Dakota123 Member
|
First time really studying your work - just gorgeous!
|
||||||||||||||
| |||||||||||||||
| Posted: 06-30-2020 05:30 pm |
|
32nd Post |
|
kart54 Member
|
That car is stunning! Two quick questions: 1.Where did you get your floormats and 2 How are your brake lines run? Looks like you have done away with the unit on the fender liner and the lines go under your brake master, how are they routed after that? Having just redone a portion of my brakes I would love to get rid of the crap on the fender liner. Kart54
|
|||||||||||||
| ||||||||||||||
| Posted: 06-30-2020 08:06 pm |
|
33rd Post |
|
redracer Member
|
Kart: the piece on the inner fender you're referring to is called the brake pressure differential switch. Here's what I wrote in 2012: Jay, Bob: what Sander has done will not compromise your brake system. The 2 end caps are removed and tapped with a 1/8" tap, around 10-12 turns (this means no fluid from one side will get into the other side, we do not tap the electrical switch outlet--no need to); then we use a brass allen plug putting teflon tape ONLY on the upper threads to ensure no tape will "clog" the fluid lines. We have to retrofit the later switches( '75 and on) since only one end cap can be removed for tapping. I keep a couple of them ready-to-go. bruce madden, red racer, atlanta, ga have plenty of the 1/8" brass allen plugs if you need them
|
||||||||||||||
| |||||||||||||||
| Posted: 06-30-2020 08:12 pm |
|
34th Post |
|
redracer Member
|
Here's a copy I wrote for the White Lady back in the early -90s: I wrote about this over 25 years ago and had it published in the White Lady, our now defunct mag. for all Jensen owners.I believe I had it entitled "Another one of Nadir's stupid safety ideas"(or something to that effect). Our dual master cylinders had one side do front brakes and the other the rears, unlike modern cars which do diagonal pressure, i.e. left front with right rear, etc.. You can live and drive easily without the rears(I have), but not the fronts, and you will NOT need a light to tell you so. Plus, bleeding the brakes has sometimes "locked" the pins on one side or the other causing the light to always be on. The "fix" is fairly simple and requires you(or friend) to have the small 1/8" pipe tap(27 threads/inch and NOT the British pipe of 28 threads/inch, which is what the oil pressure line fittings are). Remove both ends of the switch, remove the 2 sliding plugs and the small steel ball, then turn the tap 12-13 complete turns in each end(no drilling is necessary as the holes are the correct size to begin with!!). Using 2 brass allen plugs(takes a 3/16" allen wrench), wrap a little teflon tape on the "starting" ends of each plug and install, being sure none of the teflon is exposed in the chambers(snip extra off). (if you can't find the brass plugs, I still have plenty)
|
|||||||||||||
| ||||||||||||||
| Posted: 07-01-2020 01:25 am |
|
35th Post |
|
discogodfather Member
|
kart54 wrote:That car is stunning! Two quick questions: 1.Where did you get your floormats and 2 How are your brake lines run? Looks like you have done away with the unit on the fender liner and the lines go under your brake master, how are they routed after that? Floormats are cocomats. They are made in USA (down in LA) and they are like the rolls royce of floormats. Very expensive, but it's a lifetime investment. I think I paid around $220. They send you a paper pattern and you can custom modify it down to the mm, send it back to them, and they make it tailored. Extremely durable and many styles and colors and fabric. Probably out of place on a stock car, but this is a hot rod. The brake system uses a different pressure differential switch, I believe off an old toyota but I could be wrong. It sits on the side of the subframe, I will take some pics and show the setup. The original unit with all the plungers and stuff was always too complex for me to understand. It's been 20 years since we set up those brakes, but they work very well with just the right bias. I was at one point considering a race car like adjustable bias valve (like with a knob) but I never got around to it. Thanks for all the compliments! I wanted this to be ready for the Dixon British car show up in northern CA but it was cancelled. I have a feeling many of us are getting projects done and living off of gas station and internet forum positive comments! As long as people give me a pat on the head and they like the car, yes it's an MG!
|
||||||||||||||
| |||||||||||||||
| Posted: 07-01-2020 04:02 pm |
|
36th Post |
|
noomg Member
|
kart54, You can order a set of cocomats from cocomats.com they based in South Carolina. I think I paid about the same as Disco, at $195 plus shipping $220 sounds about right. I don't think for a set of custom made floormats made in America the price is unreasonable, but that of course is for you to decide. As far as cocomats being out of place, they were quite common as an aftermarket accessory in the '60s and '70s and would have been available for brand new Jensen-Healeys at the time. I'd say they could be considered a period correct accessory.
|
|||||||||||||
| ||||||||||||||
| Posted: 07-02-2020 04:29 pm |
|
37th Post |
|
kart54 Member
|
Thank you to both of you on the cocomats. I agree on them being commonplace. In fact, I have a set in my car now that are falling apart that were done some time in the late 70's or early 80's. That was why I was looking for a replacement set.
|
||||||||||||||
| |||||||||||||||
| Posted: 07-02-2020 04:47 pm |
|
38th Post |
|
redracer Member
|
You may want to take a lok at Lloyd mats; I got them for mine and they are very well made and not that expensive; I had J-H embroidered in the center to add some "pop", on a sandy backfield https://www.lloydmatsstore.com/
|
|||||||||||||
| ||||||||||||||
| Posted: 07-04-2020 04:28 am |
|
39th Post |
|
discogodfather Member
|
kart54 wrote:How are your brake lines run? Looks like you have done away with the unit on the fender liner and the lines go under your brake master, how are they routed after that? I realize now that my brake system doesn't have a differential / proportioning valve at all. The front circuit of the master goes to the front, then tee's off. The rear goes to the rear, single line. Everything is stainless. Still the Lucas master. No problems locking the drums, and I used to track this thing. 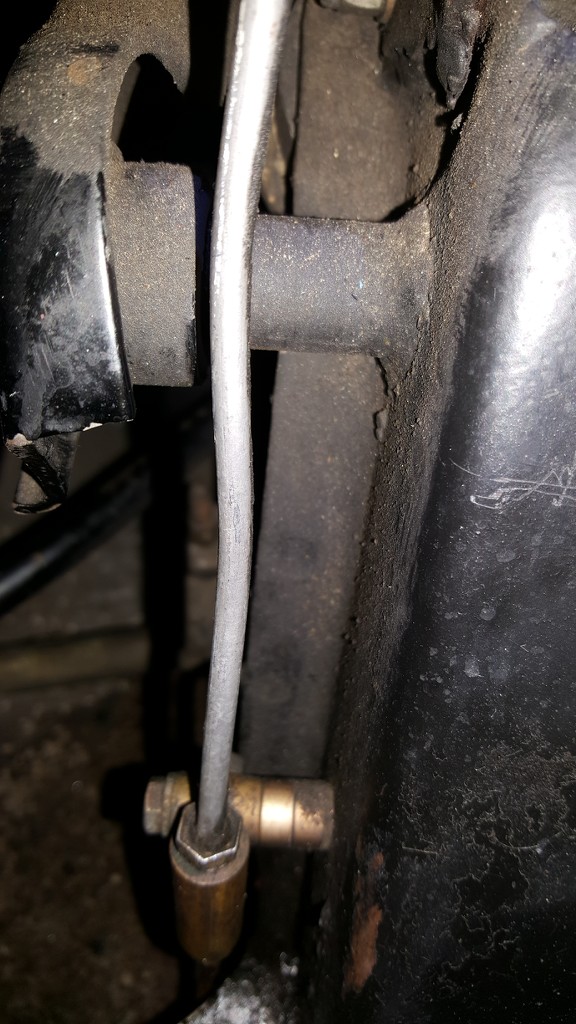
|
||||||||||||||
| |||||||||||||||
| Posted: 07-15-2020 12:19 am |
|
40th Post |
|
JensenMike Member
|
Beautiful Jensen Healey!
|
|||||||||||||
| ||||||||||||||
| Current time is 08:14 pm | Page: |
| > Jensen Healey & Jensen GT Tech > Projects > 1973 Jensen Healey #10777 Lotus "Colin Chapman" Edition "Gold Leaf" Build | Top |