| Moderated by: Greg Fletcher | ||
| Author | Post | |||||||||
|---|---|---|---|---|---|---|---|---|---|---|
|
Dakota123 Member
|
Hi, As I've described elsewhere, I'm the second owner of 10628. The original owner (OO) bought her new, sight unseen in 1973 based on preview reviews in magazines. She lived her life in San Francisco, Great Britain for a time, and then San Diego. I acquired her about 1 1/2 years ago as the OO realized that was time for her to go to a new home. Initially I set about making her street-worthy again after basically a decade of sitting in a garage, unused. To this point the brakes have had a complete rebuild including rear pistons and shoes, new Type 16p calipers, braided flex lines, TR6 M/C and 10"booster. Rear bushings were replaced as were the front control arm bushings, one lower ball joint and the steering shaft (total front end rebuild will wait for when I pull the engine). Front anti-roll bar was added and new alluminum fuel tank to replace the leaking original. Carbs were selectively rebuilt and plug wires were replaced. She runs, handles and stops really well and is a daily driver, even if a bit tatty with more than her fair share of dings and dents. No rust whatsoever, however. After a major project for work that took far, far too long and caused far, far too much brain damage it's time to turn attention to the cosmetics. Once that is done, then back to mechanicals (2.2L and Supra 5-spd -- I have the crank, a 2nd gen block, Supra 5-spd and CC kit). Somehow every panel on the left side has been dented -- looks like maybe a sideswipe incident. The goal is not to make her show-quality, but a very nice daily driver. Economics will definitely play a part of course, as will how stock to keep it vs. how much to customize. In general, I plan to minimize changes to the point where she can be easily put back to box-stock if that ever makes the most sense. One area where I will probably stray is paint color. No one in my family likes the original yellow. My preference is a different yellow, such as maybe Porsche Speed Yellow.  That would be closer to original, at least, and would be true to the fun character of the car. My family doesn't like Speed Yellow any better though, so I may go with a dark blue as in this AC Ace That would be closer to original, at least, and would be true to the fun character of the car. My family doesn't like Speed Yellow any better though, so I may go with a dark blue as in this AC Ace 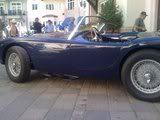 or maybe a burgundy as on this Aston Martin. (The Ace and Aston pictures are from cars that participated in the 2010 Colorado Grand, BTW, that wrapped up this past weekend in Vail, CO.) or maybe a burgundy as on this Aston Martin. (The Ace and Aston pictures are from cars that participated in the 2010 Colorado Grand, BTW, that wrapped up this past weekend in Vail, CO.) 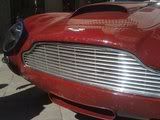 Not as much fun to me, but this is after all a family project and everyone needs to be (generally!) happy. Plenty of work before getting to that point! Anyway, here is the current status: Not as much fun to me, but this is after all a family project and everyone needs to be (generally!) happy. Plenty of work before getting to that point! Anyway, here is the current status: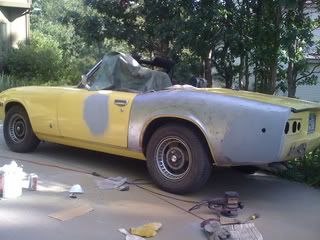 Eventually it will be a bare-metal respray but in the interest of keeping it driveable to the extent possible I'm going about it basically one panel at a time. More updates in the future... Mike Last edited on 09-20-2010 11:55 pm by Dakota123 |
|||||||||
|
Dakota123 Member
|
So I've finally been able to restart the work on 10628; the work project that was supposed to end a year ago drags on. Ironically, I'm living basically full time where 10628 spent the last several years (north San Diego County) -- so I shipped it back out from home so I have something to do in the evenings/weekends. Surprise, the PO had a respray done on the right side at some point. Glad I decided to strip it completely. It would have been somewhat ridiculous with three layers of paint on there. Weak-kneed California stripper took a couple of applications given the thick layers of paint, followed by hitting it w/ the DA sander. It's always darkest before the dawn, as they say. 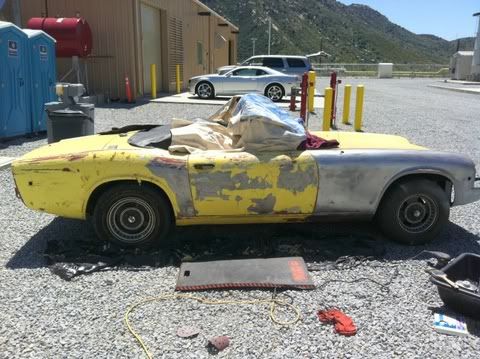 By the end of the day she was looking better... 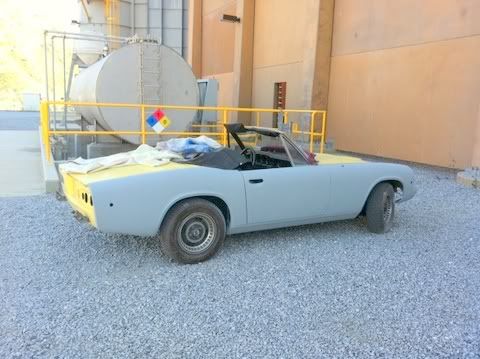 I've had the rear bumper off for so long that I'm starting to like the look better without bumpers. I'm torn, leave it off or put it back? (MK1 stainless, decent condition.) Would be no hard task to 'glass the openings. Hmmm. 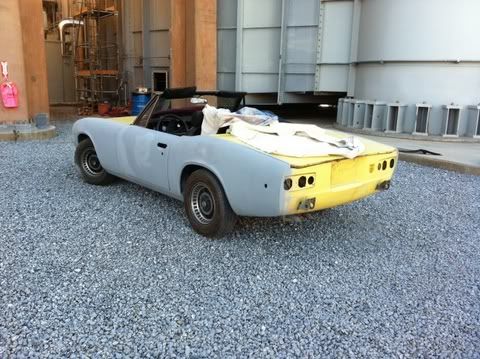 I've pretty well decided on the Porsche Speed Yellow color. Mike Last edited on 05-02-2011 06:06 am by Dakota123 |
|||||||||
|
subwoofer Member
|
Dakota123 wrote:I've had the rear bumper off for so long that I'm starting to like the look better without bumpers. I'm torn, leave it off or put it back? (MK1 stainless, decent condition.) Would be no hard task to 'glass the openings. Hmmm. If you decide to take rear bumper off, do yourself the favour to do it properly, i.e. fill in the holes with sheet metal and make a full butt weld. Much better in the long run. Here in Norway, we call it an "American style repair" when we find collision or corrosion damage repaired by adding a very badly fitting piece of metal or fibreglass underneath 1/2" of Bondo... :-) Car is shaping up, btw! It's going to be a fine piece when you get it painted and reassembled! -- Joachim Last edited on 05-02-2011 07:05 pm by subwoofer |
|||||||||
|
Dakota123 Member
|
I'm thinking fiberglass precisely because it would be easier to undo. She's a complete, 100% original car and someday it may make sense to restore it as such -- if not me, maybe the next owner. For that reason I don't plan on selling the wheels, 4-spd or original engine. I want someone to be able to put it back completely stock should they so chose. But yeah, I understand your point of view. Mike |
|||||||||
|
Dakota123 Member
|
If anybody out there has an extra, I'm looking for a right side headlight cowl. The original was lost in shipping; I had forgotten to screw the thing down. This is the square corner, Mk1 variety. I purchased an aftermarket item from Delta, but the contour where it meets the hood (bonnet) is not even close to being correct (the edge sits far lower than the hood) and consequently there is a huge, ugly gap. Thanks in advance, Mike 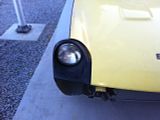 Last edited on 05-16-2011 03:45 am by Dakota123 |
|||||||||
|
Frank Schwartz Member
|
Obviously yours is yellow, but the factory yellow is a bit greenish. We repainted my daughter's JH with a Chrysler yellow called "Buttercup"..a very good yellow indeed...she had the car in NY and sold it and now it is in, of all places, Norway...new owner sent a picture and it looks great posed in a field of flowers. Chrysler "Buttercup"....you will like it !! Frank Schwartz |
|||||||||
|
Dakota123 Member
|
Painted 10628 last night; major step complete. Color is Porsche Speed Yellow - -well, actually, Speed Yellow with a pint of white and a pint of brown toner added in to mellow it a bit. Had an "ack!" moment when I picked up the paint; Somehow more orange than most of the examples I had seen (although there does seem to be some variability, even when the paint code is the same). Anyway, PPG DCC Concept is magic stuff. Just a hint of orange peel that I am sure will color sand right out. And even when I lost concentration at one point and laid it on thick in one area, the paint just sorted itself out, no run. Great stuff. Edit: Replaced last night's photo with a day-light photo. Still not a perfect representation of reality, but better. (And lest anybody think I was rude to Frank by not replying, we had a PM conversation...) 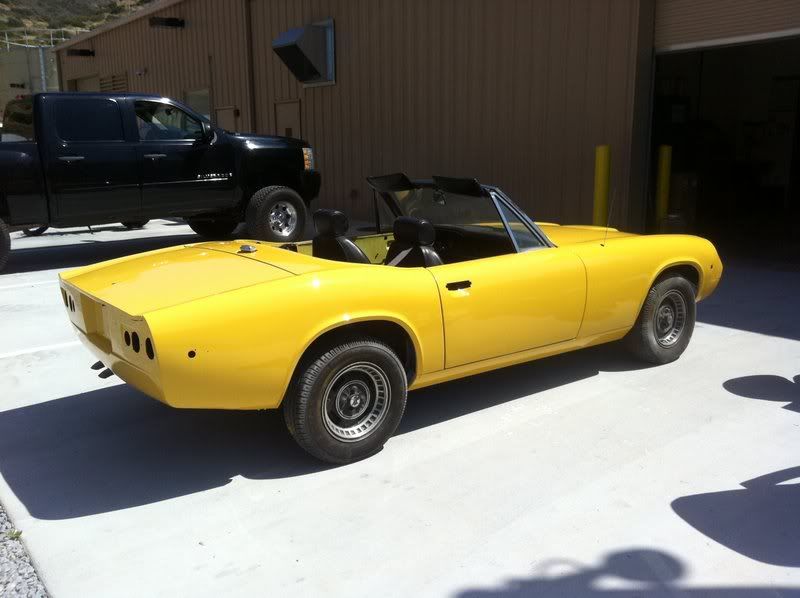 Last edited on 06-30-2020 02:07 pm by Dakota123 |
|||||||||
|
dwalls1 Member
|
Yep, that's yellow allright. Looks Great. Keep the keen pics coming. |
|||||||||
|
Dakota123 Member
|
Replaced last night's photo taken under flourescent lights with a daylight photo -- much closer to reality. A little more vibrant than what I intended, but not too far off. Definitely a tough process getting the color one has in mind. Tell you what, I have a newfound respect for the folks that do this for a living. Definitely a labor-intensive, not to mention nerve-wracking, experience all around. I'd much rather rebuild an engine! Here's what she looked like in 1973; that's the original owner. 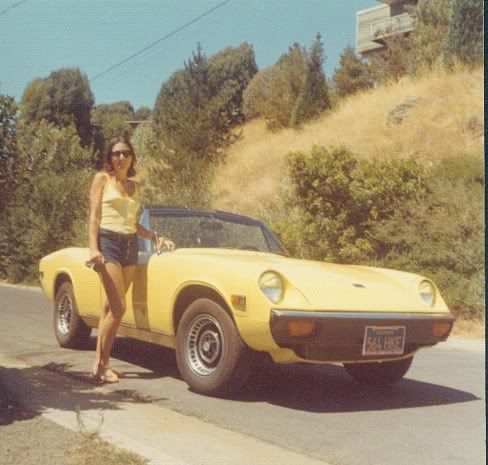 Mike Last edited on 06-28-2011 06:03 pm by Dakota123 |
|||||||||
|
Dakota123 Member
|
A quick update now that the 15" VTO wheels (from the club store) and 205/50 Yokohama S-Drive tires are on. Still a few bits to install but hard to believe it's the same car. Mike 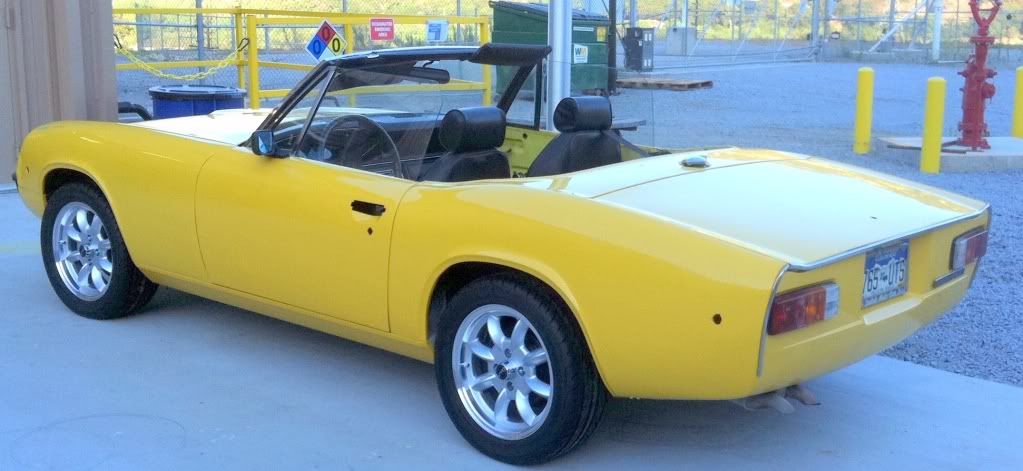 Last edited on 06-29-2020 02:58 am by Dakota123 |
|||||||||
|
Dakota123 Member
|
Not sure what posessed me since she's nowhere near show-quality, but 10628 will be at San Diego British Car Day (October 2, 2011) -- anbody else planning to attend? Mike |
|||||||||
|
Mason Jones Member 
|
Are you kidding? Even if not show quality it looks fantastic! If I lived near San Diego I would drag mine up just to get a few laughs. Mason |
|||||||||
|
Dakota123 Member
|
Thanks for the kind words, Mason -- I checked with the show's organizer and he assured me that it isn't one of "those" kinds of shows (and then related a story of a show he once judged where a car's "owner" didn't even know how to start his car since he had never actually driven it. Crazy.) Anyway, here are some pictures of the car with the Robbins top almost complete (new velcro to go). Would have come in handy driving around San Diego last Monday, rained off an on all afternoon --of course, go fast enough and no need for the top (drat those traffic lights!) I'm still a little conflicted on the lack of rear bumper. Overall I like it better but obviously the stainless finisher strips "die" too early (they should carry down a little further), and from the side it looks a little plain. The whole thing is a little "unresolved" as they say in the design world. 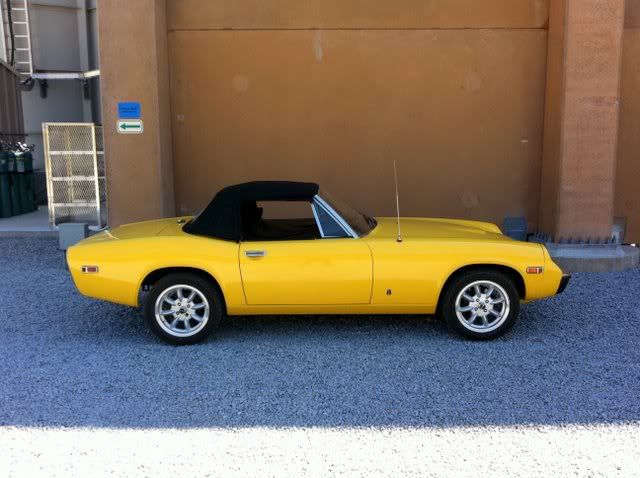  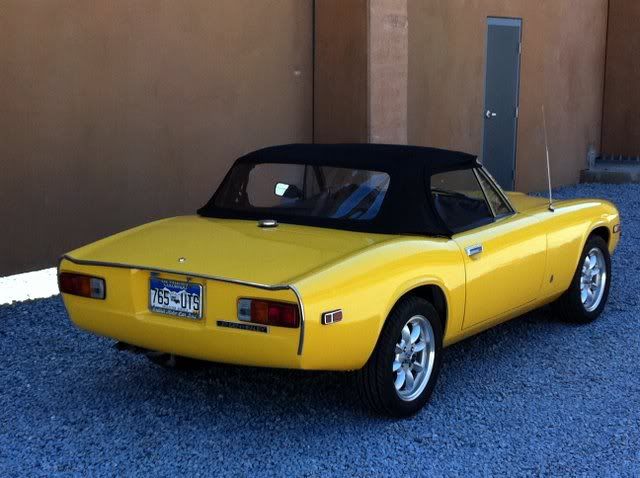 Last edited on 08-04-2019 12:11 am by Dakota123 |
|||||||||
|
Jensen Healey Super Moderator 
|
Very nice work indeed! The bonnet to bumper shut line is awesome! Kurt |
|||||||||
|
Dakota123 Member
|
Thanks, you should have seen it when I started! To be sure, a bunch of pushing and pulling and bending and tweaking to get it reasoably close. Clearly she had been in a fender-bender and nothing lined up. Mike |
|||||||||
|
Greg Fletcher Administrator 
|
Wow, the car looks fantastic! I like the back end, very clean. |
|||||||||
|
Mason Jones Member
|
What about putting the "Jensen-Healey" stripe decal that normally goes on the sides on the rear-end where the bumper was? Won't help the profile but might look nice from the rear. Had also seen somewhere recently someone had replaced the rear bumper with a very minimal chrome 2 piece from a Shelby Cobra. Can't find it now but it gave it a more 60's LBC look. |
|||||||||
|
Jensen Healey Super Moderator
|
The two piece bumpers were TR3 items on cut down mounts if we're thinking of the same car. Kurt |
|||||||||
|
Mason Jones Member
|
Yes, that sounds right, he had replaced the taillights with small round ones from ??? which added to the 60's look. I seem to recall a lot of fabbing was involved. Wish I could find the danged thing... |
|||||||||
|
Bogie07 Member
|
This one? http://ten680.wordpress.com/2011/06/26/new-rear-bumpers/ |
|||||||||
|
Jensen Healey Super Moderator
|
I'm thinking of this one. Attachment: RichThomasJH (Small).jpg (Downloaded 173 times) |
|||||||||
|
Tim Murphy Member 
|
Jensen Healey rear bumper I am not sure, but I thought a rear bumper was legally required in California. Does anyone know for sure? A couple of suggestions. What I did on my back stainless bumber was drill new mounting holes in the car frame which moved the bumber much closer to the body. Looks much better. The other thing I am thinking of is painting the lower black portion of both the front and rear bumpers the same color as the body. I think that looks better. Great job on your restoration. IMO, the JH styling is classic and elegant and they screwed it up with the bumpers, body trim and by painting the wheels black. |
|||||||||
|
Dakota123 Member
|
California does require front and rear bumpers if the vehicle came so equipped. But Colorado doesn't and that's where 10628 is registered. Should protect me until I send her back home. I like the idea of mounting the bumper closer in; I had the same thought. Or maybe reducing the depth of a MKII bumper. I'm going to leave it for the time being. Too many other things to get to, like interior, and cam drive pulleys that are suddenly looking scary-worn. Mike |
|||||||||
|
Brett Gibson JH5 20497 Member
|
can you post a picture of the closer rear bumper sounds like a good option. Brett |
|||||||||
|
Tim Murphy Member
|
Here is a view from under the car looking up at bumper mounting bracket: Attachment: Under car looking upJ1.jpg (Downloaded 147 times) |
|||||||||
|
Tim Murphy Member
|
Here is a view from the side. I had my wheels stripped and polished and also feel that is a big improvement. Attachment: Side view w wheelJ2.jpg (Downloaded 160 times) |
|||||||||
|
Tim Murphy Member
|
Here is a view looking down at the bumper from the back. Attachment: Back view looking downJ3.jpg (Downloaded 159 times) |
|||||||||
|
Brett Gibson JH5 20497 Member
|
Thanks for the photo's Tim I must say it looks very clean and appropriate. The factory probably had it out further than necassary to cover slight impacts but your version is the way I'l be going. Brett |
|||||||||
|
Dakota123 Member
|
That looks great! Do you happen to have a rear 3/4 or straight on view? Mike |
|||||||||
|
Dakota123 Member
|
San Diego British car day today. Fun day, perfect weather. Four Jensen Healeys and two Interceptors: 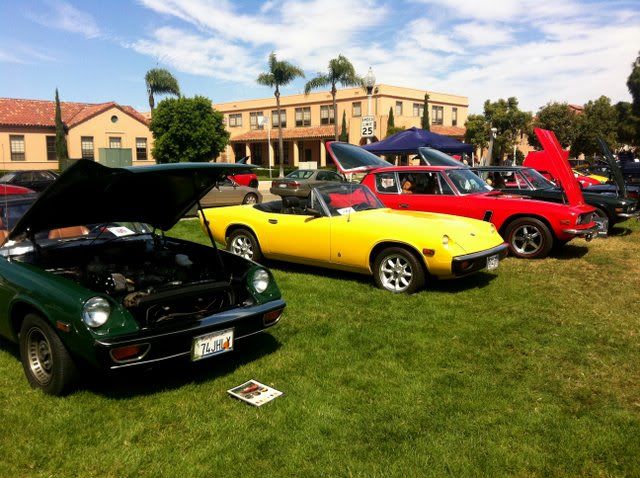 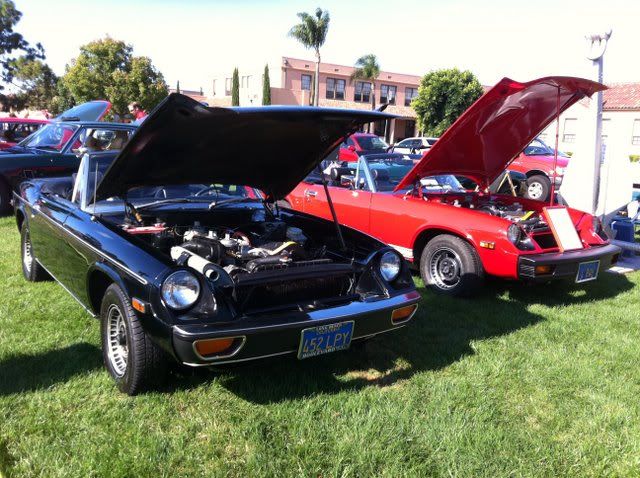 The black one won best-in-class. All-original, including very good paint. The black one won best-in-class. All-original, including very good paint.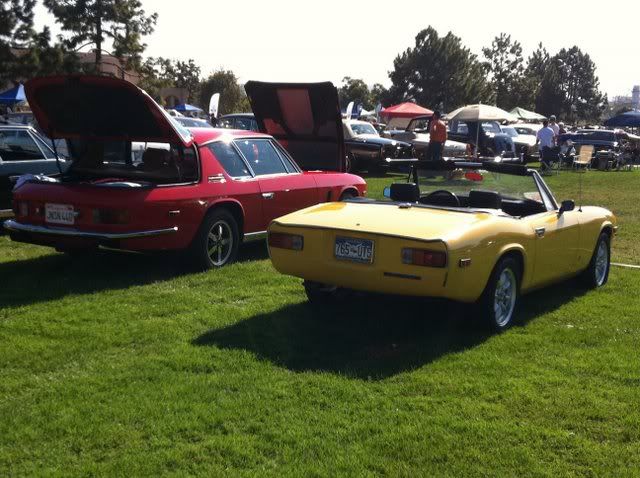 Last edited on 10-04-2011 06:33 am by Dakota123 |
|||||||||
|
Dakota123 Member
|
10628 will be getting a 2.2L w/ flowed head, 10.5:1 pistons, lighter rods, center-doweled bearing ladder, steel flywheel, W58 trans, ARP rod and head fasteners, and Megasquirt (using some fairly well-worn Dellortos as throttle bodies).  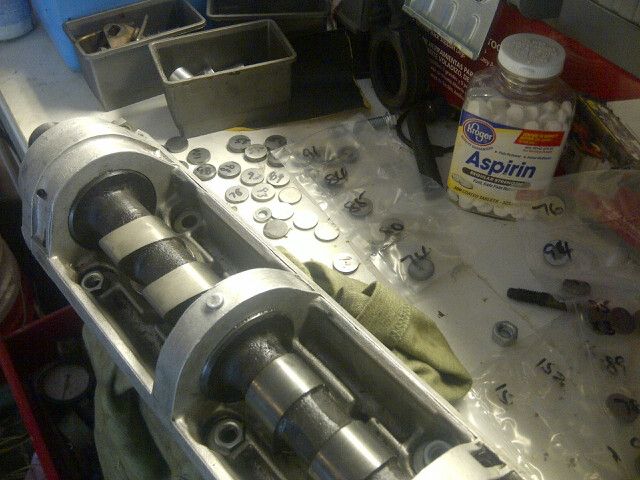 I think pasta would hold studs better than the aluminum used in 907s. Strangely, only one cam carrier stud stripped during the shimming process (and the PO had Helicoiled one), but then after sitting for several months before finally installing the carriers (as in, for the friggin' last time), four more stripped. Thanks To Jensen Healey, Super Mod, for mentioning in a post that it's wise to have a Helicoil set on hand. Or two. 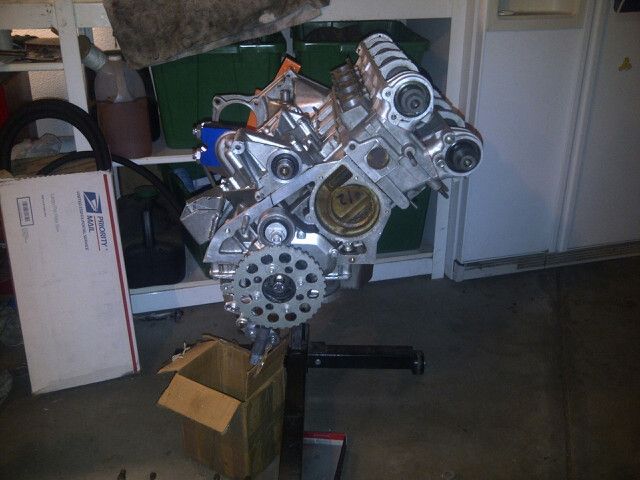 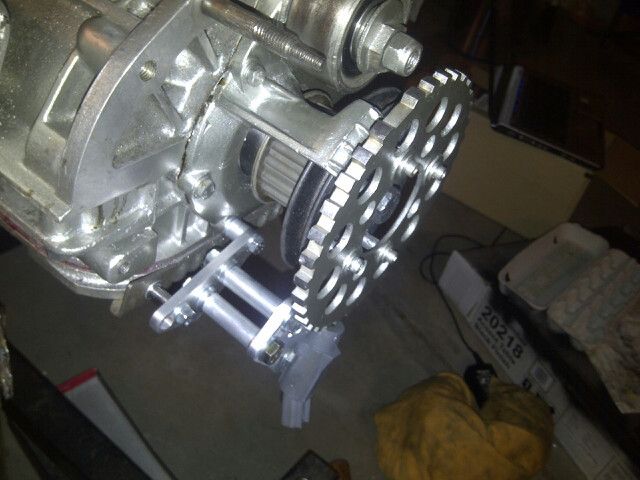 . Last edited on 08-04-2019 12:14 am by Dakota123 |
|||||||||
|
Jensen Healey Super Moderator
|
Wow! Beautiful work! Which cams are you using? What brake and suspension mods are you doing to handle the increase in power? When shimming the cams, take two and call me in the morning. Kurt |
|||||||||
|
subwoofer Member
|
Dakota123 wrote:Megasquirt (using some fairly well-worn Dellortos as throttle bodies). Will you be using the "TB"s dry and have a visible fuel rail, or will you make it a true stealth installation? I'd love to see pictures once it is done. BTW: You do not say which MS version you are planning to use, but I would much recommend forking out the extra few hundred $s for an MS3+MS3X. That firmware is evolving at breakneck speed at the moment, and does everything you need at the moment. It gets easier to tune for every new version. Probably needless to say, but no matter which MS you go for, run the MSExtra firmware and frequent the msextra.com message board. Also, buy the full license for both TunerStudio and MegaLogViewer. You will need both at some time. Also: get one of jbperf's VR conditioner boards, the main board conditioner circuit is c¤%& and causing trouble no end. If you remove questions about EDIS and the VR circuits, you remove half the posts on the msextra.com forum... :-) I am at the bleeding edge of that firmware right now, running experimental MAF code. Sort of fun to do, but maybe not a recommended course of action unless you enjoy it. -- Joachim |
|||||||||
|
Dakota123 Member
|
104/107 cams. I picked the head up off of ebay -- it was advertised as a "Skip Brown clone", and it looks to have been properly ported, i.e. in the right places and with the right geometry. The valves are slightly oversize. Intakes are 1.425". Hopefully the combo will work well. So far I've taken the brakes half way. 16P (vs. 14) calipers and a larger booster. My M/C has started leaking so I'm contemplating what to do next. Probably a larger piston size. With the larger booster the increased pedal effort should be acceptable. At some point I really want to go to a big brake setup and disks in the rear. But then, I also want to convert my A6 to a manual transmission. So yeah. Suspension has front and rear bars and Superpros in the back. When I pull the front subframe to change the engine and trans I'll do the front bushings. Undecided on dampers. I like the adjustability of Spax and AVO but the quality scares me (and I'm just not familiar with AVO). I'm also considering Greg's Bilsteins. I think I'll use the Dells dry. Stealth is good but on balance I think a conventional setup is best for me. I mean, I already have a saw wheel hanging off the front so stealth is a bit out the window. Thanks for the MS tips. Very useful info! I polished the trigger wheel serrations - -I had read that roughness or scratches can cause problems. Good to know that there may be more around the corner. I'm planning to run a MAF so interesting to know that the code is may not be quite there yet. I've tuned my A6 to 365 HP (thanks to the very intelligent folks on http://www.nefmoto.com ) so yes, I do enjoy that part of it. As long as it is physically possible to make it work, anyway. Last edited on 08-27-2013 04:39 pm by Dakota123 |
|||||||||
|
subwoofer Member
|
Since you are planning on running MAF (at some point), you really should get an MS3 - the code being worked on now is MS3 only and may not be backported to MS2. The MAF code in pre1.3a7 (the latest officially available firmware) is miles better than anything that came before it, but it still struggles with the pulsatile MAF signal a normally aspirated '4 makes at WOT at low revs. But there are ways around the problem, my car is quite smooth by now - the solution may just not be obvious at first. Have a look here: http://www.msextra.com/forums/viewtopic.php?f=125&t=50605 -- Joachim |
|||||||||
|
Dakota123 Member
|
subwoofer wrote: Have a look here: http://www.msextra.com/forums/viewtopic.php?f=125&t=50605 Bookmarked, many thanks! Mike |
|||||||||
|
Dakota123 Member
|
I've about given up looking for an Esprit, Excel or Eclat air box. Thinking about a Pipercross. They make a deep variety which should work well with velocity stacks of decent length. Looks like it will mate well to a MAF as well. Picked up 32 lb (at 2.5 bar) EV6 Roush Ford Raptor take-offs for $50 for 8. They are 'medium' height rather than 'shorts' which I would have preferred but can't beat the price, and the flow rate (at 3 or 4 bar) is in the sweet spot for 200-225 HP which is what I'm hoping for(sea level). Fuel pressure regulator body is from Radium Engineering, takes a standard Volkswagen/Audi pressure regulator. Very cool product, beautifully made. Getting closer... Last edited on 09-11-2013 07:00 pm by Dakota123 |
|||||||||
|
dbeliveau74 Member 
|
Another option would to use 71 Camaro RS front bumpers and trim the corners so they lay flat against the back. the lights are after market items available from a Kit car parts finisher solutions dealer. You can find them here: http://www.carbuildersolutions.com/uk/electrical-lighting Attachment: 1973-jensen-healey-fwrraritl (600 x 337).jpg (Downloaded 156 times) Last edited on 01-19-2017 02:59 am by dbeliveau74 |
|||||||||
|
dbeliveau74 Member
|
Front view My concept strictly photo shopped Attachment: 18rhb7x8rcjpwjpgdaytonafrtgrn (600 x 421).jpg (Downloaded 155 times) |
|||||||||
|
Dakota123 Member
|
FWIW, went back into the engine after stalling on the project for several years (detour into Audis) — a couple of assembly things had been nagging me, so decided to go back in and double-check. Getting back on track. In the meantime, just been enjoying ‘er during mild weather, having fun fielding questions. |
|||||||||
|
noomg Member
|
Dakota, I don't know about you but the number one question I always got was "Is that an MG?", which is why my license plate is NOOMG. |
|||||||||
|
Dakota123 Member
|
Actually, I got the "is that an MG" for literally the first time just the other day. Usually it's just "what is that??" and then I explain it's a Jensen Healey, the red-headed step-child to an Austin Healey and then they pretend to understand and then I tell them about the Lotus engine if it's a guy or the little British woman that first owned her if it's a woman (sexist? probably) and some understand but most don't and just say, "well it's very cute" (if it's a woman) or "cool" (if it's a guy). Or some variation thereof, lol |
|||||||||
|
Tim Murphy Member
|
When asked "what's a Jensen Healey?" I asked if they have heard of the Austin Healey. Most say yes, so I explain that both cars were designed by Donald Healey, the Austin Healey was made by the Austin company, the Jensen Healey was made by the Jensen company. I also add that the Jensen Healey was made to replace the Austin Healey which could not meet the safety and emission standards coming into effect. |
|||||||||
|
noomg Member
|
Tim, I usually don't get that far before eyes glaze over or they just walk away. I do like driving a car that no one knows what it is. In that regard, I always wanted to get an Elva Courier, even most Brit car guys don't know what it is. |
|||||||||
|
Dakota123 Member
|
Finally decided to pull the original 105,000 mile engine. Was going to pull it with the subframe but dopey me after getting the steering shaft ready to pull I forgot to actually pull it and when I started to lift the body of course everything fouled. So the engine/trans came out the old fashioned way, which ended up being no problem — pulling from the front manifold runners (strombergs) balanced things nicely. New 2.2L and W58 is more or less ready to go in. Will do the front suspension, paint the engine compartment (I didn’t do it when I did the bodywork and paint back in 2011(!) and seat covers, carpet etc. as well. Now that she’s apart I have impetus to actually finish it. Attachment: 657A40B2-854A-4819-8DDD-C6AC6B69286F.jpeg (Downloaded 146 times) Last edited on 04-18-2020 06:19 pm by Dakota123 |
|||||||||
|
Dakota123 Member
|
Can’t seem to include more than one photo at a time... Attachment: 94F2EE56-99D3-420B-8D83-000B857278EC.jpeg (Downloaded 147 times) Last edited on 04-18-2020 02:34 pm by Dakota123 |
|||||||||
|
noomg Member
|
If it's not already the plan, this would be a good time to drop the front suspension so it can be rebuilt on the bench(see Wheeler Dealers Jensen-Healey episode). Also it should make painting the engine compartment easier. As always, one thing leads to another. |
|||||||||
|
Dakota123 Member
|
Yes, indeedy, already unbolted and ready to pull the subframe. |
|||||||||
|
noomg Member
|
Just something to think about. I know with engine swap, suspension rebuild, etc. you're aways from getting to the interior but when you do something to consider is putting Dynamat in the doors, weather you were planning to Dynamat the interior or not. Putting it in the doors in combo with new door seals and panels makes the door shut with a solid thud rather than the usual rattle. I've had other J-H guys comment on it. |
|||||||||
|
Dakota123 Member
|
Great minds and all that... Dynamat already in the doors (along with new seals), and I have it on hand to put down on the floor. The doors do indeed have a nice thud now :-) |
|||||||||
|
Dakota123 Member
|
Engine in and started for the first time yesterday on the Strombergs and distributor (injection to come at a later date, after I get the basics sorted). Took a bit of fiddling with timing (my timing light quit working) but basically fired right up. Gratifying in a strange way to hear the starter laboring against the high compression. Attachment: 34EB8032-4612-4178-963A-4086190A2D16.jpeg (Downloaded 93 times) |
|||||||||
|
discogodfather Member 
|
Engine looks amazing. Is the cog wheel on the front for the fuel injection? |
|||||||||
|
Dakota123 Member
|
discogodfather wrote:Engine looks amazing. Is the cog wheel on the front for the fuel injection? It is indeed, Megasquirt 2 w/ semi-sequential add-on. Ignition will be Ford EDIS. Throttle bodies are from EFI Hardware in Australia (or NZ, can’t remember). They did a custom fuel rail for me, canted the injector bosses to match the Del Orto intake manifold. Great folks, BTW. Idle control is a Nissan/Infiniti PWM piece. Injectors are Bosch I had lying around, from an A6 2.7T. Need to source the fuel pump. MAP uses equal-length tubing into a collector, also from EFI Hardware (but we’ll see... I have a MAF I may use if I can’t get the MAP to work properly). At the rate I’m going, should be about 2030 by the time It’s up and running! Last edited on 06-29-2020 02:54 am by Dakota123 |
|||||||||
|
discogodfather Member
|
Dakota123 wrote:discogodfather wrote: Mine took 15 years, so you are way ahead. |
|||||||||
|
Dakota123 Member
|
Anybody know the size of the 907 oil drain plug? MkII engine. Slight drip from the plug, went to tighten and I can feel it starting to strip, so might need to install an insert. Edit: So apparently 1/2"-14 (BSP)? Last edited on 06-29-2020 02:08 pm by Dakota123 |
|||||||||
|
discogodfather Member
|
That's a good question, I am sure it's an inch thread but is it 1/2"-14 NPT or BSP? Or is there a difference? I once read that the originals (I guess 72 and 73?) used a whitworth head size. I have one with a magnet in it. I know all Esprits, Eclats used this same plug on the 907, 910, and 912 engines. I think the turbos went to different size. |
|||||||||
|
Dakota123 Member
|
Timesert confirmed that it’s 1/2-14 BSP (straight thread) but recommended 1/2-14 NPT (tapered). But at $300 for a kit, decided to try an O-ring. So far so good. |
|||||||||
|
Dakota123 Member
|
Had her out a couple of times, sorting this that and the other, mainly related to the brakes (Toyota pickup 4-piston calipers — the master cylinder I’m using has only a 0.75 inch bore and doesn’t move enough fluid, will try a 1-inch bore design next) and first impressions are: Engine — just wow, 2.2L, 104/107 cams, 10.9:1 (10.4 after modern head gasket), mild head porting, 14 lb steel flywheel is a great combo, absolutely transforms the engine. Accidentally had it to 5,000 rpms maybe half throttle after just a few miles in, really hadn’t meant to do that but she is so rev happy now. W58 — I love the ratios. The gear rollover noise in neutral/clutch released is awful, though, thought I had a rod knock until I figured out it is the trans. Apparently common with light flywheels. Not in love with the short-throw shifter, although rev matching works out well with the light flywheel. Might try a standard-throw shifter. Trans mount was no big deal, trimmed one side of the original JH 4-spd mount so I could move it back (it’s sits off center to clear my exhaust system), four new holes in the floor, new holes in the mount to mate to the W58 mount. Clutch is a Spec Stage 1, 7,000-lb clamp (if I did the math right) for a TR6 with the W58 input shaft option (hard to find that option on Spec’s order sheet, depends on how one arrives at the specific Web page, sometimes it was there and sometimes it wasn’t!) — fit perfectly. Effort is no, or not much, higher than what I remember. No chattering, even brand new. New front bushings and Bilsteins — feels very modern and put together now. Old dampers didn’t seem bad when I removed them, but the new ones really have made a difference. All in all, really pleased with he way she’s coming together. Last edited on 07-09-2020 12:54 pm by Dakota123 |
|||||||||
|
Dakota123 Member
|
Carpet and seats done. Decided to stay with the creaky MK 1 center console rather than the MK II, mainly because I could make the shifter gaiter/boot work without a lot of effort — ready to be done with this project for a while. I shortened the ebay shifter and re-used the 4-spd ball, just seemed right to me. The Regen seat covers are really nice — the driver’s side seat back cover was a bit larger than the existing foam for some reason, though, so I used a bit of foam from the original seat bottom (which I replaced) to fill the gap. Attachment: A7ED1AB1-4D95-45DB-B2AB-9062CF4DC5EE.jpeg (Downloaded 44 times) Last edited on 07-15-2020 04:37 am by Dakota123 |
|||||||||
|
Dakota123 Member
|
One issue I’m having is a really lumpy idle with the Kemp 104/Club store 107 cams. Sometimes she’ll settle into a nice big block Chevelle “full race cam” lope but most of the time the idle is crap. But where would the fun be if there aren’t (minor) problems to overcome? Last edited on 07-14-2020 04:18 pm by Dakota123 |
|||||||||
|
redracer Member
|
possible there may be a vacuum leak in the brake booster hose or the booster itself?? I've had to replace 2 boosters in the past year along with a leaky vacuum booster hose(you wouldn't know it if you were to look at it). Fortunately, I had 4 rebuilt a few years ago and powder coated as well, so there was little down time. Our cars/parts are aging and probably a good time to replace suspect items while everything is put on hold due to the covid |
|||||||||
|
Dakota123 Member
|
Good point, it's possible. The check valve is fine but the pedal is harder than I was expecting/remember. I'll block the manifold port, see what happens. |
|||||||||
|
discogodfather Member
|
I have a major lopey idle with the 104 cams and it does sound like a Chevelle sometimes, especially with the flowmaster super 44. It's easy to get it to 1000 rpm and fairly even with the Weber adjustments. Fuel injection I don't know, do you set idle electronically? Is there an idle solenoid? |
|||||||||
|
Dakota123 Member
|
Still on the Strombergs — it turned out to be the rear carb, started running on two cylinders during a driving thunderstorm (of course). Will sort tomorrow... edit: turned out the carb damper hung up in the bore, so fueling was right for only a very narrow range of conditions. Ridiculous. Can't wait to get rid of those awful things. Last edited on 07-15-2020 04:40 pm by Dakota123 |
|||||||||