| PM | Quote | Reply | Full Topic |
| Joined: | 09-10-2012 |
| Location: | Little Chute, Wisconsin USA |
| Posts: | 435 |
| Status: |
Offline
|
Just heard back from the machine shop: the head is in very good shape overall, nice and straight so no skimming necessary. His only concern was that the valve guides seemed a little loose, so since it's all apart I will be ordering a complete set of 16 valves, guides, and springs to be installed when it goes back together. Just going with the stock valves, not the stainless ones. I am going to go with the uprated springs from the club store, though. Not going to touch the block this time around since everything looks pretty good other than the usual carbon buildup.
Question while I'm waiting to hear back from Greg: does anyone know if the valve guides in the club store are bronze, or steel? The ones Delta has are bronze, while the originals are steel, and my machine shop guy would prefer steel if available.
Meanwhile, I've been plugging away at the floorpan repairs.
It was a bit of a mess as I suspected. The PO had riveted some sheet metal over the existing floor and then covered the whole mess with some kind of sealant, almost a half inch thick in spots. I still have no idea what was used there. It has the consistency of a hard black plastic.
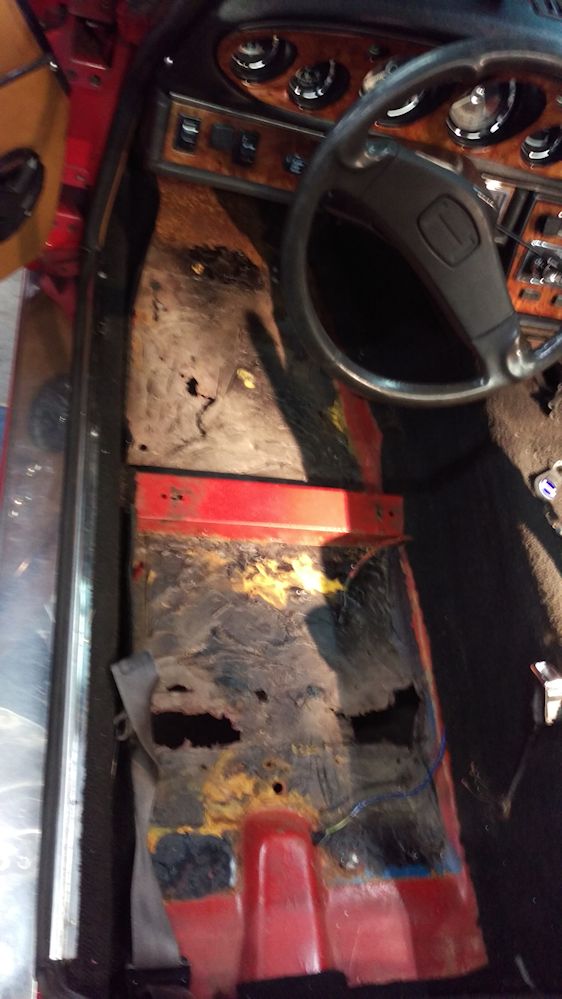
Here's what the floors looked like after removal of seats and carpet, and the riveted in metal...
Anyway, it broke up easily when whacked with a hammer, and then the offending parts of the floor were cut out with a Sawzall and a pneumatic body saw.
I looked into the replacement floor pans from Delta, but I just couldn't justify the cost. Since I have a metalworker in the family (my son) we decided that we could do it ourselves. It was an excuse to buy a couple of new tools: a 36" sheet metal brake, and a Milwaukee electric sheet metal shear which is the cat's pajamas for doing quick cutting work.
So, the son and I created our own replacement floor. I went with 20 gauge cold rolled sheet steel (the original 19 gauge was not something I could find easily and 18 gauge seemed like overkill, it's not like I'm racing her). It was all bent by hand using a 36" sheet metal brake for the "square/straight" sections, and an anvil (an old section of railroad rail) and a hammer and torch to get the curves right near the gas pedal. Old school stuff I guess, and I'm learning as I go.
A "during" shot of the drivers side:
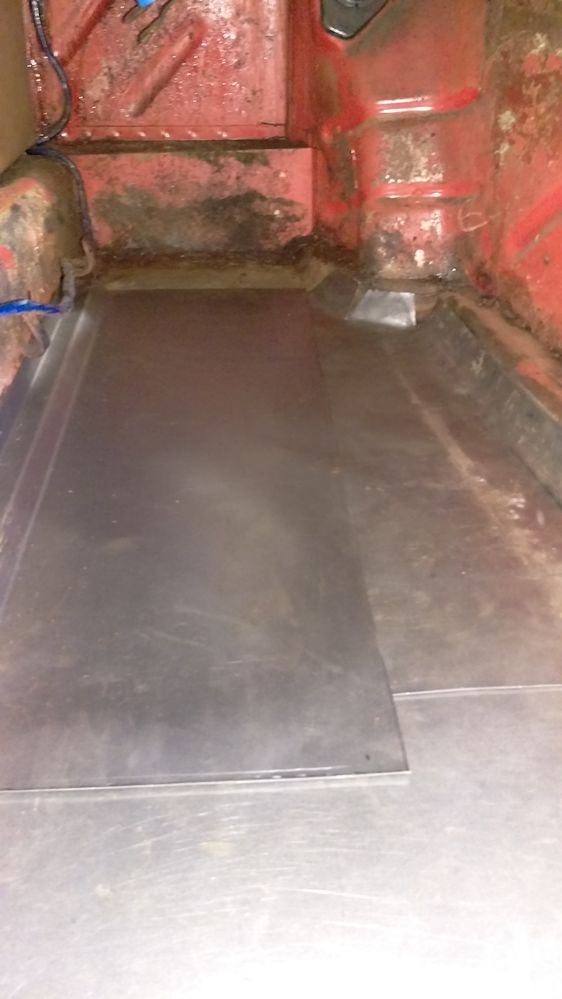
If you look closely you can see that there are 3 pieces to it: (1) the rear "under the seat" section which (from memory) is a basic rectangle about 22" wide and about 24" front to back, (2) the front left section which is a basic rectangle about 10" wide and about 26" front to back, and (3) the front right section which is about the same size but took a lot of cutting, heating, and hammering to get the curves into it.
And finally, after it was all cut, heated, bent, hammered, and welded in place:
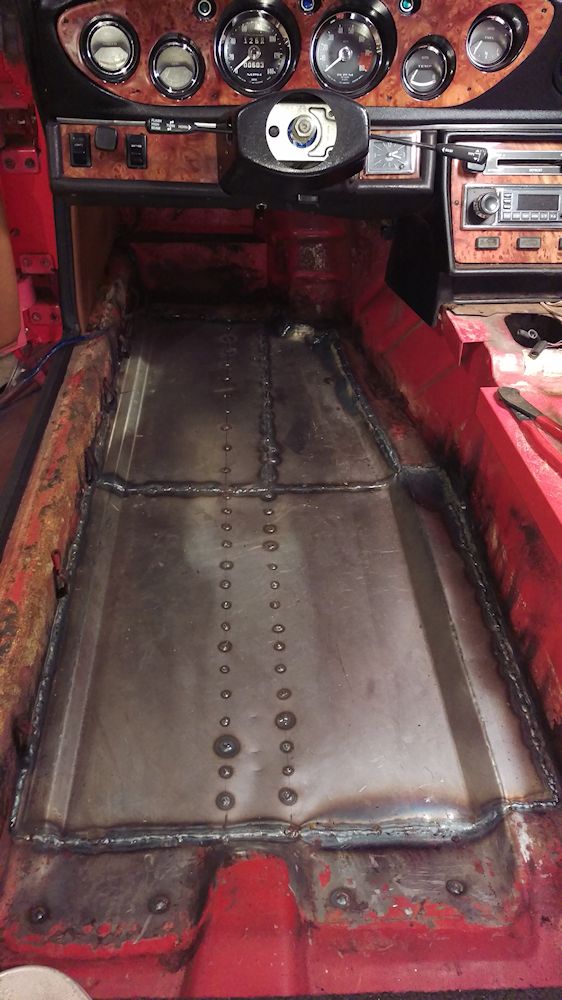
For the record: what you're seeing on the left inner sill isn't rust, it's old carpet adhesive.
The whole thing came out of a piece of 20 gauge stock 24" x 60". I didn't roll any beads into it which may come back to haunt me, but it doesn't seem to be oil canning too badly Once the seat rails are welded back in that should give it a bit more side to side stability. Because of the channel that runs underneath front to back, there isn't more than 9' or so side to side that is unsupported so the rolled beads seemed like they wouldn't accomplish much. All that's left to do is get in there with a grinder and clean up the welds a bit. Then (waiting until after the passenger side is done), I'll need to fabricate new seat mounting rails, which should be the easiest part of all of this. The old ones look like someone chewed on them on the bottom edges.
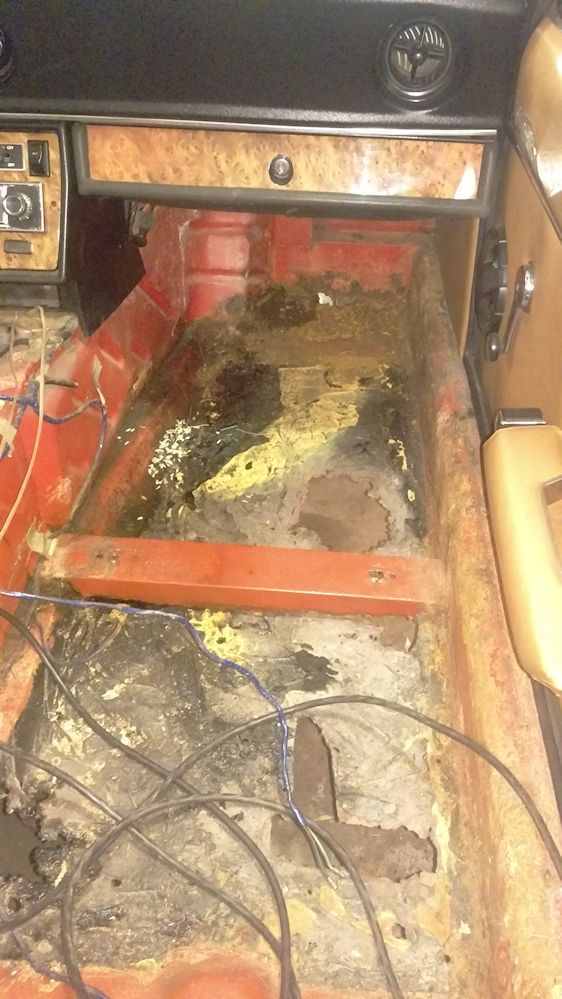
Now, on to the passenger side. That has its own set of issues:
I cut out the old floor last night. More ugliness. It almost appears that it was replaced once before with very thin metal, the metal doesn't look anything like the drivers side (it actually has a texture to it, not smooth). And then, of course, this was all covered with the same black plastic filler. We're going to have to figure out the "box" at the firewall since the rust is actually creeping up the vertical there above the floor pan. Also, we will be addressing the rust underneath the battery tray... I can see through there into the car in a couple of spots. Hoping I can just remove the battery tray, patch in underneath, and then fabricate a new battery tray.
This should be interesting... but the good news is that once this is done I can declare her rust free, or as rust free as they get, anyway.
Last edited on 01-08-2016 07:23 pm by answerman